How to set the Special Options?
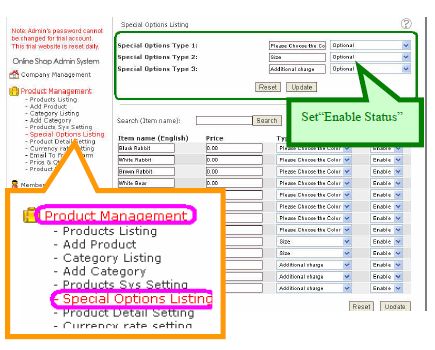
Step 1 : Set the name of “Special Options” type
Management Location: Product Management -Special Options Listing
There are 3 types of “special option” for us to set the name. Administrator can set special option enable status according to individual requirement. Enable status information are as follows:
Optional: Online shop customers can choose not using special options when they order products.
Compulsory: Online Shop customers must choose an item of special options before ordering an product.
Apply in individual product: Administrator can set whether it is a must or not to select this item for ordering a product when they add or edit according to the individual product. After starting this function, a “Compulsory” field will appear in adding or editing product interface.

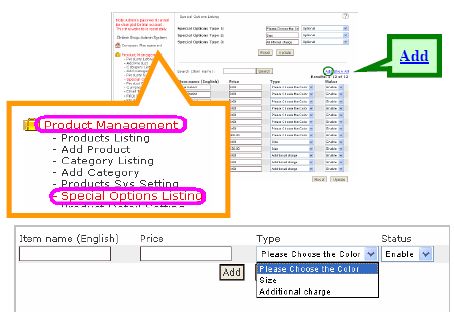
-Press the top right corner “Add”.
-Fill in Item name, Price and Type. Then press .
.

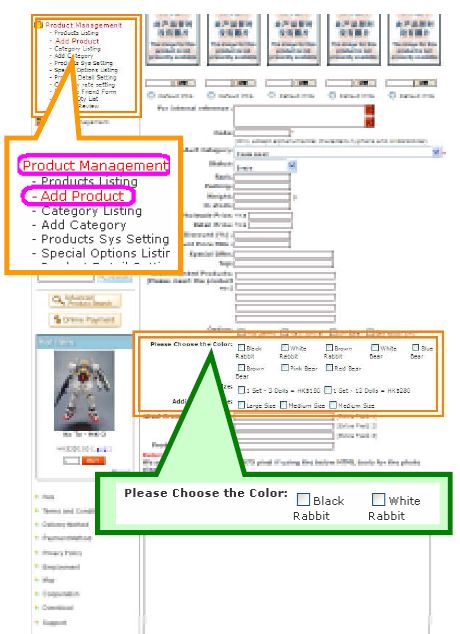
Step 3 : Choose “Special Options”
Management Location:Product Management – Add Product
When you add product, please tick the appropriate options.


Apply in individual product: Administrator can set whether it is a must or not to select this item for ordering a product when they add or edit according to the individual product. After starting this function, a “Compulsory” field will appear in adding or editing product interface.

Step 2 : Set “Special Options”
Management Location: Product Management - Special Options Listing
Management Location: Product Management - Special Options Listing
-Press the top right corner “Add”.
-Fill in Item name, Price and Type. Then press
 .
.
Step 3 : Choose “Special Options”
Management Location:Product Management – Add Product
When you add product, please tick the appropriate options.


