FAQ
What is Domain Redemption Period?
What is a Top Level Domain (TLD)?
gTLD - Generic Top-Level Domain
Generic top-level domains are under Internet Corporation for Assigned Names and Numbers’ (ICANN) approval. There are seven types of gTLD worldwide: .com, .edu, .gov, .int, .mil, .net, and .org. Some of the most common top-level domains include .com, .org and .net.
ccTLD - Country Code Top-Level Domain
Top-level domains that are generally used or reserved for a country, state, etc. There are 250 types of ccTLD worldwide, such as .uk, .de, .tw, etc.
How do I contact my registrar?
How do I renew my domain name?
If the domain name registered by CommuniLink, please find following method for domain renewal:
If you want to extend the domain name renewal period, please contact our Customer Service Officer (call: 29980808).
What is a domain name registrar?
Can I have many domain names that all go to the same website?
What are the valid characters allowed when buying domain names?
-
Alphabet a – z
-
Numbers 0 – 9
-
Symbol: - (hyphen)
-
Other than above are not allowe
-
( . ) Period is a special character, it is used in second level domain (i.e. .com, .com.hk, .hk)
What is the difference between \"Fax to Email\" and \"Tradditional Fax\"?
1) Receiving fax
DFax: You will send and receive faxes anywhere you can receive email.
4) Fax Backup
May I apply your DFax Service with my existing fax number?
Can I send a fax online?
- Send fax by your pc on the Internet. (Must connect to the Internet)
- Send fax with DFax Manager on the Internet
- Support .doc, .ppt, .xls, .pdf, .tiff, .png, .jpg, .ps format
- Send fax by Email
- Support .doc, .ppt, .xls, .pdf, .tiff, .png, .jpg, .ps format in attachment
If you want to get more details about the functions as mentioned, please browse http://www.communilink.net/p45-en-add_dfax.html
Can I choose the fax number?
How much time is needed to activate DFax service officially after I applied the service?
Can I have a trail hosting account before joining your service?
Whom is the copyright reserved to?
What should I pay attention to for the web development package?
-HTML Page size is approximately as big as an A4 paper size
.com / .net domain registration is included in the web development and CMS web design package. May I register other domain, such as .com.hk/.hk?
What is the price for changing background photo for CommuniLink web development package template?
It depends on the level of modification complication. It costs HK$400 up.
Our website was developed by joining web development package, may I change another template?
Yes, HK$150/page will be charged to change the template. If there are more than 10 pages, please contact our customer service officer for price details.
We are your existing web hosting client, may we join the web development service?
Yes, minimum 5 pages, please contact our customer service officer for price details.
Can we upgrade to other web hosting service if we join the web development package?
Yes, the price will be calculated based on the web hosting service fee, domain registration fee and the web development fee. Please contact our customer service officer for price details.
What will be the charge if we request modification of the Gathermind website content in the future?
HK$200/page will be charged for the website content modification. If there are 10 or more pages, please contact our customer service officer for price details.
How can we provide the web site content to you?
You may send the web site content to us by email , customers usually provide the files to us through FTP if the file size is too big.
How may design will your company demonstrate?
What is the difference between “domain names” and “website address”?
Will you notify me when my domain is set to expire?
CommuniLink will notify you that the domain expired via Email , one or two months before the expiration date unless you use the domain name of
What is the difference between CDrive and FTP?
1) Security
FTP: It does not have SSL encryption and virus scanning features.
2) Flexibility
CDrive: There is User Manger in Cdrive system so that our customers can set the user ’ s limits of authority and the space. It can help to reduce the abuses of utilizing recourse greatly, for example you can set a specific user can only upload files. Furthermore, you also can check all the past records in each account.
3) Image Preview
What are the uploading and downloading Traffic restrictions per month?
Does it need to install extra programme to use CDrive?
How do I receive the Fax ?
Can I join CDrive with my own domain name?
What is the limit for uploading the file every time?
You will be able to upload up to 1GB to store your files via this online system.
What kind of file format can CDrive support?
If we want to transfer the files through CDrive, do we need to create log in account for customer first?
How to enter CDrive operation platform?
What is the operation procedure for CDrive?
Why should I use CommuniLink Web Hosting Plan?
Which websites or contents of file are not allowed to host?
How do I transfer the Web Hosting Service from another company to CommuniLink?
Generally, there are two steps to transfer your web hosting service to CommuniLink:
After created an account in CommuniLink, you should upload your web page files to CommuniLink server and set up your email address. It is suggested to upload your information to CommuniLink server before starting to transfer the DNS Record to CommuniLink, in case you lost the important Email or fail to browse your website.
What is the major difference between Unix Hosting and Windows Hosting?
What is the Bandwidth?
Why I need the web hosting service?
How do I establish an Individual or a Company Website?
Firstly, you must choose and register a domain name. You may get a domain though CommuniLink.
Where do I get the FTP Login information?
How to use the Secure Server (SSL)?
The shared SSL certificate can be used for domains under Unix Classic Plan or above.
1. Login to WCP


3. Click Overview to read the description of SSL.
You can buy your own SSL certificate by clicking on Your Own SSL.
Here you can find your SSL URL
Important Note:
If you insert any external images/files into your webpage, a warning message will pop-up altering the visitors that the website is not secure if accessing your website using this method.
ALL the files in your public_html directory can run the SSL.You can then reference all your SSL encrypted files through the secure URL.
How to save the web pages to the server?
Upload the designed website files to the folder named "public" in FTP so that the visitors will be able to browse your page through the browsers such as Internet Explorer.
You need accessFTP site via Internet Explorerand type “ftp://ftp.”and then your domain name. For example, if your domain name is “abc.com” then the URL is ftp://ftp.abc.com.
The Second Step:
Login to your FTP account (please refer to Q3to get more about the Login information), enter your username and password.
The Third Step:
You are now logged into your account! Open the folder named "Public_html".
The Fourth step:
Copy and paste your website files into the “Public_html” folder.
The Last step:
Rename the default page Index.html to Index.htmx.
What is PayPal?
PayPal is a global leader in online payment solutions with more than 200 million accounts worldwide. Available in 190 markets and 24 currencies (including HK Dollars) around the world, PayPal enables global E-commerce by making payments possible across different locations, currencies, and languages. Using Paypal is no monthly and set up fees , Paypal charge you 3.4% and HK$2.35 only when the transaction succeed.
You just need to fill up a simple online application form https://www.paypal.com/hk/mrb/pal=PZ3NTS9KTNDB2 to complete the registration.After the application, you can integrate your registered PayPal account with CommuniLink Online shop. So if the customers want to order your products, they can browse paypal sitevia your online shop system, and use credit card to settle the payment to your shop in PayPal.
What is your refund policy?
Refund information can be found in our Terms and Conditions in the following sections:
- 30-Day Money Back Guarantee
- Cancellation Policy
Will you notify me when my domain is set to expire?
CommuniLink will notify you that the domain expired via Email , one or two months before the expiration date unless you use the domain name of Hong Kong . However, HKDNR will send an Email of r enew d omain n otification to who use the domain name of Hong Kong .
Does CommuniLink offer any plan for Non-Profit Organizations?
Yes. We have a hosting plan with special pricing or free of charge for qualified Non-Profit Organizations. To lean more about this plan, please contact CS Dept.
How do I downgrade my services?
If the size of files I uploaded to the FTP exceeds the agreed storage space, what will happen?
I have uploaded my site files to my FTP account, but the page still cannot be displayed, sometimes it pointed to the error page (Forbidden), why?
Red “X” appears instead of image I inserted in my web pages, why?
All of the image you used on your web pages must be uploaded to the folder named “public_html” in FTP. Otherwise you cannot see the image via any browsers such as Internet Explorer.
I just made a change on my site, but I do not see the change in my browser right away. Why?
Since the browser keeps the temporary memory of your site. If you use IE5.0 or above, please do with the following instructions:
Step 1:
Open Internet Explorer. Choose "Tools", Click "Internet Options".
Step 2:
Click "General", then click "Delete files" to delete the temporary Internet files, click "OK", Close the setting page. Make sure close all of your browsers, and restart the browser you will see your change on the site.
Reson2:
There is another possibility that your Internet service provider (ISP) updates the web pages slowly. In order to enhance the access speed some Internet service providers are using Proxy server, which decrease the number and speed of update. (You can ask your friends using other ISP to visit your website, and then you will get the answer.)
How do I request my User ID and Password for my Domain Account Manager?
Different Domain Registrar will have different ways to modify the contact information or manage Domain.Generally, Domain Registrar will send you an Email containing your Domain Authorization Information, so that you can modify your DNS.
Domain Name of Hong Kong
You can call (852) 2319 1313 to get the information from HKDNR.
International Domain /Domain Name of China
If the Domain Name is registered through other company, you can contact with your Domain Name Registrar or the intermediaries and request them to email you the Domain Authorization information.
What is POP3 ?
POP (Post Office Protocol) is used to provide simple remote access to mailboxes. POP3 is the latest version of POP. With POP3, once mail clients connect and download their messages, the messages are typically removed from the server and stored on the client’s local machine.
This means that you have to ensure that the all the machines are backed up in order to prevent you loosing any information in email messages. To resolve this problem, you could use the IMAP4 or Web Mail clients which allow messages to be manipulated on the server.
Your POP3 server in Communilink:
Setting:
mail.yourdomain.com
example:
mail.wcpdemo.com
What is SMTP?
SMTP is a network protocol used to send email across the Internet. Short for Simple Mail Transfer Protocol, a protocol for sending e-mail messages between servers. Most e-mail systems that send mail over the Internet use SMTP to send messages from one server to another; the messages can then be retrieved with an e-mail client using either POP or IMAP. In addition, SMTP is generally used to send messages from a mail client to a mail server. This is why you need to specify both the POP or IMAP server and the SMTP server when you configure your e-mail application.
Your SMTP server in Communilink:
Setting:
smtp.yourdomain.com
example:
smtp.wcpdemo.com
Will I be able to check my emails when I am away from my home/office computer?
Can I use Outlook to send and receive Email?
If I register the domain name and email service at the same time, when can I use it officially?
CommuniLink will help you to register domain and create the email server account at the date we receive your payment. Generally, it will take 24 hours to register a domain. You can use the email service once the registration is completed.
I’m using another Domain Email Hosting service, how do I transfer the service to CommuniLink?
CommuniLink will assist our customers to transfer domain to CommuniLink Email Server, if you are using another Domain Email Hosting Service, we are always pleased to hear from you, our customer service hotline is: (852) 29980808. Our professional account manager will listen carefully for your requirements and provide the proper information and assistance to you.
How to choose a proper Email Service Plan?
CommuniLink provides six Domain Email Hosting Service Plan to our customers. You can choose one of these plans according to the quantity of Email accounts and the space storage. If all six plans cannot meet your requirements, we are always pleased to hear from you, our customer service hotline is: (852) 29980808. Our professional account manager will listen carefully for your requirements and provide the customize service plan to you.
Can I forward all incoming mails to a specific email account automatically?
All email accounts has email-forwarding feature so that you can set to forward all incoming mails to a specific email account automatically.
Can I set the storage limit for a specific email account?
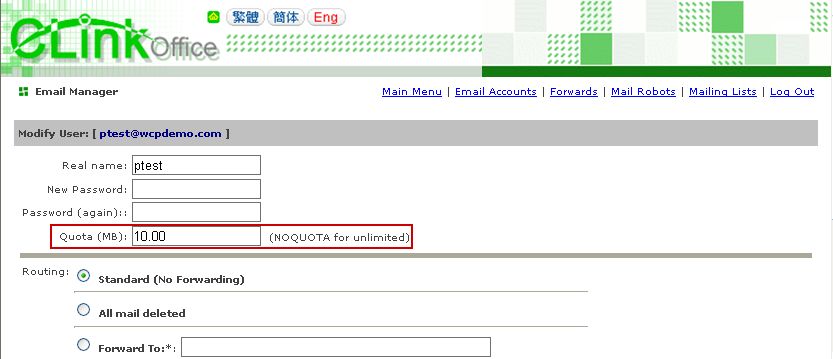
Yes, users could set the email space quota for a specific email account via Email Management Platform - Email Manager.
How can I send and receive email after I’ve joined the plan?
There are two different ways to send and receive email:
1.You can use Email client software such as Outlook to send and receive Emails. This can be useful for reducing the occupied Email space and time consuming.
2.Web Mail is also one of the choices you can use to send and receive email.
Can I create or delete some Email accounts by myself?
You could manage your email accouts by Email Manager. We provide a web interface - Email Manager, to our customers so as to let all of you could manage your email accounts and set the password easily.
What is the Email Forwarding? How to set it?
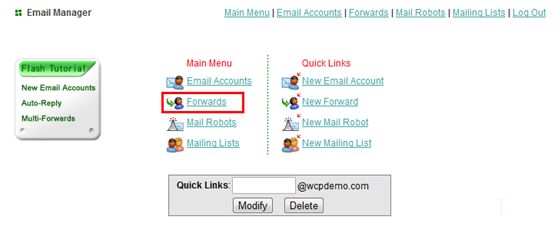
You can follow the instructions to set up Email Forwarding :
Step 2 :
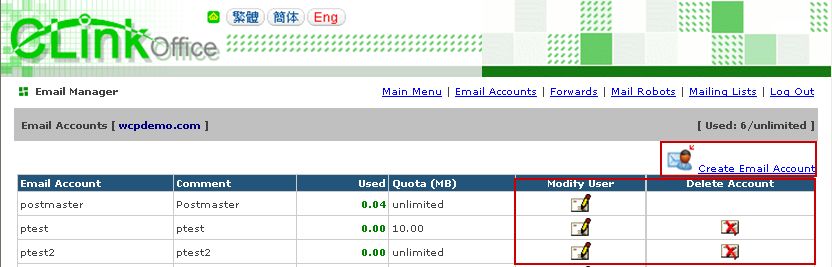
Click on “Modify User” button next to the email account that you want to change.
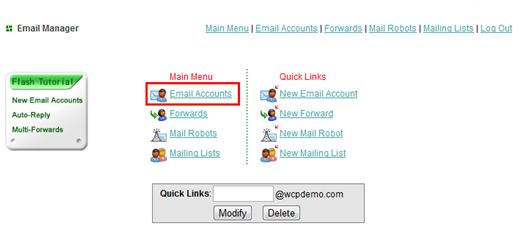
Login to your email manager, select “Email Accounts” from “Main menu”
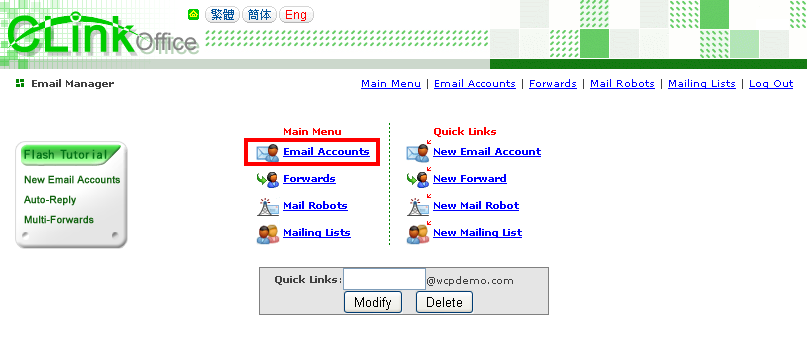

Select “Forward To”, enter the email address which you want email messages will be forwarded to, and then click “Modify User” . 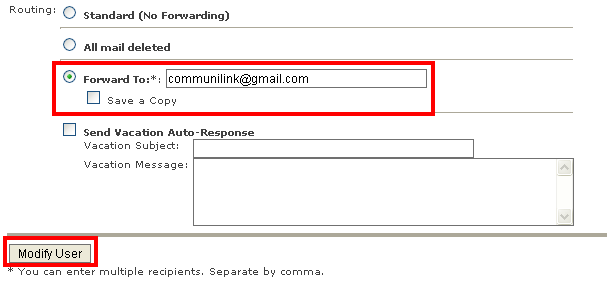
How to get the login information of Email Manager ?
Step 1 :
When the account is actived, you will receive an Email with subject of “CS Center Login Information". As long as you follow the instructions in the Email, you can login to the CS center (
Step 4 :
In the Service section, click “account information” with blue font.
Step 5 :
Click “Account Password” button, when you login to your account successfully.
How to log in to Email Manager?
(For example, if your domain name is wcpdemo.com, your login URL is http://office.wcpdemo.com)
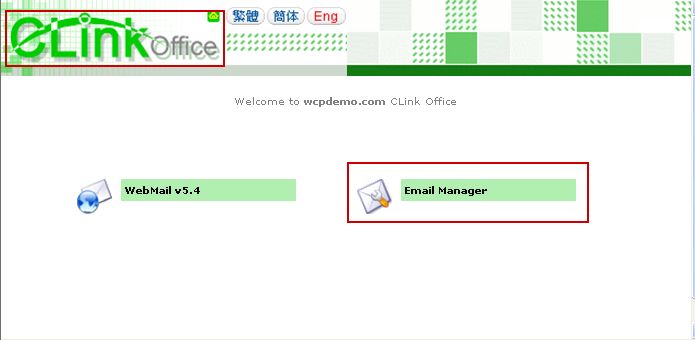
Step 2
Type your Domain name and Password.
("postmaster" is the administrator’s login name)
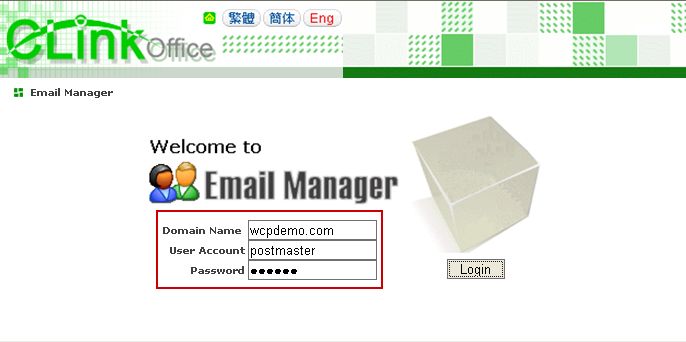
You can add or delete the email address when you have logged in to the account successfully. Also, you change the quota at any time with immediate effect.
If I forgot password of my email account, what can I do?
Step 1 :
Login to your email manager , select “Email Address” from “Main menu”
Step 2 :
Click “ change” button on the right of the email address you want to reset the password.
Step 3 :
Type your new password twice so as to reset your password completely.
Do your server support Macintosh ?
Yes. You could transfer your file from MAC to our system by Fetch. And you could also use Telnet and the POP e-mail program (e.g. Eudora, Claris E-mail and Netscape Mail)
How long does it take to setup my account?
Normally, with all require document or information provided and payment confirmation, the account can be setup within an hour during office hours.
You will receive an email with your account information, user name and password after account setup. Since Internet may not yet update your domain status, you can then start uploading your site by IP. You will have access to your account 24 hours a day.
How do I register my domain name?
I’ve got many domain names, how can I get all of my Domains to point to the same web sites?
For details, please refer to http://www.communilink.net/p5-en-change_dns.html
How do I modify the existing Domain contact information?
Different Domain Registrar will have different ways to modify the contact information or manage Domain. Generally, Domain Registrar will send you an Email containing your Domain Authorization Information, so that you can modify your DNS. If you registered Domain Name through CommuniLink, Please choose your domain category:
Domain Name of Hong Kong (e.g..hk, .com.hk, org.hk)
International Domain /Domain Name of China (e.g. .com, .net,.cn,.com,.cn)
Domain Name of
HKDNR will send you an Email about your Domain Authorization Information, so that you can modify your DNS.
International Domain /Domain Name of
Generally, Domain Registrar will send you an Email about your Domain Authorization Information, so that you can modify your DNS. .
If you forget or loss your Domain Authorization Information, you can call (852) 29980833 or Email to [email protected] to get the information from our Supporting Manager. The email relating to the password will be sent to the Registrant Contact Email address only,
You can also complete a “Modification of Primary Contact/ Domain Information Form” to modify your account information. Please note that the “Modification of Primary Contact/ Domain Information Form” must be printed on stationery of the account holders’ company. And the form should be sealed with the company seal. Please complete it and fax to (852) 2998 0800. If you created an individual account please fax the form with your HKID photocopy to (852) 2998 0800.
If you forget or loss your Domain Authorization Information, you can call (852) 2319 1313 to get the information from HKDNR.
I have registered Domain in other company. Can CommuniLink help me to handle Domain Renewal issues?
Sorry, we can’t. You’re suggesting contact with your Domain Name Registrar or the intermediaries for the Domain Renewal issues.
If I’m using the other company’s hosting service, Can I transfer my Domain to CommuniLink and join your services?
Yes you can.
After we received your payments, we will create a n account for you on your DNS, so that you can upload your website files and create an Email address.
After that, you can choose to modif y domain name by your self or ask CommuniLink to help you to transfer your domain name . Click here to get the details.
What is WHOIS?
WHOIS is the database of all domain name registrars (owners). WHOIS contains information about the domain name, nameservers, registration, and sometimes the expiration dates.
You can see if your desired domain name is available or not by WHOIS.
Below website can provide you the WHOIS for some domain extension.
What domain names do you support?
We support all TLD (top level) domains (.hk, .cn, .com, .net., .org, .info, .biz, .cc)
For more detail and the price, please visit:
Do I need to prepare some documents to register a domain name?
You don’t need to submit any documents to register the internationalised domain name or the domain name of
|
How long does it take to register a domain name?
After receive the payment and the proper documents, CommuniLink will help to apply your domain name to Domain Registrar immediately. Later, you will receive an Email Notification. In general, the registrar needs 24-36 hours to proof your application form.
Does Communilink support chinese domain name?
CommuniLink supports Chinese domain name in .hk. i.e. 域名.com, 域名.com.hk or 域名.hk.
You may register the doamin name through CommuniLink.
For Chinese domain name, it is only avilable for joining Domain Redirect or DNS Service.
Will you disclose my information, after I complete my domain registration?
The domain registrar will disclose your domain information on WHOIS to assist people to obtain information about your registration record of domain names. The data you provided used for lawful purposes only. And we guarantee that your personal information will not sell to the third party.
Can you hold the domain name for me before I purchased the Hosting Plan?
No.
You need to complete the on-line application form. When we received the payment, we will submit your application form to the domain registrar.
How to Set Up an Email Account in Outlook 2003?

If you’re asked whether you’d like to open this particular account automatically every time you start Outlook 2003, click Yes (if you do) or No (if you don’t). If you don’t want to be asked this question again, tick the Always perform this check... box.
2. Start Outlook 2003, go to Tools tab, and click E-mail Accounts...

3. Select Add a new e-mail account, and then click Next.

4. Select POP3 and then click Next.

5. Enter your email account details.
a) User Information
Enter Your Name (as you want email recipients to see it)
Enter your E-mail Address. (e.g. [email protected])
b) Logon Information
Enter your FULL email address as your User Name. (e.g. [email protected])
Enter your Password (This is the email password set in Email Manager)
Tick "Remember password".

c) Server Information
Enter mail.wcpdemo.com as your Incoming Mail Server (replace wcpdemo.com with your domain name)
Enter smtp.wcpdemo.com OR your ISP’s SMTP as your Outgoing Mail Server (replace wcpdemo.com with your domain name)
***Please contact your ISP for the outgoing mail server setting if you are using theirs SMTP.

6. Click Next and then click Finish.

What is IMAP?
IMAP (Internet Message Access Protocol, formerly known as the Interactive Mail Access Protocol) is a protocol for email clients to retrieve email messages from, and work with the mailboxes on, a mail server. IMAP is the protocol that IMAP clients use to communicate with the servers. Communilink Webmail and IMAP are designed to work together. This means that when you look at your email through IMAP, you will see exactly the same results as if you had used your web browser through Webmail. The reverse is also true.
Your IMAP Server in Communilink
Setting:
mail.yourdomain.com
example:
mail.wcpdemo.com
IMAP4 is considered as a substitute of POP3, because IMAP allows you to access your email messages and files without transferring them between computers. You set up IMAP on the computer(s) from which you want to access email from your account.
|
|
IMAP4
|
POP3
|
|
How to receive the Email
|
|
|
|
Strength
|
|
|
How do I set up smtp2620 email account in Microsoft Outlook 2003 ?
1. Open Outlook 2003 , From the Tools menu, choose "Accounts."
2. Enable Add an email account, and then click Next 3. Select your email account and click Change


For details, please visit CS Center Account Information at https://support.communilink.net 

I have more than one domain, so should I apply Email Service to all of my domains?
You don’t need to do that. CommuniLink launches ”Domain Email Redirect” service . You don’t have to apply Email Service to all of your domains, the service details as followings:
Domain Email Redirect Service :
You have 2 domains: The first domain name (aaa.com)
The other domain name (bbb.com)
Apply the Domain Email Redirect Service of CommuniLink, and set to forward your Email to the first domain (aaa.com).
If you receive the incoming mails to the second domain (bbb.com)
The email will forward to the same email address under first domain.
Feature and Service Introduction :
As long as you have a domain name (aaa.com, for example) under CommuniLink Email Service, you can apply our ”Domain Email Redirect” service. Our service allows you to direct incoming messages from one domain to another. When you got the incoming mails to the Email address such as [email protected] , it will automatically forward to the email address for your specific domain such as [email protected] .
Payment
Basic Monthly Fee : HK$25
Installation Fee : HK$150
Must prepay for 12 months.
Domain registration fees are not included.
Notes : You have to redirect your email domain to the one under CommuniLink Email Service.
Can I send mass email to customers and my Website members?
1. CommuniLink SMTP will overload that it influences other customers shared the same server.
2. There is a chance that you will be treated as a spammer and listed on the malicious attacks so as your domain and the IP address will be blocked by some Email Service Providers. Next time you send an Email to their server will be treated as Spam Email.
3. If CommuniLink detects the situation is occurred as mentioned before by any of our customers sending mass email we may halt services without notice.
I always receive the Email that not send to me or the email advertising for a product or service.Why?
If you always receive the junk mail but the recipient is not your email address, it is possible because the spammers use special programs that extract your email addresses from Web sites and Usenet postings, but not due to the service error.
These kinds of emails always change or blind the recipient in order to make you believe is an error from server. In addition, CommuniLink server will add server name ( @SERVERNAME.COM , for example ) to recipient address automatically. The best way to avoid ending on a spammer’s mailing list when you post to a Web forum or a newsgroup, you can disguise you Email Address in Newsgroups, Forums, Blog Comments, Chat.
Can I send the email advertising for my product or service?
Communilink Internet Limited is a licensed Internet service provider (SBO license:1218) in
I’d like to know more about "Anti Spam" Service. Is it effective, and what is the principle of it?
Generally, “Anti Spam” could help you to clear your mailbox from different kinds of advertising and obscene emails, but the number of success rate is depends on the rules and principles the providers set.
Most of the Email Service Providers use the following procedure to verify the Spam Email:
- Verify OpenRelay (ORDB.org)
- Verify the Public Blocked list (spamcop.net, mail-abuse.org)
- Verify DCC list (rhyolite.com)
- Verify Pyzor & Razor list
- Apply Bayesian auto learning & filtering.
However, technology is developing rapidly nowadays. Relying on the “Anti Spam” procedure as we mentioned above is not enough.
We know the procedure is not efficient, therefore CommuniLink launches a new “Anti Spam” system: “Spam Controller”. This brand new system can “Learn by itself”! If the spam emails on the controller platform was not released, our system will analyze the emails per day and record the characteristics in order to improve its blocking system! You have no longer to worry about the slippery spammers could escape from the anti-spam systems! For details, please refer to http://www.communilink.net/p58-en-spam_controller.html
How can I backup my internal outgoing and incoming mails, so as to make convenient for the managers to check?
CommuniLink provides “Catch SMTP” service, so that you could monitor all your outgoing and incoming emails. You do not need to change any settings of your email account, the email system will automatically backup your out-going and incoming mail messages, and send to the specific email address. The senders will not aware of this back up. For more details, please refer to http://www.communilink.net/p79-en-smtp.html
Why I got problem to send and receive email in China?
There are several reasons for getting problem to send and receive Email in
Can I send or receive Email, when my mailbox is over the size of limit?
When your mailbox is over the size of limit, you are not able to send or receive Email. You have to delete some emails, or you can use the Email client such as Outlook to download all of your mail messages to your computer so as to release the mailbox using storage.
How do I get my mail messages when I work offline?
You can configure an Email client such as Outlook 2003. Turning on “Cached Exchange Mode” when you are setting up the Outlook. A copy of your mailbox is stored on your computer. This copy provides quick access to your data and is frequently updated with the mail server. You can check your Email even if a connection from your computer to the server isn’t available.
Error Code: 0x800C0131 or 0x800C0133
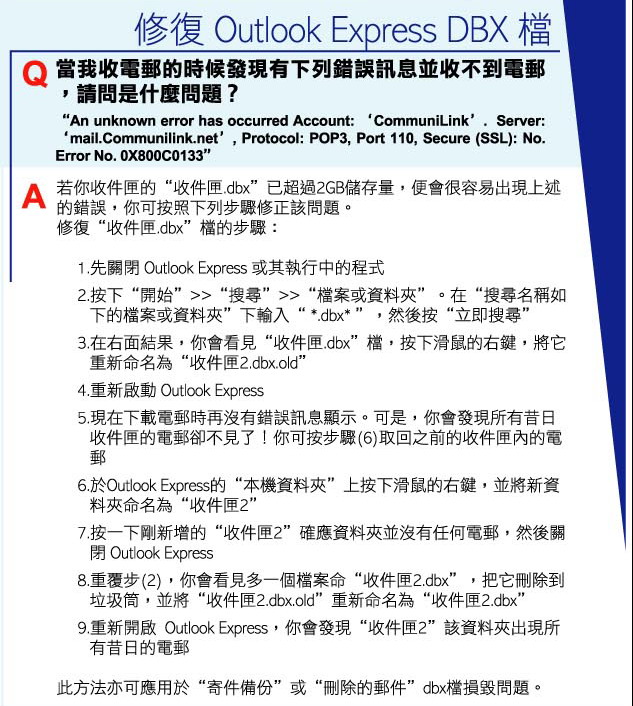
This error occurs due to a corrupt or over-full in email inbox. It is because the “Inbox.dox” file size exceed to 2GB maximum size which is set by Outlook Express. Therefore, you cannot receive the email.
1. after you backup the file, then you can delete that file and create the new one. You can find official support document for the Error Code 0x
2. After you turn off the email scanning function on antivirus software, please do testing for email receiving. After you compact the email, please do the testing for email receiving again.
How to compact the email?
Go to “File”, choose “folder” and press “compact all folders”. If email receiving is normal after compacting, that mean your “Inbox” do not have maintenance regularly. E.g. “Inbox” have hundred of emails, do not classify the mail, etc. This is very dangerous because you may easy to lose all of email suddenly.
How to maintain Outlook Express:
“Inbox” should not have too many emails. You should assign the receiving email to a particular category that is created by yourself.
After you delete or move the email, please execute “Compact”. This action can prevent the database file that become confused.
Error Code: 0x800CCC0E, 0x800CCC0F, 0x8004210B or 0x80042108
• Incorrect account settings
• Your user profile in Outlook is damaged
• An e-mail item on your POP3 server is damaged
• Incorrect configuration of your Anti-Virus software
• Outlook Express has been removed from the computer or the installation is damaged
• Incorrect configuration of personal firewall software
Error Code: 0x800CCC6A
551 USER NOT LOCAL - User mailbox is ... 0x800CCC6A, N/A, SMTP_451_ERROR_PROCESSING,
Error processing request. 0x800CCC6B, N/A, SMTP_551_USER_NOT_LOCAL
Error Code: 0x8004060C
Possible Cause:
Resolution:
Error Code: 0x800CCC90 or 0x800CCC18
Account:’mail.yourDomain.’, Server: ’mail.yourDomain’, Protocol: POP3,
Server Response: ’-ERR The AUTH protocol exchange was canceled by the client.’,Port: 110, Secure(SSL): NO, Server Error: 0x800ccc90, Error Number: 0x800ccc18
Possible Cause:
Resolution:
Error Code: 0x800CCC1A
Similar Symptoms:
A secure connection to the server could not be established.
Client’s Anti-Virus program does not support SSL.
Resolution:
Account: ’accountname’ Server: ’servername’, Protocol: POP3, Port: 995, Secure (SSL): Yes, Error Number: 0x800CCC
Possible Cause:
1) Disable the scanning email feauter in your Anti-Virus
2) Disable the SSL setting in mail client
Error Code: 0x800420C8
Message Could Not Be Opened From Outbox Folder, Account:
(various SRX cases have the error code mislabelled at 0x800420C8)
Possible Cause:
Resolution:
Delete and reset the email account in outlook and make sure there’s only one identical email.
Error Code: 0x800CCC7F
Possible Cause:
Resolution:
Error Code: 0x800CCC79
The message could not be sent because one of the receipents was rejected by the server. The rejected e-mail address was ’ ’. Subject ’XXX’, Account: ’mail.XXX’, Server: ’smtp.XXX’, Protocol: SMTP, Server Response: 骁 sorry, your envelope receipient has been denied (#5.7.1)’, Port: 25, Secure(SSL): No, Server Error: 553, Error Number: 0x800CCC79

Error Code: 0x800CCC6F
An unknown error has occurred. Subject ’the subject’, Account: ’mail.xxxx.com’, Server: ’mail.xxxx.com’, Protocol: SMTP, Server Response: 骂 mail server permanently rejected message (#5.3.0)’, Port: 25, Secure(SSL): No, Server Error: 554, Error Number: 0x800CCC6F
Possible Causes:
2) Sender was trying to send / forward an email which has been detected as a high potential spam mail
Resolution:
1) Rename the attached file and try again
2) Do not forward the email and retype the message and try again
Error Code: 0x800CCC7D
0x800ccc7D.
1) Disable the scanning email feauter in your Anti-Virus
2) Disable the SMTP SSL setting in mail client

Error Code: 0x800CCC0F (For China user)
Your server has unexpectedly terminated the connection. Possible causes of this include server problems, network problems, or a long period of inactivity. Account. account name, Server: ’server name’, Protocol: POP3, Server Response: ’+OK’, Port: 110, Secure(SSL): No, Error Number: 0x800ccc0f
In order to receive/send email normally for all users, please be reminded that all users using the same internet should apply.
Error Code: 0x800CCC0D
Causes:
1) You are not connected to the Internet or a network
2) Wrong setting in POP3 or SMTP fields.
3) DNS server error
3) Domain Name expired
Resolution:
1) Contact your ISP to fix the internet problem
2) Check your setting in Outlook / Outlook express.
Any spelling mistake cause error on receiving or sending email.
pop3: mail.yourdomain.com
smtp: smtp.yourdomain.com or your ISP’s smtp
3) Contact your DNS service provider to check for your domain pointing status.
4) Contact your Domain Registrar to renew your domain name.
How do I get my admin (postmaster) password to create email account?
What is the difference between IMAP and POP?
IMAP4, the latest version, is similar to POP3 but offers additional and more complex features. For example, the IMAP4 protocol leaves your email messages on the server rather than downloading them to your computer. If you wish to remove your messages from the server, you must use your mail client to generate local folders, copy messages to your local hard drive, and then delete and expunge the messages from the server.
With IMAP (Internet Message Access Protocol) you read your mail while it is still on the mail server. Because your mail remains on the server, you can access it from any IMAP-configured computer with internet access. Whether you are at work, at home, or traveling around the world, all of your messages are available to you.
POP (Post Office Protocol), on the other hand, is designed to handle offline operations. POP downloads e-mail to the PC, generally removing it from the central server. After messages are moved onto the desktop of the current local computer and deleted from the server, you then manipulate them on your desktop. Therefore, POP e-mail is only available on that specific desktop computer. E-mail stored locally using POP may not have a back-up system in place and would be vulnerable to loss in the event of a computer crash, whereas with IMAP, e-mail messages and folders are backed up nightly by Communilink Server and are available in case of loss.
However, for IMAP users, as email store in server, please ensure you have enough email space with Communilink in order to keep receiving the incoming email.
What is Email Manager?
Through Email Manager, administrator can create email accounts, set auto-forward or auto-reply message, etc.

When I create an email account in Email Manager, it says the user account already exist, but there’s no such account in my email account list.
The email account you want to create is in your Forward List which functions as virtual email account.
2) You will see the email account name that you tried to add
3) Click Delete Button
4) Confirm Delete
5) Create the email account again. 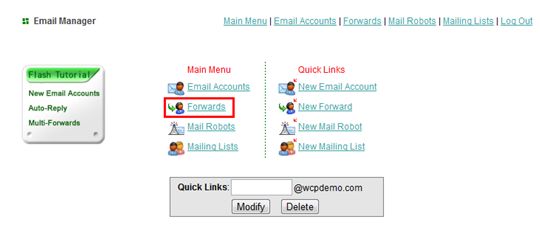
Why my Outlook / Outlook express keep asking me the password?

How to set up email account with an Apple Macintosh using Mac OS X 10.x?
Here below example for 10.4
Example for 10.3 and 10.5
Before starting, to avoid errors while setting up Mail, make sure that you are connected to the Internet. If you cannot be connected to the Internet, you may still set up Mail, but additional steps will be required.
1) In the Dock, click on the Mail icon.
2) If this is the first time you’ve opened the Mail application, you will immediately be brought to the New Account setup assistant.
Click the Continue button at the bottom right and skip to step 6 below.
3) If you’ve opened Mail before, wait for Mail to open then click on the Mail menu at the top left of your screen and select Preferences.
4) Click on the Accounts icon at the top of the window.
5) Click on the plus sign ( + ) at the bottom left of the window, circled in the example below.
6) In the General Information area, set the Account Type to "POP."
a) Enter "Main Account" (or a description of your choosing) for the Account Description.
d) Click the Continue button.
7) In the Incoming Mail Server area
a) Enter "mail.yourdomain.com", substituting"yourdomain.com" with your actual domain name into the Incoming Mail Server field. ( ex: mail.wcpdemo.com)
b) Enter your username into the User Name field
c) Enter your password in the Password field.The window should look like the example below.
Note: If you get an error like the example below, this either means you are not connected to the Internet or that your e-mail username or password are incorrect. Try retyping both of them making sure the "Caps Lock" key on your keyboard is not on.
Click the Continue button and go on to step 8.
8) In the Outgoing Mail Server area, enter "smtp.yourdomain.com" in the Outgoing Mail Server field. (ex: smtp.wcpdemo.com)
Check with your specific ISP for exact Outgoing server settings
Click the Continue button.
If the "Accounts" preferences window is still open, click the red close bubble button at the top left of the window to close it.
b) Enter your name in the Full Name field.
c) Enter your e-mail address in the Email Address field.The window should now look like the example below.
Click the No button.
Set my email forward to another email address and save a copy
3. Select “Forward To” and type in the email address to receive forward emails:
If there are more than one email address, use “,” as separator.


What is the maximum message size?
Maximum incoming and outgoing message size for webmail is 100MB.
ALL Email and Hosting Plan : Maximum incoming message size is 100MB.
|
Webmail
|
Max Incoming Size (MB)
|
Max Outgoing Size (MB)
|
|
Economic Email Popular Email Cloud Value Email Cloud Basic Email Commercial Email or Above Cloud Entry Hosting or Above Cloud Popular Hosting or Above |
100 |
100 |
|
Value Hosting Basic Hosting Classic Hosting or Above Cloud Classic Email or Above Cloud Business Hosting or Above Database Hosting Online Shop |
100 |
100 |
|
Mail Client - (e.g. Outlook)
|
Max Incoming Size (MB)
|
Max Outgoing Size (MB)
|
|
|
Economic Email Popular Email Cloud Value Email Cloud Basic Email Value Hosting Basic Hosting Cloud Entry Hosting Cloud Popular Hosting |
Using other SMTP
|
100 |
Depends on ISP
|
|
Commercial Email or Above Classic Hosting or Above Cloud Classic Email or Above Cloud Business Hosting or Above Database Hosting Online Shop |
Using our SMTP
|
100 | 100 |
|
Commercial Email or Above Classic Hosting or Above Cloud Classic Email or Above Cloud Business Hosting or Above Database Hosting Online Shop |
Using other SMTP
|
100 |
Depends on ISP
|
Set Auto-Reply or Vacation Message for an Email Account


Reset password and change quota limit of email account.
User can also change his/her password after login to Office Clink.
http://office.yourdomain.com (e.g. http://office.wcpdemo.com)
1. Click “Email Accounts”

2. Click “Modify User” button
3. -Fill in the password twice if resetting password
-Type the quota if you want to update mailbox size (you have to type NOQUOTA to set unlimited quota)

4. Click “Modify User” button to complete the setting.
5. You will see either successfully message as below
Email Account password changed successfully , or
Quota set to xxxx byttes
How to create virtual email account and set forward?
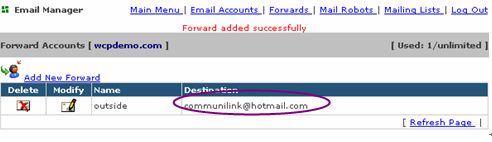
Forward function in Email Manager is used to forward username1@yourDomain to username2@otherDomain (e.g. [email protected] à[email protected])
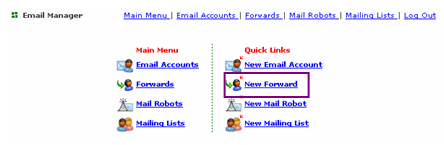
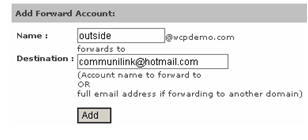
1. Click “New Forwards” 2. In the “Add Forward Account”, type in the following information: Example: Name: outside
Forward Email Address: c[email protected]
Which version of PHP my hosting service plan supports?
We have different servers that support PHP4 or PHP5. You can check the version in Web Control Panel (WCP).
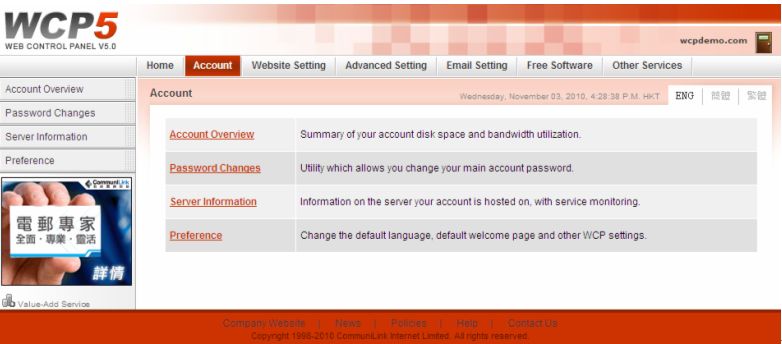
3. On the top, click on PHP Info to show the server’s phpinfo() . Set up your own phpinfo() on the website
1. Create a PHP file ( e.g. phpfile.php ) 3. Log in to your FTP account 4. Upload this PHP file to public_html folder 5. Then you can read the phpinfo() http://yourdomain.com/phpfile.php 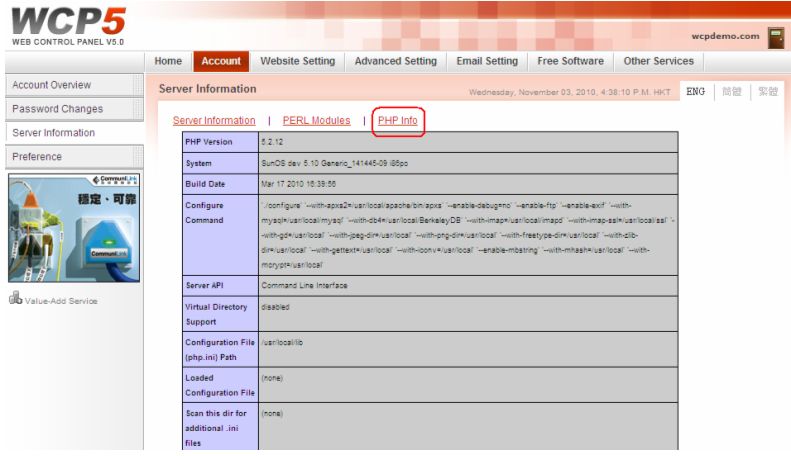

( e.g. http://wcpdemo.com/phpfile.php )
Why does my website need Site Add Ons service?
Why is my new domain not loading when I enter its address in the browser?
There are three major issues that could cause your site to not be available from your web browser.
1. The domain name registration hasn’t propagated yet. It takes approximately 24 - 72 hours for any newly registered domain to show up on the Web. During this 24 - 72 hour period, important information about the domain name (including information about its name servers, registrar, and contact information) is being sent to all of the name servers around the world. You will not be able to access your domain until all of the name servers that lie between your local computer and your server have received and processed this information. A similar process occurs any time a domain is renewed after its expiration date. If you renew your domain before its expiration date, however, no downtime will be experienced.
To check the status of your domain name registration, you can perform a WHOIS search on the Internet.
2. Your domain name registration has expired. Domain names will go off-line if they have expired. You can also perform a WHOIS search to check the status of your domain registration as well. If the Status field reads anything other than Active, you should contact our Support Dept .
3. The Name Servers aren’t set correctly. If your domain is registered with us, please contact our Support Dept. Otherwise, please make sure you configure your domain DNS servers to DNS1.COMMUNILINK.NET and DNS2.COMMUNILINK.NET.
Why my Outlook Express keeps trying to send a message but the Outbox appears to be empty?
First check the obvious. While viewing the Outbox, click View --> Current View and be sure it is set to "Show All Messages". Also verify that "Show replies to my messages" is not checked. If you then see the unsent message you can delete it normally. You should then click File --> Folder --> Compact.
If the Current View setting is correct, then the "Outbox.dbx" file has been damaged. This can be caused by antivirus programs scanning outgoing email. This scan is not necessary to protect your computer if you still have antivirus system scan running in the background, so disable all email scanning to prevent future damage. To repair the Outbox, close Outlook Express and delete "Outbox.dbx" in your store folder. A new Outbox will be created automatically when you re-open Outlook Express.
The absolute path of CGI programs
Here are certain files for your cgi programs
-
Home Path /home/yourusername (ex: /home/wcpdemo)
-
Sendmail Path /usr/lib/sendmail
-
Perl Path /usr/bin/perl
-
Python /usr/local/bin/python
My PHP script is not running. Can you take a look for me?
No one can remember the login or password for our domain and the registration indicates no valid e-mail. What do we do?
In order to have your login information emailed to your valid email address you will have to contact our Support Team via email at [email protected].
Please include:
- the account username
- the account password
- domain name
We need this information to verify you as the account holder.
How can I register a domain name?
What is Domain Redirect Service?
Domain Redirect is a tool to set your domain to an assigned website.
Browse http://yourdomain.com
How do I set my domain redirect?


How can I change the password of Domain Redirect Management?


How to renew a domain?
If you did not register your domain name through CommuniLink, please contact your domain registrar for assistance with renewing your domain name.
To renew a domain registered through CommuniLink:
-
For the .hk domain please send the payment to HKDNR of http://www.hkdnr.net.hk directly. They should send an email notification before your domain expiration.
- For the other domains, You’ll receive the email invoice 1-2 months prior to its expiration. Please refer to instruction in the email to renew the domain.
-
If you wish to renew the domain more than one year, please contact our CS Dept to revise the invoice.
-
To settle the payment by credit card online please visit https://secure.communilink.net/payment/
Important: Renew your domain at least 30 days prior to its expiration to avoid the risk of losing your domain and ensure that your renewal is successfully processed.
How can I cancel my domain name registration?
The domain name could not be cancelled if the registration is being processed by the registrar. Thus, please kindly double check the spelling before registration.
How can I edit my domain contact information?


4. Click on “Edit”.
What will be my domain expiry date after the registrar transfer?
One year will be automatically added to your current expiry date after the registrar transfer.
e.g. If your domain is due on
Why is my domain locked?
Be aware that domains can also be locked by the Registrar for the following reasons and cannot be unlocked:
- Your domain is within 10 days of the expiration date
- Your domain name was registered or transfered within the last 60 days.
- Your domain name may be locked as the result of a dispute being investigated.
I have already submitted a domain transfer request, why is my domain name still held in my old registrar?
Our registrar partner will contact you at the Administrative Contact e-mail address of the requested domain. You need to follow their specific instructions, listed in this e-mail, to approve the transfer. If you have not been contacted, check that your Administrative Contact e-mail address is correct.
Upon approval, the transfer request will be submitted to your current registrar. Your current registrar will either allow or deny the transfer and may send an e-mail to you asking for your approval of the transfer. You must follow their specific instructions to approve the transfer as well.
Here are a few standard reasons for denying a transfer:
1. Registrar Lock Period of 10 days before expiration.
2. ICANN Standard of 60 days after renewal or transfer.
3. Payment due for domain renewal.
4. A domain name that is already expired.
5. The domain name is locked at your current registrar.
How do I get my Authorization Code from CommuniLink?
How can I get my authorization code if my admin email is invalid?
For more details, please contact our Customer Service Officer at 852-29980808.
What is an authorization code or EPP code?
Domain registrar will assign an authorization code to each domain name during the application. This code is needed for domain registrar transfer.
How can I transfer my domain name out of CommuniLink?
Important: This process can take several days to complete; therefore, before initiating a transfer request, make sure that your domain is not up for renewal. Domains cannot be transferred around 30 days before their expiration.
What is a Catch-All EMail Account?
How to cancel the catch-all account?
How to reset password and change quota limit of email account? (by postmaster)


How to set Auto-reply or vacation message of email account? (by postmaster)


Any spam filter service?
Why I get so many spam mail? Does Communlink sell my email address?
We need to keep your information to verify your identify of our service, bill you and contact you if any problem of your account.
How the spammer get my email address?
If you have posted your email address on a newsgroup, bulletin board, or signed a web-based guestbook, spammers may have found your address that way. They also get domain name registration (WHOIS) records, collecting the email addresses of administrative, technical and billing contacts for domains; they often try at possible addresses as well.
Why I get the spam mail, but the recipient email address is not mine?
After the spammers have your email address, they put it along with thousands of others in the BCC (blind carbon copy) field of a mail, effectively hiding your and thousands of other email addresses.
I didn’t send mail to those recipients. Why I get so many return message suddenly?
How to stop the spam mail?
Why receiving so many spams?
http://www.infosec.gov.hk/tc_chi/yourself/soans.html
Do I have any reward if I refer my friend to join your service?
http://www.communilink.net/p4-en-affiliate.html
What is Domains Control Panel (DCP)?
What is the URL of SpamController? And how can I get my password?
Any sample to set an access counter on my website?
User must required a Unix Platform hosting service which includes Web Control Panel (WCP) feature.
Then, follow the instructions below:
1. Login to WCP
2. Click Free Software and then click Access Counters.

3. Click Overview to learn more about this function
4. Click Setting on the left-top corner to start installation

5. Click Install button to setup the counter

6. Follow the instruction in WCP to add a new counter page

Any sample to set Form Processing on my website?
User must required a Unix Platform hosting service which includes Web Control Panel (WCP) feature.
1. Login to WCP

5. The program execute path then shown at the bottom.
6. You can change the email address or program path, etc by click Change button. 

Any sample to set Postcards on my website?
User must required a Unix Platform hosting service which includes Web Control Panel (WCP) feature.
2. Click Free Software and then click Postcards.

6. For adding more postcards or deleting it, follow the instructions shown in in WCP 
Any sample to set Time / Clocks on my website?
User must required a Unix Platform hosting service which includes Web Control Panel (WCP) feature.
Then, follow the instructions below:


Any sample to set a Bulletin Board on my website?
Then, follow the instructions below:

4. Insert Database Name, Database Username and Database Password.
These informations can be found by access to CS center.
5. Leave "wcp_cdb_" in Prefix filed to set the prefix name of database tables.
6. Click Install button to setup the Discuz Forum.

How can I use PHP program to upload files?
What are my A & MX records?
A & MX records are part of DNS configuration. They are used to resolve the web and email of a specified domain name.
If you are using CommuniLink DNS servers, our Support Team is pleased to send you the A & MX records upon request.
How do I change the Name Server of my domain?
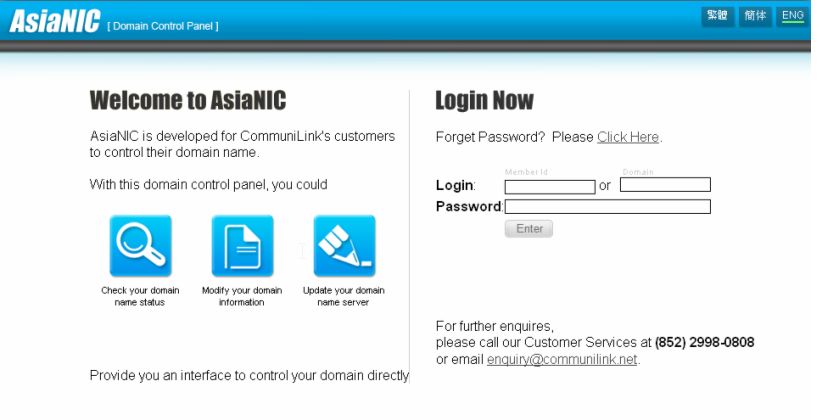
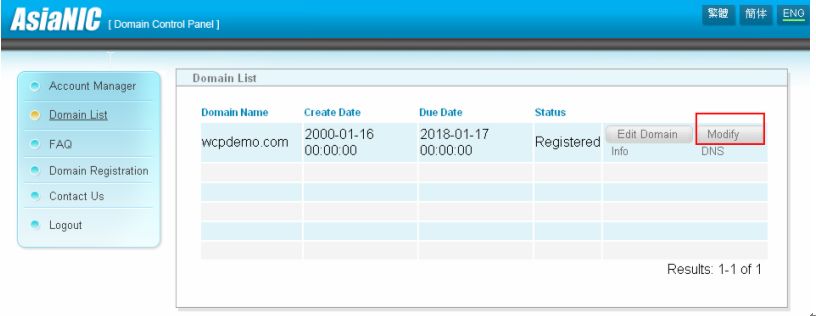
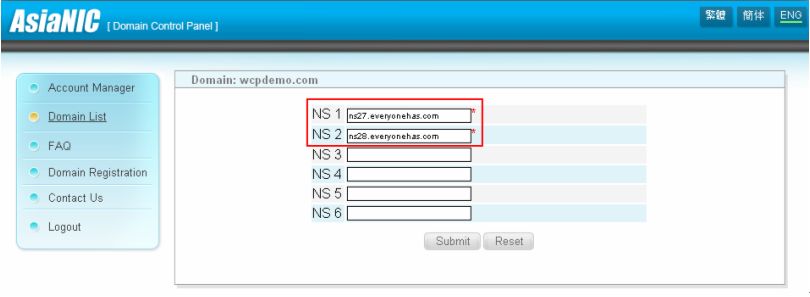
Note: Generally, DNS update takes approximately 24 to 72 hours.
How do I disable the scanning email feature in Norton Anti-Virus?
Follow these steps to turn off incoming and outgoing email scanning:
1. Start Norton AntiVirus. If Norton AntiVirus is installed as part of Norton SystemWorks or Norton Internet Security, then start that program.
2. Click Options. If you see a menu, click Norton AntiVirus.
3. In the left pane, click Email.
4. In the right pane, uncheck Scan outgoing Email and incoming Email
5. Click OK.
6. Close Norton AntiVirus
How do I disable the scanning email feature in Norton Anti-virus if I use Window Vista?
2 Under the product tab, click Settings.
3 Click Auto-Protect, and then click Configure.
4 In the User Account Control window, click Continue.
5 In the left pane, under Real-Time Protection, click Email Protection.
6 Uncheck Scan outgoing and incoming email messages.
7 Click OK.
8 Close the Norton product.
How to check my Email via website ?
You may simply visit our webmail webpage at http://weboffice.com.hk to check your email via website.
I joined SpamController Service. Why will be treated as spam by the system when I send an email to my colleagues?
Why I can’t delete my email in Webmail ?
When your mailbox capacity is full or near full, error message will be encountered when you delete your email :
Server response: [ALERT] You exceeded your mail quota.
As a copy of deleted messages will be copied to the trash as a backup, Therefore, if your mailbox does not have enough space for e-mail copy, the error message will be displayed.
You may either choose one of the following method to solve the above error:
1. Clear the message in trash folder.
2. Download messages to your email client .eg: Outlook
3. Increase the capacity of your email box via Email Manager
4. Send e-mail to our Technical Support Department ([email protected]) to delete your email at once.
Note: CommuniLink could only delete all the email in webmail at once. We will not selectively delete the e-mail. Please also provide your user names, passwords and folder name in the e-mail.
How can I check the Bandwidth current usage of my domain?
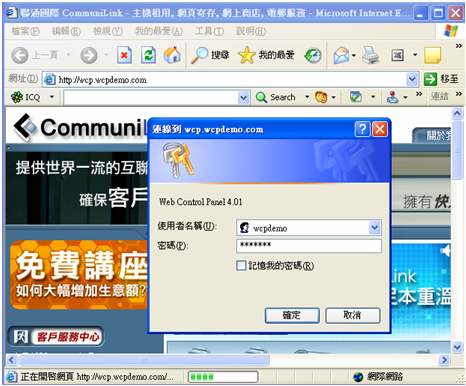

What can I do if my website exceeds the limit of Bandwidth?


What is Web Control Panel (WCP)?

How do I set password protect files and directories?


How can I display chinese in my ASP pages?

My website cannot access to MS access db, can you help?
Does Communilink support Jmail?
JMail.ServerAddress = "www.YourDomain.com"
JMail.Sender = "[email protected]"
JMail.Subject = "JMail Sample"
JMail.AddRecipient "[email protected]"
JMail.body = "This is a sample message sent with JMail."
JMail.Execute
msg.Logging = true
msg.silent = true
msg.From = "[email protected]"
msg.FromName = "My Realname"
msg.AddRecipient "[email protected]", "His Name"
msg.AddRecipient "[email protected]"
msg.Subject = "How you doin?"
msg.Body = "Hello Jim" & vbCrLf & vbCrLf & "How’s it going? ..."
if not msg.Send("user%domain.com:password@smtp.isp.com" ) then
Response.write msg.log
else
Response.write "Message sent succesfully!"
end if
Does Communlink support CGI to run on servers?
Our servers support CGI. However we are forced to delete your CGI programs if they consume too much server’s resources or affect the server’s performance.
Where can I run the CGI programs?
CGI files should be uploaded using ASCII mode and should be put in public_html/cgi-bin folder, which the permission is preset to 700 or above in all our Unix servers.
For Windows servers, it is suggested to put the CGI files in public_html/cgi-bin folder, where no permission is set.
Why my CGI not work?
How to CHMOD of my files?
Through Web Control Panel (WCP)
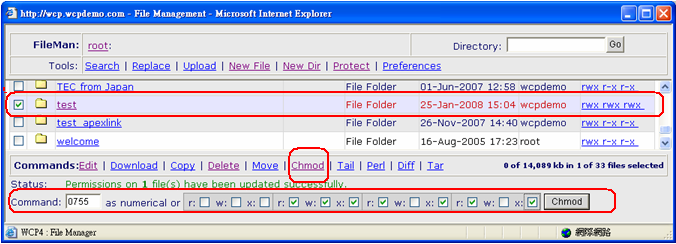
1. Log in to Web Control Panel and then go to File Manager. 2. Tick the checkbox of the file which needs to chmod. 3. Click on Chmod from below toolbar 4. A command bar will show up. You may tick the checkboxes or fill in the number in the number field. Note: e.g. If you want to set the permission to 755, please insert 0755.
Please do not tick the first three checkboxes or please start with a zero (“0”) in the number field.
I’m new to CGI, can you help?
Why do I need to Chmod of my files?
List of CHMOD’s and what they mean.
chmod 777 filename
How do I import a MySQL dumpfile into my database?
After you have dumped out your data into a file as dbname.sql, you can upload this database file by FTP to your home directory. (/)
Once you have uploaded the dump file to your account, get a shell prompt on our system using telnet.
-
Telnet YourFTPIP (ex: telnet 203.124.10.90)
-
Insert your FTP login and and password
-
Then type mysql -p dbname < /home/username/dbname.sql
How to get my mysql information?
Once your account is ready, you will receive an email from us (subject: CS Center Login Information). By following the email instructions, you will be able to retrieve all login information about your service plan, such as Email Manager, FTP account, etc.
If you cannot find your database login information through CS Center, please email to [email protected]with “Activate SQL: *yourdomain.com” as subject.
*yourdomain.com is your domain name.

How to import my existing database if not via the WCP?
2) Use ftp upload your SQL file to web server such as wcpdemo01.sql with your FTP login information
3) In DOS mode, type "telnet YourHostingIP" (ex: telnet 203.124.10.90) and then login with your FTP login information. You can get your YourHostingIP by ping yourdomain.com.
5) Enter your mySQL password
6) The database will be successfully imported.
Note:
wcpdemo01 is your database name
wcpdemo is your FTP username
wcpdemo01.sql is your existing SQL file
Can I connect to MySQL remotely?
Yes, but we only allow limited connection, thus please provide remote host IP.
This service is subject to a monthly and one-time setup charge. For service details, please contact our CS department at 29980808 or email to [email protected] for service details.How do I connect To MySQL?
Do you offer MySQL 5?
Yes, we do. Our newest server supports MySQL 5 for our new and some of our current users.
If you want to migrate your existing database MySQL 4 to MySQL 5, please contact our Customer Service Department for your service migration.
Note:There have been many changes from MySQL 4 to MySQL 5, it is your responsibility to ensure that your database is compatible with MySQL 5 before migrating.
How can I check my database quota?
Database quota information is available in Web Control Panel (WCP):
1. Account Overview, or
2. PHPMyAdmin (select the table, and the quota will show on the bottom right corner)
Note: Account Overview information is updated every 24 hrs.
Can I run a PHP script on cron?
Do you provide some PHP scripts?
My PHP script is not running. Can you take a look for me?
Below are some websites which have example PHP scripts, so you can download and install these scripts on your account:
Do your Unix Servers support wget or Lynx?
How come every file I upload to FTP is 0 byte on the server?
To fix the problem, either configure your personal firewall to allow your own FTP connection, or disable your firewall while you have FTP connection.
How to create extra FTP account? (For Unix Platform user)
User must acquire the Extra FTP service or has Unix Professional Plan or above.
1. Login to WCP
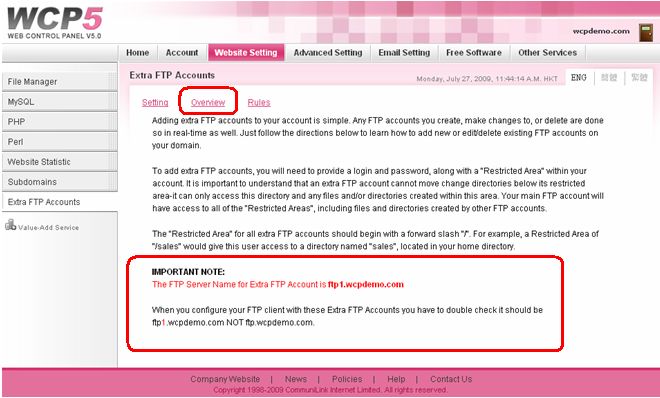
3. Click on Overview and Rules on the left-top corner and read them carefully before set up the account.
4. Click Setting on the left-top corner
5. Insert the Login name for your extra ftp accounts, such as ftpdemo.
Then, insert the password for this user.
Also set the restricted area for this account, such as
/public_html/ftpdemofolder or /ftpdemofolder .
ex: ftp1.wcpdemo.com 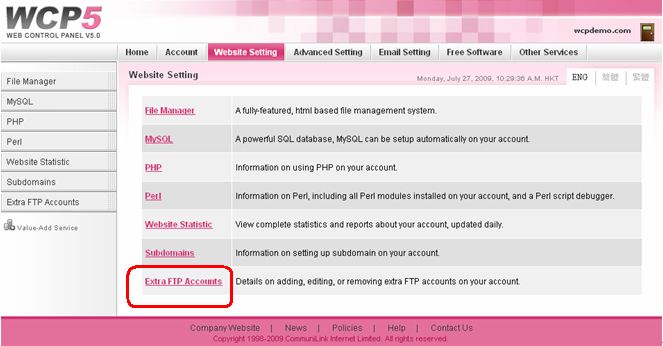
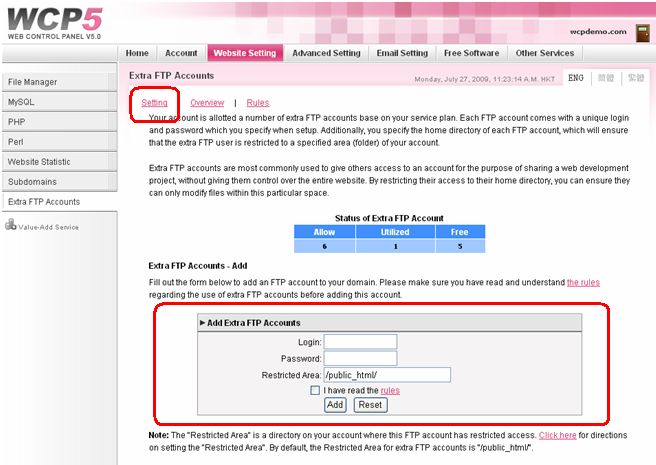
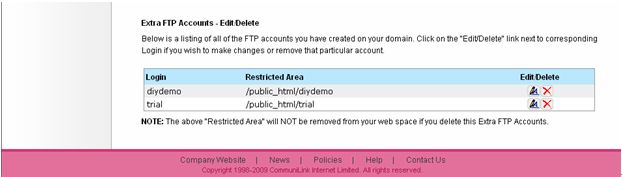
7. The FTP server Name for extra ftp account is shown at the bottom of Overview, such as ftp1.yourdomain.com, NOT ftp.yourdomain.com
How do I change my FTP password? (For Unix Platform)
For Unix Platform user, follow the step to change your FTP password
-
Login to WCP (Get your WCP password)
Note: You may use letters, numbers, and other special characters on your keyboard.
The new password must be six (6) to eight (8) characters long.
The new password must contain at least three (3) letters (a-z) and two (2) digits (0-9).
Note: If you forget your current FTP password, you have to send email to [email protected]to reset for you before you change in WCP.
Effect: Telnet and FTP !!
The password is letter-case sensitive, meaning an ’A’ is not the same as an ’a’.
How can I get my FTP password?
What FTP tool do you suggest?
My FTP suddenly times out, disconnects or not giving me any access.
-
If you are using Dreamweaver, Dreamweaver gives the error message "Waiting for Server" followed by "An FTP error occurred - cannot get remote folder info" and then a disconnect notice. Other FTP clients and programs that you try to connect with just timeout and disconnect.
-
You think it should be Communilink problem because you have not modified your own settings since the last time you used FTP successfully.
-
You seem to be being blocked from using FTP.
-
Suddenly you only have access to certain directories in ftp, but not others deeper down the directory trees.
-
Turning Passive Mode on or off makes no difference.
-
From a shell prompt, you can "cd" and navigate through all your directories.
-
Check your personal firewall/security settings (programs like Norton Anti-Virus or Zone Alarm, ) to make sure that they are configured to allow your FTP access.
-
Try turning these programs completely off and retry FTP.Try using FTP from a different computer at your same location.
-
Try using FTP from a different computer at a different location outside your building that gets internet access from a different provider or that is on a different network.
-
Check the connection from your PC to Communilink server.
What is FTP?
computers or servers on a network.
You can use FTP tools or IE to upload your website or file into Communilink
FTP server.
What should I know when using FrontPage to manage my web site?
If you’re planning on using Microsoft FrontPage to manage your web site, there are a couple of issues
things you may want to keep in mind: There are two worlds. The General Unix hosting world, and the Microsoft world. While this is not necessarily a bad thing, Microsoft had indeed decided to play by its own rules. As a result, FrontPage does not always conform to the rules of Unix, so you should be extremely careful when accessing a FrontPage web via FTP. It’s easy to damage the FrontPage web, as well as it’s associated server extensions, and if it happens, you may loose the ability to administrate it from your FrontPage Explorer.
Do not alter, or delete files that are part of a FrontPage web
Do delete, move, or alter directories ending in _vtf. These are the FrontPage extensions
What does everything in a WebStatistic report mean?
Unique Visitor:
A unique visitor is a host that has made at least 1 hit on 1 page of your web site during the current period shown by the report. If this host make several visits during this period, it is counted only once.
The period shown by AWStats reports is by default the current month.
However if you use AWStats as a CGI you can click on the "year" link to have a report for all the year. In a such report, period is full year, so Unique Visitors are number of hosts that have made at least 1 hit on 1 page of your web site during those year.
Visits:
Number of visits made by all visitors.
Think "session" here, say a unique IP accesses a page, and then requests three others without an hour between any of the requests, all of the "pages" are included in the visit, therefore you should expect multiple pages per visit and multiple visits per unique visitor (assuming that some of the unique IPs are logged with more than an hour between requests)
Pages:
The number of "pages" logged. Only files that don’t match an entry in the NotPageList config parameter (and match an entry of OnlyFiles config parameter if used) are counted as "Pages". Usually pages are reserved for HTML files or CGI files, not images nor other files requested as a result of loading a "Page" (like js,css... files).
Any files requested from the server (including files that are "Pages") except those that match the SkipFiles config parameter.
Total number of bytes for pages, images and files downloaded by web browsing.
Note 1: Of course, this number includes only traffic for web only (or mail only, or ftp only depending on value of LogType).
Note 2: This number does not include technical header data size used inside the HTTP or HTTPS protocol or by protocols at a lower level (TCP, IP...).
Because of two previous notes, this number is often lower than bandwith reported by your provider (your provider counts in most cases bandwitdh at a lower level and includes all IP and UDP traffic).
Entry Page:
First page viewed by a visitor during its visit.
Note: When a visit started at end of month to end at beginning of next month, you might have an Entry page for the month report and no Exit pages.
That’s why Entry pages can be different than Exit pages.
Last page viewed by a visitor during its visit.
Note: When a visit started at end of month to end at beginning of next month, you might have an Entry page for the month report and no Exit pages.
That’s why Entry pages can be different than Exit pages.
Session Duration:
The time a visitor spent on your site for each visit.
Some Visits durations are ’unknown’ because they can’t always be calculated. This is the major reason for this:
- Visit was not finished when ’update’ occured.
- Visit started the last hour (after 23:00) of the last day of a month (A technical reason prevents AWStats from calculating duration of such sessions).
A browser that is used primarily for copying locally an entire site. These include for example "teleport", "webcapture", "webcopier"...
This number represent the number of hits or ratio of hits when a visit to your site comes from a direct access. This means the first page of your web site was called:
- By typing your URL on the web browser address bar
- By clicking on your URL stored by a visitor inside its favorites
- By clicking on your URL found everywhere but not another internet web pages (a link in a document,an application, etc...)
- Clicking an URL of your site inside a mail is often counted here.
Add To Favourites:
This value, available in the "miscellanous chart", reports an estimated indicator that can be used to have an idea of the number of times a visitor has added your web site into its favourite bookmarks.
The technical rules for that is the following formula:
Number of Add to Favourites = round((x+y) / r)
where
x = Number of hits made by IE browsers for "/anydir/favicon.ico", with a referer field not defined, and with no 404 error code
y = Number of hits made by IE browsers for "/favicon.ico", with a referer field not defined, with or without 404 error code
r = Ratio of hits made by IE browsers compared to hits made by all browsers (r <= 1)
AWStats differentiate also hits with error and not to avoid counting multiple hits made recursively in upper path when favicon.ico file is not found in deeper directory of path.
Note that this number is just an indicator that is in most case higher than true value. The reason is that even IE browser sometimes make hit on favicon without an "Add to favourites" action by a user.
HTTP status codes are returned by web servers to indicate the status of a request. Codes 200 and 304 are used to tell the browser the page can be viewed. All other codes generates hits and traffic ’not seen’ by the visitor. For example a return code 301 or 302 will tell the browser to ask another page. The browser will do another hit and should finaly receive the page with a return code 200 and 304. All codes that are ’unseen’ traffic are isolated by AWStats in the HTTP Status report chart, enabled by the directives ShowHTTPErrorsStats. in config file. You can also change value for ’not error’ hits (set by default to 200 and 304 with the ValidHTTPcodes directive. The following table outlines all status codes defined for the HTTP/1.1 draft specification outlined in IETF rfc 2068.
They are 3-digit codes where the first digit of this code identifies the class of the status code and the remaining 2 digits correspond to the specific condition within the response class. They are classified in 5 categories:
What is the meaning of "Number of Visits" in my web statistic?
Think "session" here, say a unique IP accesses a page, and then requests three others without an hour between any of the requests, all of the "pages" are included in the visit, therefore you should expect multiple pages per visit and multiple visits per unique visitor (assuming that some of the unique IPs are logged with more than an hour between requests)
What is the meaning of "Unique Visitor" in my webstatistic?
The period shown by AWStats reports is by default the current month.
However if you use AWStats as a CGI you can click on the "year" link to have a report for all the year. In a such report, period is full year, so Unique Visitors are number of hosts that have made at least 1 hit on 1 page of your web site during those year.
http://awstats.sourceforge.net/docs/awstats_glossary.html
Where can I check my web statistic ? (For Unix Platform)


How can I view the webstatistic on my site? (For Window Platform)
What is Product Level ?
Any setting is required before I add new product ?
How to set the method to show the product ?
When using POP3 to download the mail, how to reserve the mail on server?


How to close the Email screening on NOD?


How to set Whitelist in Spam Controller?
For SpamController User:

Can I delete the email account and continuously receive the email of that email address?
You can delete the email account and set to Forward at the same time.



Why my Outlook Express keeps trying to send a message but the Outbox appears to be empty?
Either one Outbox.dbx or Sent Items.dbx file is damaged, so mail cannot automatically move to Sent Items from Outbox.dbx. Please delete it, the problem will be solved. It is because Outbox.dbx and Sent Items.dbx file is one of the system file, so the system will create the new one when this two system files cannot be found. Therefore, it will not affect the system when you delete them.
Before you delete this two files, please understand two main points as below
1. Under Windows XP, dbx file is hidden in Outlook Express.
We suggest you that turn on “Explorer display system file and hidden file” feature, and then you can see all of them. (Tools->Folder Option->View)
When you want to search dbx file, please tick “search system files, hidden files and files” in advanced searching.
Step:
there are two methods. If first one is not work, please use the second method.
Method 1:
Choose File -> Folder -> Compact all Folders
Method 2:
Open Outlook Express. Go to Tools -> Options -> Maintenance, then press “Store Folder”
Copy the path in the box, and then Close Outlook Express.
In the Taskbar, Go to Start -> Run.
Paste the Path to the box (The Path is copied at before), then press OK
You can delete Outbox.dbx and Sent Items.dbx at the same time. Also you can delete either one for testing until sending email becomes a normal.
Open Outlook Express and do the test for sending email to outside in order to know that whether the sent mail can move to Send Items.
How to use htaccess to password protect files and directories?
To utilize htaccess dynamic password protection on a directory:
1. Telnet into your FTP account
telnet ftp.yourdomain.com
2. Create a passwd file. You can create a passwd file with the "htpasswd" utility on the server.
run htpasswd -c [filename] [user] 3. You will then be prompted for a password for the user. Type the password.
To add a new user to an existing password file, run the command:
htpasswd [passwd file] [user] Then you will be prompted for a password for "testpro2".
4. Create a .htaccess file. You can either create this file locally and ftp the file to the server, or you can edit the file directly on the server using the text editor pico: pico .htaccess
A standard .htaccess file contains the following:
AuthUserFile require valid-user
For example, if you want to protect a directory "testprotect" in your public_html directory, place the following .htaccess file in the testprotect directory. Be sure to include the full path including your home directory for the AuthUserFile. This assumes your document directory is located in /home/wcpdemo/testprotect, and your passwd file is named ".htpasswd" and is located in the members directory.
ex: htpasswd -c .htpasswd testpro
ex: htpasswd .htpasswd testpro2
AuthGroupFile
AuthName
AuthType Basic
AuthGroupFile /dev/null
How to Set Up an Account in Outlook Express?

2. Click Add, and click Mail to start the Internet Connection wizard.

3. Enter your name (as you want email recipients to see it), and click Next.

4. Enter your email address (e.g. [email protected]) , and click Next.

5. Enter your email account details.
Select POP3
Enter mail.wcpdemo.com as your Incoming Mail Server (replace wcpdemo.com with your domain name)
Enter smtp.wcpdemo.com OR your ISP’s SMTP as your Outgoing Mail Server (replace wcpdemo.com with your domain name)
And click Next.

6. Enter your email account details.
Enter your FULL email address as your Account Name. (e.g. [email protected])
Enter your Password (This is the email password set in Email Manager)
Tick "Remember password"
And, click Next.

7. Click Finish.

8. Go back to Email Account Properties page, go to Servers tab, and tick "My server requires authentication". Then, click Appy and OK.

Can you assist me in doing my CGI program/website?
CommuniLink provides hosting services – Email and Website services. For programming and website design, please refer to reference books or open sources. If you would like to have further assistance, please do not hesitate to contact our Customer Service Department at 29980808 for special arrangement.
How can I to avoid my files being exposed to the public?
In Unix servers, all folders inside the public_html folder, without an index page, will be exposed to the public.
There are two solutions: 1. Upload a blank index.html file to those folders 2. Add an .htaccess file to those folders
In the .htaccess file, it should read
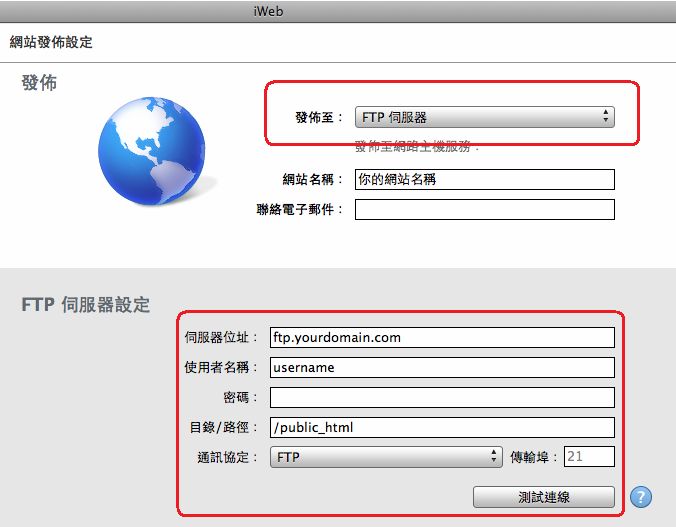
How to use iWeb to upload the website?
2. Please fill in your login information about FTP in FTP server setting
User name: your FTP login ID, e.g. wcpdemo
Password: your FTP login password, e.g. wcpdemo
Directory / Path: /public_html
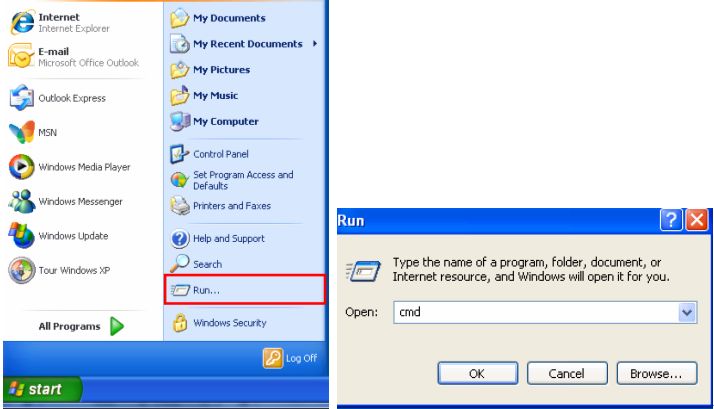
How can I get a command prompt on my own computer?
The following tells you how to get a command prompt on your own computer, not on our servers.
You may need to get a command prompt on your own computer on occasion in order to do ping, nslookup, traces or other tests, or to get to a place where you can issue a telnet command to reach our systems.
The procedure for getting a command prompt on your own computer depends on your own operating system:

How can I change FTP password? (For Window Platform)
For Window Platform, please use FTP client to change your FTP password.
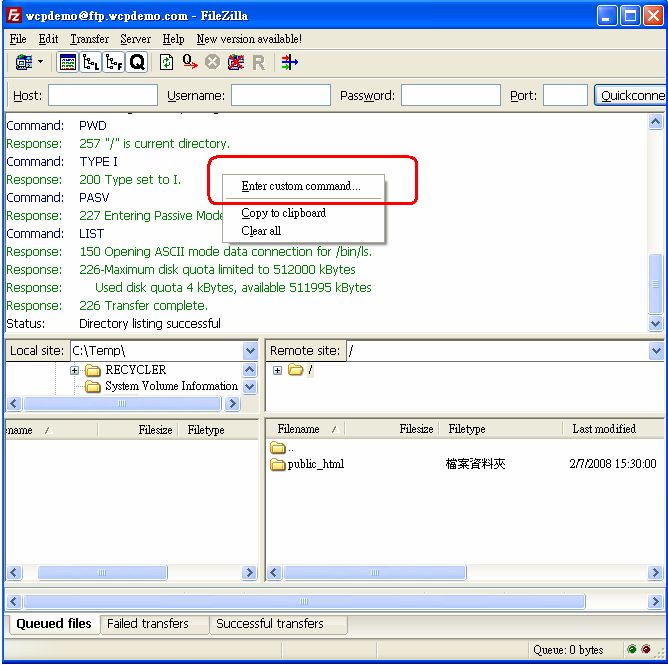
3. Type the command below and press OK
Ex: SITE PSWD "adm123" "newadm"
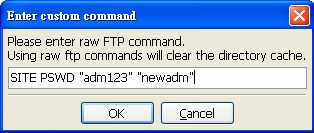
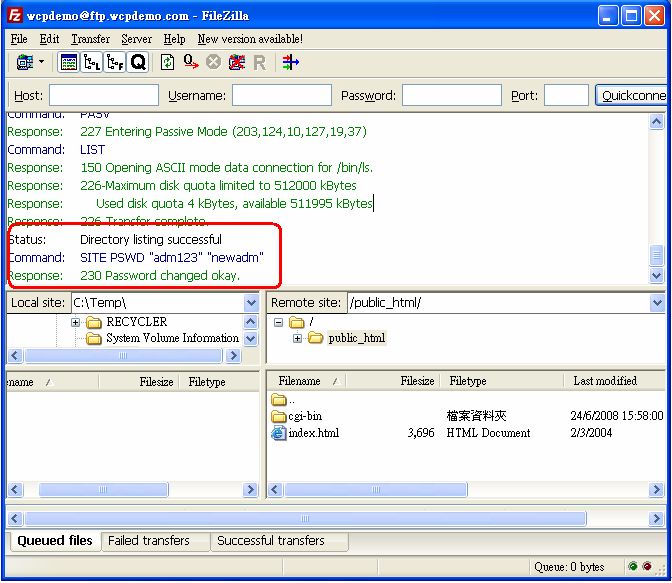
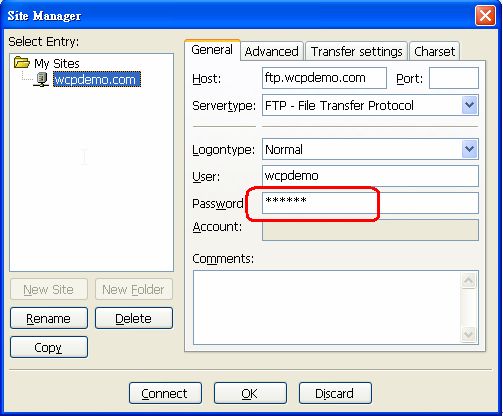
How can I change FTP password? (For Unix Platform)
For Unix Platform user, follow the step to change your FTP password
1. Login to WCP (Get your WCP password)
http://wcp.yourdomain.com
ex: http://wcp.wcpdemo.com
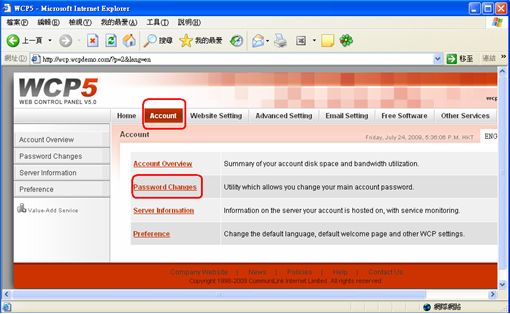
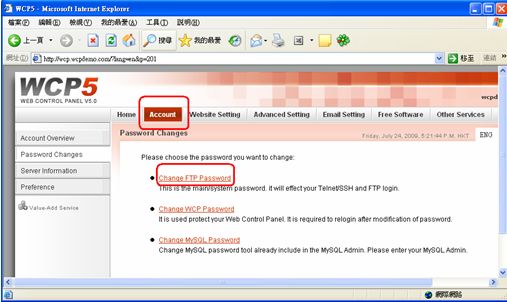
You may use letters, numbers, and other special characters on your keyboard.
The new password must be six (6) to eight (8) characters long.
The new password must contain at least three (3) letters (a-z) and two (2) digits (0-9).

5. Click Change Password
Note:
Effect: Telnet and FTP !!
The password is letter-case sensitive, meaning an ’A’ is not the same as an ’a’.
Why every file I upload to FTP is 0 byte on the server?
1. Every time you upload a file to the server, if it becomes empty or zero byte after it is uploaded, it is most likely because of a personal firewall setting that you have on your computer.
To fix the problem, either configure your personal firewall to allow your own FTP connection, or disable your firewall while you have FTP connection.
2. If only this time you cannot upload, your FTP storage maybe FULL.
To fix the problem, either delete some files in your FTP storage, or contact our Customer Service Department to order extra storage for your FTP.
How to get the login information for WCP?

How to login Web Control Panel (WCP)?
When you got the login information about the WCP, you can fill in the user ID and password in WCP.

How can I check my FTP usage?
Through WCP, you can check your web and email space.
Please follow below steps:
1. Login to WCP
http:/wcp.yourdomain.com
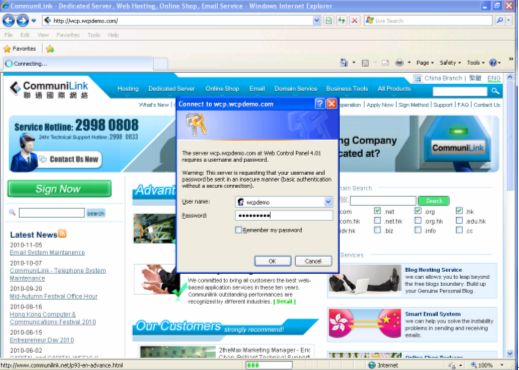
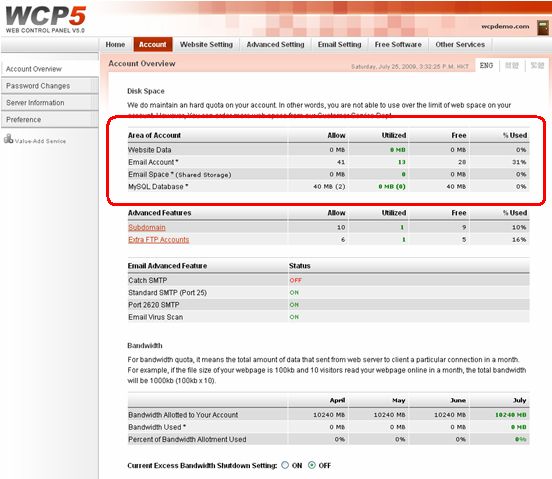
Note: This disk space utilization is updated every 24 hours.
We do maintain a hard quota on your account. In other words, you are not able to use over the limit of your web and email space. However, you can order more space from our Customer Service Department.
What are the functions on File Manager? How to access?
This File Manager is a web-based File Manager that allows a user to completely manage a website without the need of FTP or Shell access. You can perform tasks such as:
- Create new files using a WYSIWYG html editor (like FrontPage or Dreamweaver)!
- Edit existing files
- Change permissions on files
- Upload one or multiple files and handle ascii/binary transfers
- Search for files based on file names, or full text searches
- Multi-file search and replacement
- Archive management - create, view, extract .tar files as well as .tar.gz files
To access to File Manager, follow the steps below:
1. Login to WCP


Why my website still show the old page after update?
1. Make sure that your update website is uploaded into a right directory (public_html)
2. Your computer keep the catch memory.
Avoid the further catch in Netscape:
Clear your browser cache in Netscape:
How to create sub domains?
User must have sub domain service or Unix Professional Plan or above.
1. Login to WCP
Also, insert the subdomain location, such as
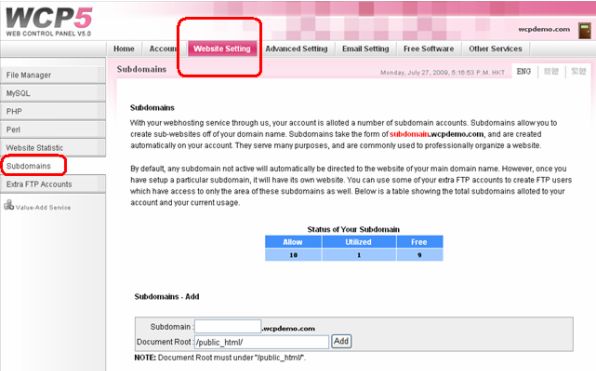
3. Insert the subdomain name, such as subtest .
/public_html/subdomains/subtest .
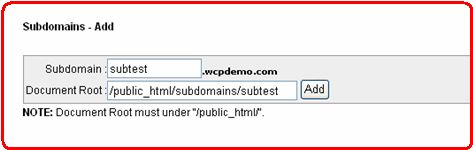
4. A message will appear. You can delete or edit this subdomain by clicking on Delete or Edit button on the right.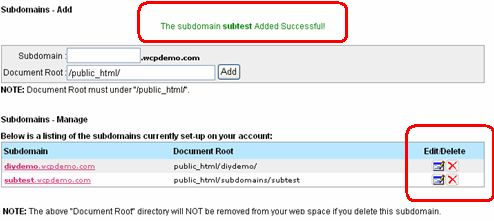
How can I set the temporary index page (under construction page) on my website?
After the account has been set up, a directory (public_html) for your site is created on the server. This directory contains a temporary index page which is set by Communilink. You can replace it by your own temporary index page.
You need to remove or overwrite this page with your own index file in order for your website to show up. It is best to delete the default index.html file from your web folder then upload your website.
Where can I put my web pages and files?
To show your website available at http://www.yourdomain.com, your website data should be uploaded to public_html folder after login to your FTP.
For your secure file, you can upload folder and file into your FTP, but not into your public_html folder.
Can I access my domain name with or without www?
Yes, you can access the domain name with or without the WWW in front. For example, you could access domain name "yourdomain.com" and "www.yourdomain.com" to have same result.
How can I test my website before DNS update to Communilink?
Two methods:
Note: Preview Link is not available for Onlineshop / EasyEshop client.
2. Change your Network Card DNS to Communilink instead of your ISP assigned one.
· Click Start
· Click Control Panel
· Double-click Network
· Double-click Local Area Connection
· In General window, click Properties button
· Select Internet Protocol (TCP/IP) (Windows XP) or Internet Protocol Version 4 (TCP/IPv4) (Windows
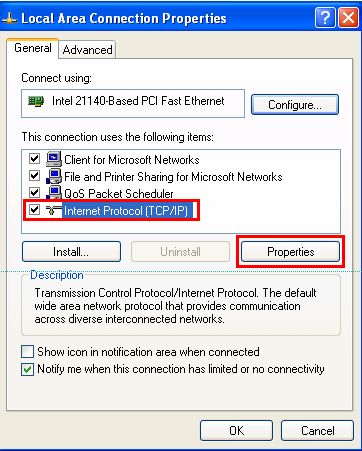
· Jot down your current DNS setting for later recovery
· Enable the last Option: Apply Below DNS server setting
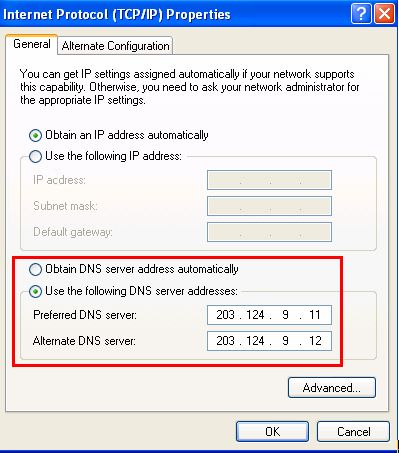
· Click OK button for both TCP/IP window and Local Area Connection window
· Restart your computer and try to access your website by www.yourdomain.com, it will show what you upload in your communilink FTP
· Then you may also access the WCP by http://wcp.yourdomain.com
How do I check my network connection? (ping and tracert)
ping www.yourdomain.com (example: ping www.wcpdemo.com)
and then type:
tracert www.yourdomain.com (example: tracert www.wcpdemo.com)
3. If it’s your email connection problem, then type
ping mail.yourdomain.com (example: tracert mail.wcpdemo.com)
tracert mail.yourdomain.com (example: tracert mail.wcpdemo.com)
ping ftp.yourdomain.com (example: tracert ftp.wcpdemo.com)
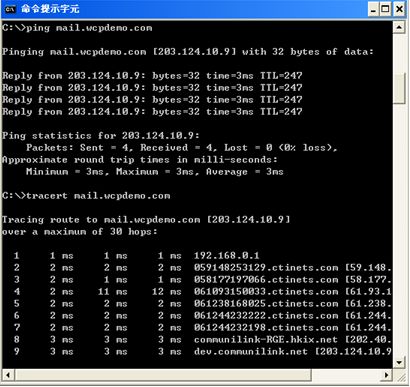
Each line of output represents 1 "hop" on your trip across the Internet to our network and includes the time, in milliseconds, that it took to traverse that hop. If you see times over 350ms, or over 1 second, or asterisks (*), then that is the point on the Internet where you are being slowed down. Please contact your ISP.
How can I manage my database if I am using Windows platform?
Windows platform does not have panel which can connect to database. External MSSQl software is required, such as SQL Server Management Studio Express.
You may download SQLServer2005_SSMSEE.msi at http://www.microsoft.com/downloads/details.aspx?displaylang=zh-tw&FamilyID=c243a5ae-4bd1-4e3d-94b8-5a0f62bf7796

How to login webmail?


Error Code: 0x800ccc13
There are number of possibilities that will have this error. For mainly possibilities, ithe outlook is damaged or loss of data
If your mail is held in Outbox and the email cannot be send, you should clear your Outbox and temporarily suspend “email screening” on the anti-virus software. After that, please reboot your computer and try it again.
If the problem is not caused by Outbox congestion, please refer to Microsoft Official Website,
http://support.microsoft.com/search/default.aspx?query=0x800ccc13&catalog=LCID%3D1033&mode=r
Error Code: 0x80040600
Error Code: 0x800ccc19
Your anti-virus software and Outlook have conflict or your Outlook is damage
Resolution
Why the email attachment become winmail.dat ?
Since the problem of outlook settting is from sender and the email format in Outlook is RTF format, the attachment become Winmail.dat
There are some references that related to prevent the attachment become Winmail.dat after sending out.
http://email.about.com/od/outlooktips/ss/wt121705.htm
http://support.microsoft.com/kb/278061/zh-tw
Why cannot see the attachment in mail ?
If the email has attachment, user cannot see the attachment in mail. That may have compatibility issues or the attachment is blocked by anti-virus software. Please zip the file and try it again.
How to search Mail Header ?
How to set up email account with an Apple Macintosh using Mac OS X 10.x?
Here below example for 10.4
Example for 10.3 and 10.5
Before starting, to avoid errors while setting up Mail, make sure that you are connected to the Internet. If you cannot be connected to the Internet, you may still set up Mail, but additional steps will be required.
1) In the Dock, click on the Mail icon.
2) If this is the first time you’ve opened the Mail application, you will immediately be brought to the New Account setup assistant.
Click the Continue button at the bottom right and skip to step 6 below.
3) If you’ve opened Mail before, wait for Mail to open then click on the Mail menu at the top left of your screen and select Preferences.
4) Click on the Accounts icon at the top of the window.
5) Click on the plus sign ( + ) at the bottom left of the window, circled in the example below.
6) In the General Information area, set the Account Type to "POP."
a) Enter "Main Account" (or a description of your choosing) for the Account Description.
b) Enter your name in the Full Name field.
c) Enter your e-mail address in the Email Address field.
The window should now look like the example below.
d) Click the Continue button.
7) In the Incoming Mail Server area
a) Enter "mail.yourdomain.com", substituting"yourdomain.com" with your actual domain name into the Incoming Mail Server field. ( ex: mail.wcpdemo.com)
b) Enter your username into the User Name field
c) Enter your password in the Password field.
The window should look like the example below.
d) Click the Continue button.
Click the Continue button and go on to step 8.
8) In the Outgoing Mail Server area, enter "smtp.yourdomain.com" in the Outgoing Mail Server field. (ex: smtp.wcpdemo.com)
Or enter your ISP’s SMTP.
The window should look like the example below.
Note: Certain Internet Service Providers (ISPs) require that you use THEIR SMTP servers for Out going mail.
Check with your specific ISP for exact Outgoing server settings
Click the Continue button.
9) The Account Summary area should look like the example below.
Click the Done button.
11) If this is the first time you’ve opened Mail, you will see the "Welcome" dialog box below. You will not see this "Welcome" dialog if you’ve opened Mail before.
Click the No button.
If the "Accounts" preferences window is still open, click the red close bubble button at the top left of the window to close it.
12) Mail is now configured to send and receive e-mail.
How to activate the Global SMTP port Outlook Express?


How to set up email account on iPhone?


3. Then press “Add Mail Account”
4. In New Account, please fill in the information about the email account
Name: your name
Address: your email address
Password: your email account password
Description: description about this email account

5. In Add Account, please choose IMAP and fill in the information about your email.
Incoming Mail Server
Host Name: mail.yourdomain.com
User Name: your email address, like [email protected]
Password: your email’s password
Outgoing Mail Server
Host Name: smtp.yourdomain.com (If your service does not have SMTP or your telecom service provider has blocked the SMTP of other companies, please fill in the SMTP of your telecom service provider) User Name:
Password:
Then, please press “Save”.
6. If it shows the error as below when you are waiting for “verifying IMAP account information”, please press continuous. (waiting time depends on the connection speed. If waiting time is too long, you can reload the setting again.)

What is Webmail?

What is an Extra FTP Account?
All our UNIX Professional Plan or above include Extra FTP Accounts.
*Only UNIX platform users are allowed to change the login name and location of the extra FTP account.
What is a Web Statistic?
All UNIX hosting users may check the web statistic through the Web Control Panel.

What is a Subdomain?
In general, a domain name has the following format : xxx.com, xxx.org, xxx.net, etc.
But the format of a subdomain is 111.xxx.com, 111.xxx.org, 111.xxx.net, etc.
Examples: demo.wcpdemo.com
demo.wcpdemo.com is a sud domain of wcpdemo.com
Subdomains help to organize information within a website. So a company website may use subdomains to classify the different aspects of its contents such as promotions.xyz.com , news.xyz.com and forum.xyz.com.
UNIX professionals who participate are entitled to register or more sub domain functionality, through the Web site management platform (WCP) can be easily added.
What is a Mailing List?
Note:
Bulk emails cause heavy traffic loads; to sustain our service quality, it is not recommanded to set more than 50 email addresses on each Group List.
Should you need Email Marketing service, please do not hesitate to contact our CS Officer at 2998-0808 for details.
How to set other port of the SMTP in iPhone?

What is Server Bandwidth?
What is a RAID System?
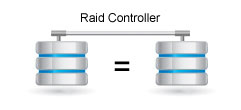
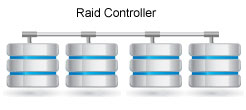
What is Dedicated Local Bandwidth?
What is Dedicated International Bandwidth?
How do I get my Authorization Code from the Registrar?
Please do get the Authorization Code and don’t forget to unlock the domain before initiating a domain transfer request.
Some domain registrars provide a self-management tool for their users. For instance, users can request the Authorization Code and update WHOIS contact information in the management panel. If your domain was registrered through a reseller, please directly contact your reseller.
Below are some brief guildelines about how to unlock a domain and how to retrieve the Authorization Code in different domain registrars:
Note: Make sure the WHOIS Administrative email address is valid.
A) GoDaddy
1.Go to GoDaddy website.
2.Log in.

3.In My Account, click on My Products.

4.Select the domain name.

5.In the Domain Information section, at the Locked row, click Manage to unlock your domain.
6.On the same page, at the Authorization Code row, click Send by Email, and then click OK twice.

B) Network Solutions
1.Go to Network Solutions website.
2.Click on Manage Account.

3.Log in to your account.

4.Under My Products and Services tab, next to My Domain Names, select the domain name.

5.In Details section, at the Domain Protect row, click Turn Off or Request Authorization Code.

How do I transfer a .com/.net domain to CommuniLink?
What is Online Shop Framework?
|
(1) Logo Header (Banner)
|
||
|
(2) Top Menu Bar
|
||
|
(3)
Left Menu
|
(4)
Webpage Content
|
(5)
Right Menu
|
|
(6) Footer
|
||

Note: The position of Menu Bar may vary according to different Online Shop templates.
Where is Logo Header (Banner)? How to set it?

Management Location: Template Management > Layout Setting
What is Top Menu Bar? How to set it?

The position of Menu Bar will be displayed according to the selected Online Shop layout.

Management Location : Template Management > Top Menu Bar Set
-You can choose to active specific pages and buttons via this management interface.
-Besides, you can also set the default homepage and language.

What is Left Menu and Right Menu?

Management Location: Template Management > Layout Post Set
-You can manage the left and right menu by choosing the displayed items and their positions via this page.

Where is Webpage Content?

How to use Webpage Content?
The easy-to-use Content Management System allows you to set the webpage content and upload pictures on self-service.
Webpage Content Management System is mainly divided into 2 parts:Content Management System and Other Management System.
(1) Content Management System
Management Location: Content Management
(2) Other Management System
‧ What’s News : Company management > News Listing
‧ Products : Product Management
‧ Account Info : Member Management
‧ Shopping Cart - default “Payment Method” content. Once customers order, it will display the order form.
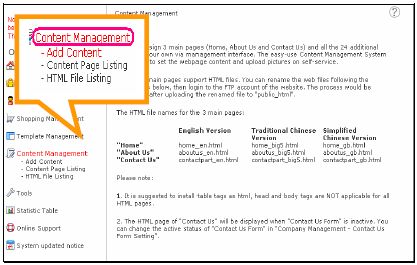
What are the 3 main HTML pages and the 24 additional pages?
Please note: The HTML page of “Contact Us” will be displayed only when “Contact Us Form” is inactive. You can change the active status of “Contact Us Form” in “Company Management - Enquiry Form Setting”.
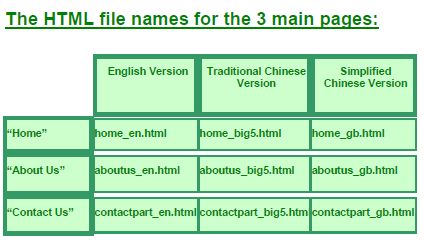
There are 24 additional pages available:
 to enter specified webpage for editing or adding webpage content.
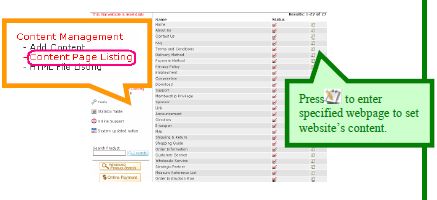
Upload Photo and Fill in Content
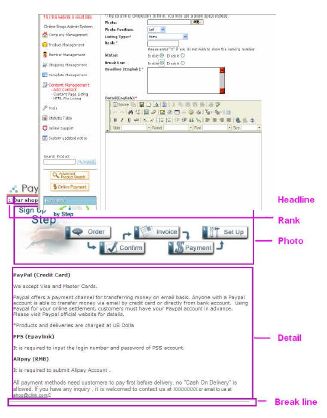
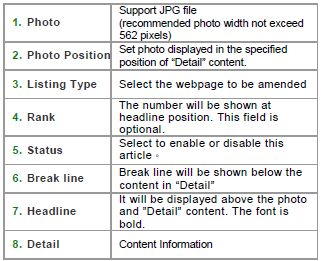
What is Content?
You can use "Content" to upload photos, write message and customize your content. The following is a brief introduction for each item:
Where is Footer? How to set it?

Management Location: Template Management - Footer Setting

What is Product Photo Size?
(Future size adjustment will not alter the images that have been already uploaded)
Adjustable image sizes are as follows:
Thumbnail Photo Size
a) Product image in “Product Listing”
b) Product image in side menu location
c) Image in“What’s News”details
d) Product image in “Product Details”

How to set the Product Photo Size?

What is watermark?
(If you want to change the watermark in future, it won’t change the previous uploaded photos.)

Note: Watermark photo is a value-added function.
How to set the watermark?
Management Location: Product Management - Products Sys Setting
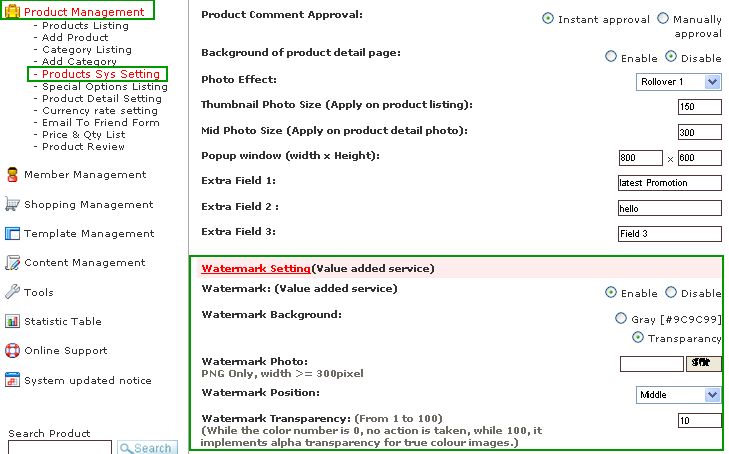

(2) Choose watermark background
The best watermark effect shall be the PNG watermark image with grey or transparent background. Select the watermark background colour:
Select "Grey" for grey watermark background;
Select "Transparent" for transparent watermark background;
If the watermark background is neither grey nor transparent, select either one as this setting will not affect the watermark effect. It is recommended to create the PNG watermark through Photoshop. For other photo editor software, it is suggested to save the PNG image as 32 bits format if there is such option.

(3) Upload watermark photo and choose its position
Only PNG format is supported.

(4) Set watermark transparency

If you have used photo editing software ( e.g. Photoshop) to create your transparent watermark, you can choose “0” for the transparency.
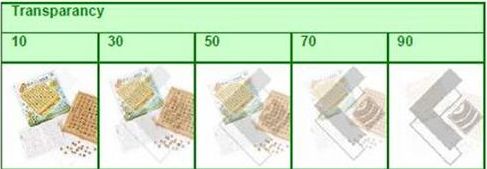
What is System Currency and Decimal Point Format?
Decimal Point Format is the decimal for the product price.

How to set the system currency and decimal point format?
System Currency
Simply select or input the currency unit (e.g. HKD, USD).
Options - “No decimal place”, “one decimal place” and “two decimal places”. (calculate by using round off method)

What is Product Category and Product Level?
What is product category level?
You should choose products belonging to which category when you are adding product. You can classify all products into different categories and then each category can also be classified into 2nd or 3rd level (depends on the number of the levels you confirmed).
(Example: If you confirm 3 levels category, you have to add the category to the 3rd level before adding any product.)

How to set the Product Category?
You may upload photo, select the display order and status for all categories.
Photo: Photo file supports JPG format. This field is optional. Photos will be displayed only if you select "Products-Default Style" as "Category Listing".
Headline: Input category name
Rank: Arrange category ranking (the smaller number the higher position)
Status: It can be set Enable/Disable/Members Only (“Members Only”-only members can view product details.)
Description: Input content to describe category. Introduction will be displayed at the top of the category’s product list.

How to manage the Product Category?
Choose the appropriate category in “Category Listing”, press the button on the right side “
Edit” or “ Delete”.
or
If you want to edit the category information, you can press “e Edit” or “d Delete” in the side of article headline from the Management interface.
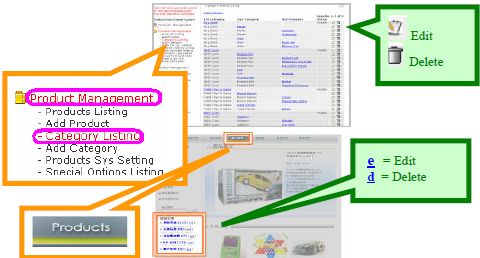
What is Products’ Special Options?

How to set the Special Options?
Step 1 : Set the name of “Special Options” type
Management Location: Product Management -Special Options Listing
There are 3 types of “special option” for us to set the name. Administrator can set special option enable status according to individual requirement. Enable status information are as follows:
Optional: Online shop customers can choose not using special options when they order products.
Apply in individual product: Administrator can set whether it is a must or not to select this item for ordering a product when they add or edit according to the individual product. After starting this function, a “Compulsory” field will appear in adding or editing product interface.
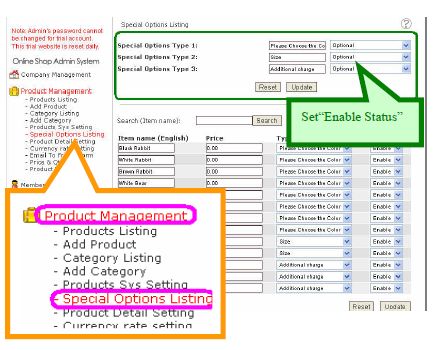
Management Location: Product Management - Special Options Listing
-Press the top right corner “Add”.
-Fill in Item name, Price and Type. Then press
 .
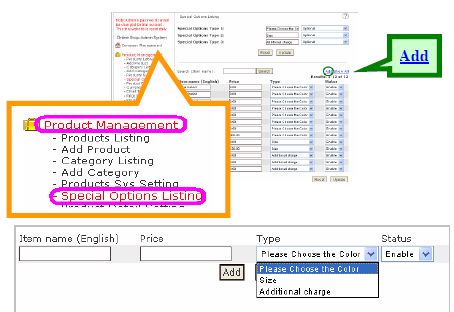
Step 3 : Choose “Special Options”
Management Location:Product Management – Add Product
When you add product, please tick the appropriate options.
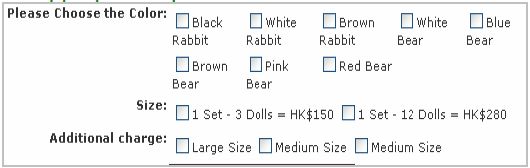
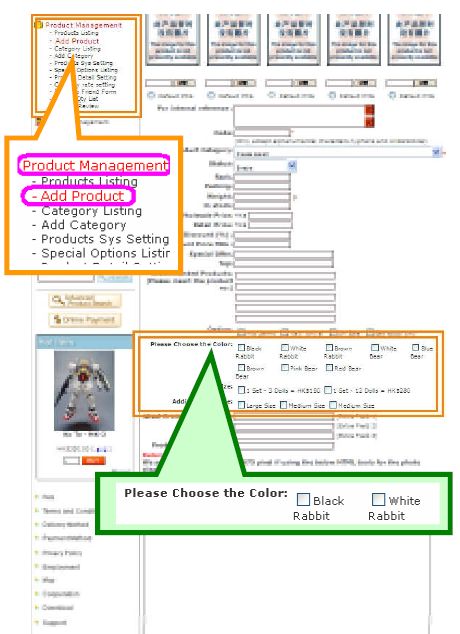
How to set the Product Listing Format?
Only need to choose appropriate format, then press "Submit".

Number of columns
(Only apply for Mosaic)

Number of rows
The number of products in each product list. If the product listing format is mosaic, it will be the number of rows in the list.


What is Product Listing Style?
(1) Promotion List: Choose specified product for promotion and display selected items in "New Arrival", "On Sale" or "Hot Items". (Not applicable for text list of product listing format)
(2) Default Product List: Display specified category of product list.
(3) Category List: Display Category Listing to let visitors choose appropriate category first before viewing products.

How to select the Product Listing Style?
Listing Style in Product Page: Simply select your favourite style, and then press "Submit".

What is Promotion Product Listing?
-the 1st part is for specified promotion product;
-the 2nd and 3rd parts are to display selected items (e.g. "New Arrival", "On Sale" or "Hot Items".


How to set the Promotion Product Listing?
Choose the product code of promotion product.

Choose to display "New Arrival", "On Sale" or "Hot Items".


How to set the Default Product List?
Product Listing interface - Default style
Choose appropriate category, then press "Submit".

How to set the Category Listing?

Management Location: Product Management – Product Sys Setting

You can also upload a photo for your category:
Management Location: Product Management – Add Category

What is Membership Approval System?
CLink Online Shop provides 3 approval methods for member systems below to meet the needs of different stores:
(1) Instant Approval: visitors can automatically become member simply by completion the online membership form.
(2) Email Confirmation: visitors will receive an email confirmation after submitted the online membership form. They only have to click the link in the email to activate the account.
Management Location: Member Management – Member Sys Setting
Select the appropriate approval system

How to enable/disable the Membership Form?

If "Join Us" button is disable, visitors will not be able to fill out the member application form.
Management Location: Template Management – Top Menu Bar Set

How to check Member Information?
Management Location: Member Management – Member Listing
Member List
Member list in "Member Listing" displays the information of all members and customers who ordered in the shop.
You can search by member’s login name

Sorting
Administrator can sort members information by clicking the specific field for sorting according to "ascending order" or "descending order".

How to manage Member Account Information?
Add New Member
Click Add New Member simply from "Member Listing" in "Member Management" or directly from "Add New Member" in "Member Management".
The four buttons on the right of member list represent four functions below:


What are the Permissions for Members?
1) Product for members only
2) Product category for members only
3) Only members can buy
4) “Member Zone” webpage
5) Newsletter
6) Member discount【value-added function】
7) View order history
8) Download latest invoice(PDF format)
9) “Product Review”【value-added function】for members only
How to set "Products For Members Only"?
When you add new products, choose “Members Only” next to the "Status" box, then visitors need to log in as a member in order to view the product details.

How to set "Product Category For Members Only"?
Management Location: Product Management – Add Category

How to set "Only Members Can Buy"?

How to set "Member Zone"?
This is a HTML page for members only. Website buttons will be displayed at the side menu (you can enable it by selecting “Membership Privilege” in “Layout Post Set”). You can name the website file first and then upload it via the following the methods:
Or
2) Management Location: Content Management – HTML File Listing
Upload your website file (HTML format) to the correct field.

How to set "Newsletter"?
With the Newsletter function, administrator can release some latest information to his members and/or subscribers; hence, it helps to build and maintain long-term customer relationships.
To send newsletter
Management Location: Member Management- Newsletter
To
Input the email address of individual customers or input [email protected] for sending email to the members who have agreed to receive newsletter.

Select to send the newsletter in Text or HTML format

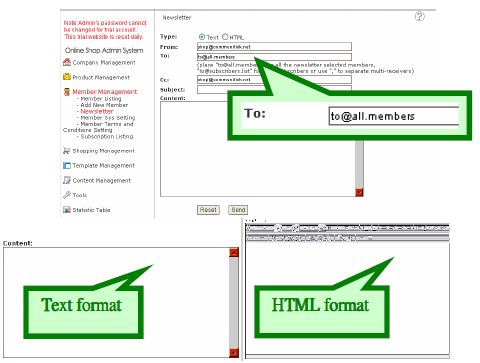
Note: CommuniLink is a licensed company issued by the Office of the Telecommunications Authority (OFTA). Email Abuse activity is strictly prohibited. For details, please refer to http://www.communilink.net/p37-en-email_abuse.html. SPAM is not only harmful because of its negative impact on consumer attitudes toward CommuniLink, but also because it can overload CommuniLink network and resources. To ensure the high server performance, it is advised to send newsletter to members during non-peak hours (8pm to 8am), and the amount shall not exceed 500/day.
How to set "Member Discount"? [value-added function]
Management Location: Member Management – Member Listing
Step 1: Choose Member
Search the specified member in Member Listing’s list, then press
.Step 2: Enter Discount
Enter discount at "Member Discount" position.


How to set "Download Latest Invoice (PDF format)"?
Management Location: Shopping Management – Cart Setting
Start "view latest invoice (PDF format)" function
Choose "Yes" to start this function.


Upload PDF file to members
Search specified member in the list of Member Listing, then press
 .
Choose "Yes" to enable this function.

View latest invoice
Members can view the invoice after logged in , click "Account Info", then Press


How to set "Product Review"? (value-added function)
Management Location: Product Management - Products Sys Setting
Choose "Allow members to write comment only"

Or
Set to disclose the instant comment or further approval is required
Choose the way to approve the product comment


What is Membership Form?
19 specified fields
|
Company
|
Email
|
QQ No
|
Address
|
|
Name
|
Website
|
MSN ID
|
Country
|
|
Gender
|
Phone 1
|
ICQ No
|
Newsletter#
|
|
Age
|
Phone 2
|
Yahoo ID
|
Terms and Conditions#
|
|
Birthday
|
Fax
|
Skype ID
|
# ’Newsletter’ is for visitors to choose whether they want to receive the latest news and/or newsletters or not.
# Visitors have to accept the "Terms and Conditions" in order to proceed the registration.
Customize your own fields name

How to set the "Membership Form” ?
Management Location: Member Management – Member Sys Setting
Fields Setting
You can choose the status of your membership form field to "enable", "disable" or "compulsory".
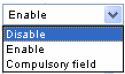
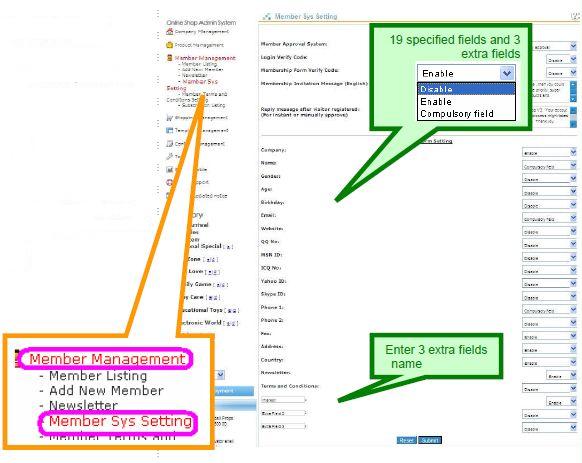
Other Settings
An "invitation message" will display on the screen when visitors click on "Account Info" or the "Join Us" button next to the login area.
Enter “Membership Invitation Message”
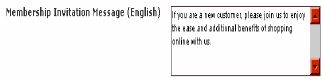
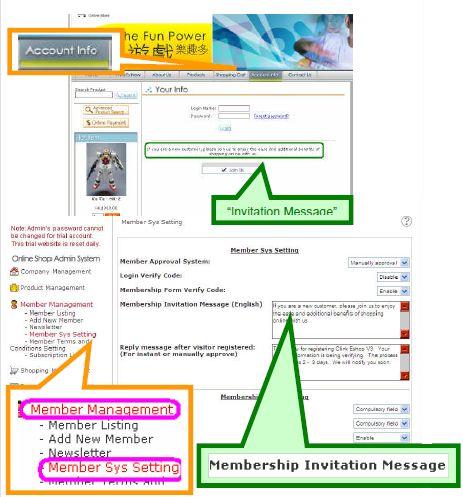
Reply message
After the visitors have completed the form, a reply message appears. Administrator can customize the message (e.g. Date of approval).
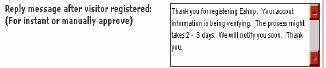
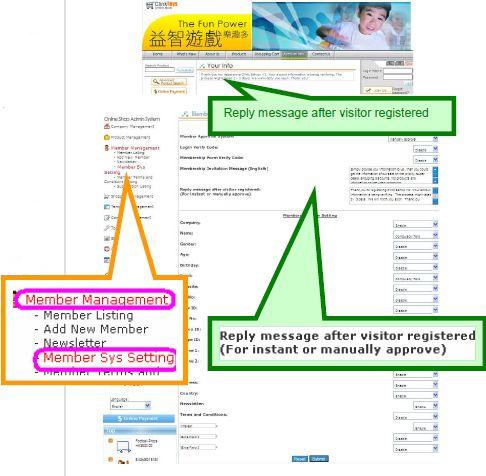
What is "Membership Approval System"?
CLink Online Shop provides 3 approval methods for member systems below to meet the needs of different stores:
(2) Email confirmation: Visitors will receive an email confirmation after submitted the online membership form. A link is enclosed in the email; they need to click on it to activate the account.
(3) Manually approval: Once the online form has been submitted, administrator manually approves the membership.
Management Location: Member Management –Member Sys Setting
Membership Approval System


How to use Account Info?
Management Location: Member Management – Member Listing
Member List
Member list in "Member Listing" displays the information of all members and customers who ordered in the shop.
You can search by member’s login name

Administrator can sort members information by clicking the specific field for sorting according to "ascending order" or "descending order".

Add New Member


How is the General Order Procedure look like?
Step 1: Product Selection

Step 2:Product Order
In "Product Details", select product quantity and color (special option), and then click on "BUY".

Step 3:Order Confirmation
Choose "shipping service" in Shopping Cart, then press "Update". Then input contact and delivery information and finally choose the payment method.

Step 4:Order Acknowledgement

Step 5:Online Payment
If online payment is selected, customer can select the payment gateway enabled at this stage.

Step 6:Online payment–Input credit card information
(i.e. PayPal) Customer can simply provide personal information and credit card information even if they do not have any PayPal account yet.

Step 7:Online payment – Payment Confirmation
Press "Pay" if the payment information is correct.

Step 8:Online payment – Completion
Press "Return To Merchant" to return to the online shop.

Step 9:Online payment – Email Confirmation
PayPal will send the transaction information to both buyers and sellers by email.

What kinds of Shipping Fee do we provide?
(1) Single shipping fee
(2) Delivered location shipping fee
(3) Delivered location shipping fee - Weight and freight【value-added function】
Besides, administrator can choose "free delivery" if orders are over a specific amount of money.
What is Single Shipping Fee?

Management Location: Shopping Management –Cart Setting
Set "Single shipping fee"
Choose "Single shipping fee" in Delivery Fees.

Set the amount of single shipping fee
Enter shipping fee in the item below.


What is Delivered Location Shipping Fee?

Set “Delivered Location Shipping fee”
Management Location: Shopping Management –Cart Setting
Choose "Delivered Location Shipping fee" in Delivery Fees.


Add/Set Shipping Way
Management Location: Shopping Management – Shipping Fee Setting


What is Delivery Location Shipping Fee - Weight and Freight?【value-added function】

Management Location: Shopping Management – Cart Setting
Set “Delivered Location Shipping fee”
Choose "Delivered Location Shipping Fee" in Delivery Fees.


Management Location: Shopping Management –Weight and Freight
Add/Set Shipping Way

Product Weight Setting
There are 20 fields for the weight (the red boxes).
" <=" represents less than or equal to whereas ">" represents greater than.
Shipping Fee Setting
Enter the shipping fee in the respective green box; it is determined based on the weight and the location.

If edited the watermark, will it be shown on my existing product photos?
How to set Free Delivery Setting?
Management Location: Shopping Management – Cart Setting
Start "free delivery amount"
Choose the item with “- free delivery amount’’ in Delivery Fees.

Set "Free Delivery Amount"
Enter free delivery amount.


How to set Terms and Conditions?
Once you have set your terms and conditions, buyers have to read it and confirm it in order to continue to the next step. Thus Terms and Conditions help to reduce conflicts that may arouse between parties.

Management Location: Shopping Management – Terms and Conditions
 .

What is Order Form?

How to set Order Form?
Management Location: Shopping Management–Cart Setting
Set "Order form notice:"
Enter text in this field.

Set "Order Extra Field"
Customize the name of extra fields


How to set Online Payment Gateway?
Management Location: Shopping Management – Gateway Config
 located at the top-right corner, it shows the details about gateway settings.
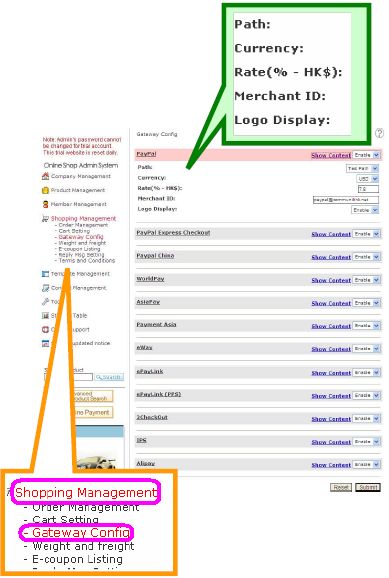
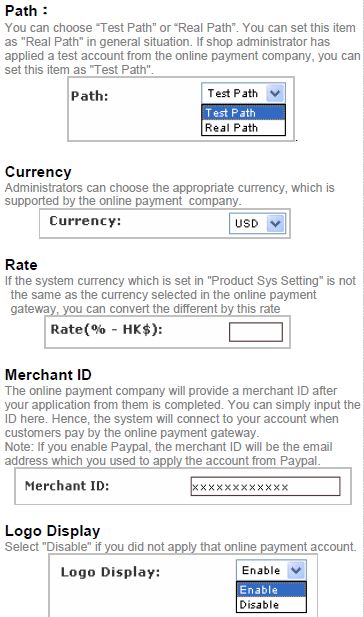
How to set Volume Discount?
Management Location: Shopping Management – Cart Setting
There are 3 discount entries; each entry can set the specified total purchase amount and its discount ratio.


How to set Minimum Charge?
Management Location: Shopping Management – Cart Setting
Enter minimum charge amount.

How to set Order Acknowledgement Email Address?

Edit received order email address
Management Location: Shopping Management – Reply Msg Setting
Enter appropriate email address in the following 2 positions, then press
.

What is Order Management?
View/Edit/Manage Order Information
Management Location:Shopping Management – Order Management
Order List
All orders information will be shown in the order list of "Order Management".
Order Searching
You can choose to enter 4 items’ keywords (order no., login name, order date and delivery date). Besides, you can also choose to view paid orders only.

Order Sorting
You can sort the orders according to the following six items. There are two arrow signs:
 represents from small to large;
 represents from large to small. You can check all order information clearly.

 View Order History
 Edit Order Information
 Delete Order


How to activate the Global SMTP port on iphone?


Can you install the cURL PHP extension in the Unix Server I am using?
How to add Advertisement?
Management Location: Template Management - Layout Post Set
Choose Advertisement 1/Advertisement 2 in the Left/Right Menu and click on "Submit".
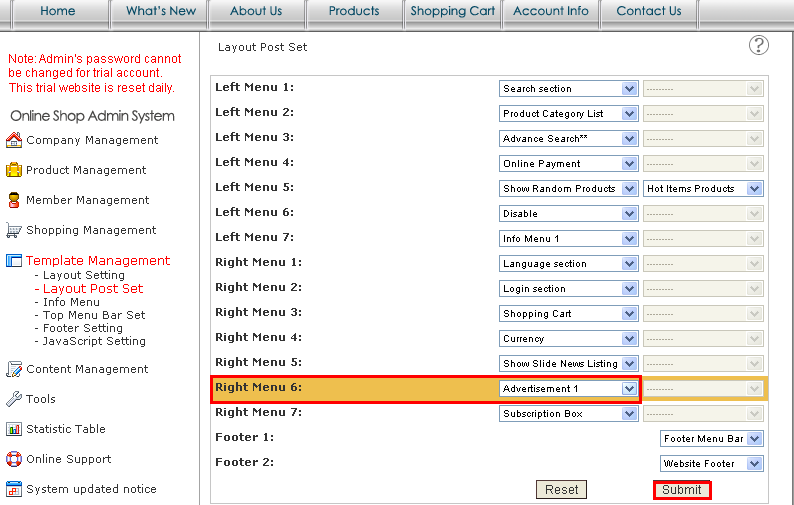
2. Upload the HTML file to the correct place.
Management Location: Content Management - HTML File Listing
Upload the HTML file to Advertisement Position (1)/Advertisement Position (2).
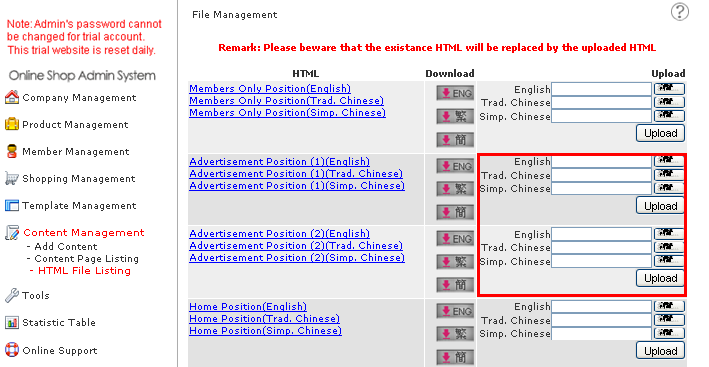
FTP Location : Inside the public_html folder
Rename the HTML file to the designated file name:
Traditional Chinese Version : eshop_adv1_ big5.htm (or eshop_adv2_big5.html)
Simplied Chinese Version : eshop_adv1_gb.html (or eshop_adv2_gb.html)
Result:
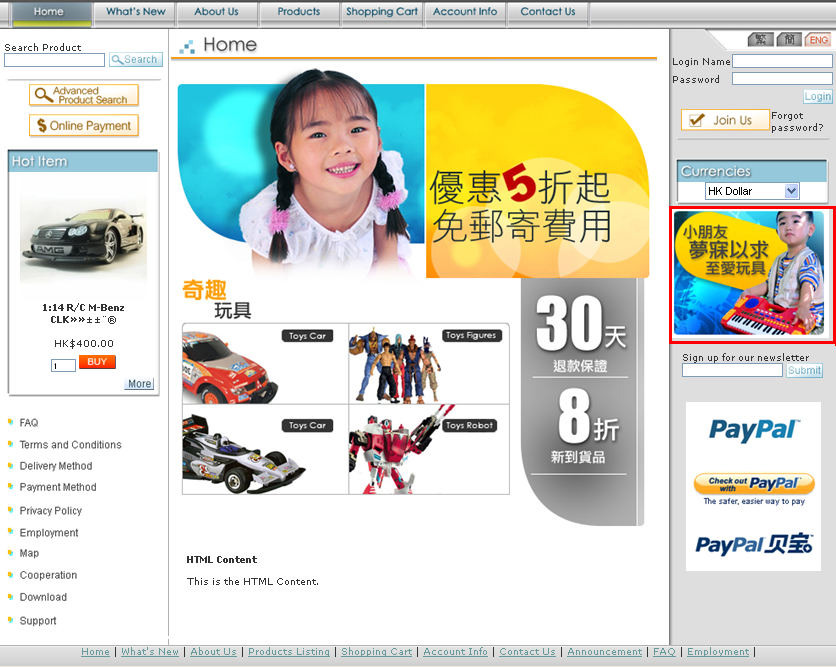
*** Click here to learn how to add an advertisement in the Home Page. (Flagship only)
How to set up PayPal as my payment gateway?
1. Next to Paypal, choose "Enable" and click on "Show Content".
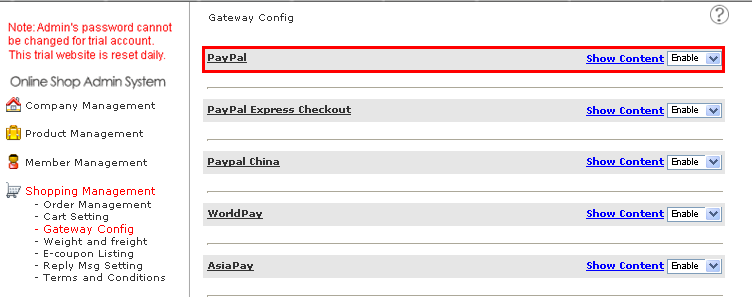
2. Fill out the following information:
i) Path
It should be "Real Path".
*Choose "Test Path" if the online payment gateway company has provided you a testing account.
ii) Currency
Each online payment gateway supports different currencies. Choose the currency that was selected at the online payment gateway company.
iii) Rate
Calculate the rate when the system currency is different from the currency selected in the online payment gateway.
Example 1
System currency is in HKD
Online payment gateway currency is in HKD
Rate in online payment gateway is 1
Example 2
System currency is in HKD
Online payment gateway currency is in USD
Rate in online payment gateway may be 0.128
iv) Merchant ID
The merchant ID is the email address you have entered for your PayPal account.
Display or not the PayPal logo at the bottom -left/-right corner of the website.
For details, please visit:
http://faq-eshopv4.clinksoft.net/menu_eshopv3-1.php?lang=en&p=33
Why is my Data Importer not working?
Management Location: Tools - Data Importer
Please check the following:
-Only CSV file is supported;
-The column A of the CSV file should be 0 for all NEW items;
-Don’t forget to remove the first row of the CSV file ("data field reference") before importing it into the system;
-Some fields are compulsory, please download the Data Field Reference file and read it carefully.
If error occurs, please click on "Click here for Error(s) Detail".

For details, please visit:
http://faq-eshopv4.clinksoft.net/menu_eshopv3-1.php?lang=en&p=69
How to adjust the exchange rate of a currency?
Management Location: Product Management - Currency rate setting
Use the system currency to calculate the ratio of that currency.

2. Online Payment Gateway
Management Location: Shopping Management - Gateway Config
Check which online payment gateway is using that currency, and make the adjustment accordingly.

How to set up an email account in Outlook 2010?

2. Clickon New to start the Add New Account wizard.

3. Select "Manually configure server settings or additional server types", and click Next.

4. Select "Internet E-mail", and click Next.

5. Enter your email account details.
Enter Your Name (as you want email recipients to see it)
Enter your E-mail Address. (e.g. [email protected])
Select POP3 for the Account Type
Enter mail.wcpdemo.com as your Incoming Mail Server (replace wcpdemo.com with your domain name)
Enter smtp.wcpdemo.com OR your ISP’s SMTP as your Outgoing Mail Server (replace wcpdemo.com with your domain name)
Enter your FULL email address as your User Name. (e.g. [email protected])
Enter your Password (This is the email password set in Email Manager)
Tick "Remember password".
Click "More Settings"
***Please contact your ISP for the outgoing mail server setting if you are using theirs SMTP.

6. On Outgoing Server tab, tick "My outgoing server (SMTP) requires authentication" , and then click OK.
***Please contact your ISP for the authentication setting if you are using theirs SMTP.

7. Click Next, wait and click Finish.
How to set up an email account in Outlook 2007?

2. Click New to start the Add New E-Mail Account wizard.

3. Select "Manually configure server settings or additional server types", and click Next.

4. Select "Internet E-mail", and click Next.

5. Enter your email account details.
Enter Your Name (as you want email recipients to see it)
Enter your E-mail Address. (e.g. [email protected])
Select POP3 for the Account Type
Enter mail.wcpdemo.com as your Incoming Mail Server (replace wcpdemo.com with your domain name)
Enter smtp.wcpdemo.com OR your ISP’s SMTP as your Outgoing Mail Server (replace wcpdemo.com with your domain name)
Enter your FULL email address as your User Name. (e.g. [email protected])
Enter your Password (This is the email password set in Email Manager)
Tick "Remember password".
Click "More Settings"
***Please contact your ISP for the outgoing mail server setting if you are using theirs SMTP.

6. On Outgoing Server tab, tick "My outgoing server (SMTP) requires authentication" , and then click OK.
***Please contact your ISP for the authentication setting if you are using theirs SMTP.
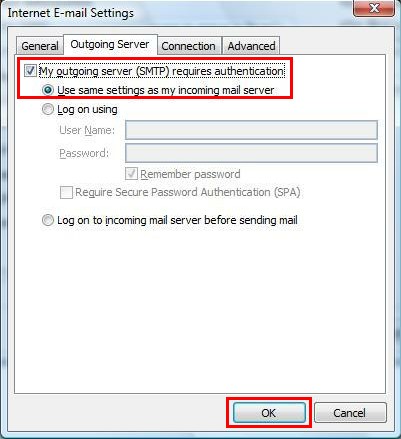
7. Click Next, wait and click Finish.
How to add a Static Advertisement in the Home page of a flagship store?
1. Edit the Home Position
You can edit any of the Home Postions that are displayed on the Home Setting Page or add more Home Positions if needed.
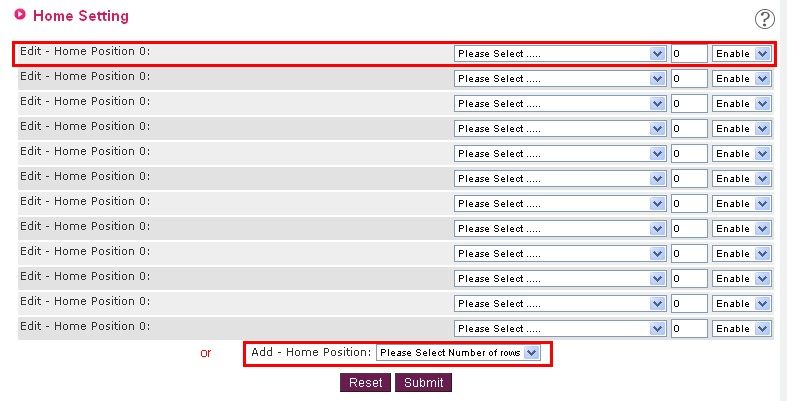
2. Choose the Static Advertisement style
Choose your preferred style. There are 4 styles available: Style 1 stands for 1 photo, Style 2 stands for 2 photos, and so on.
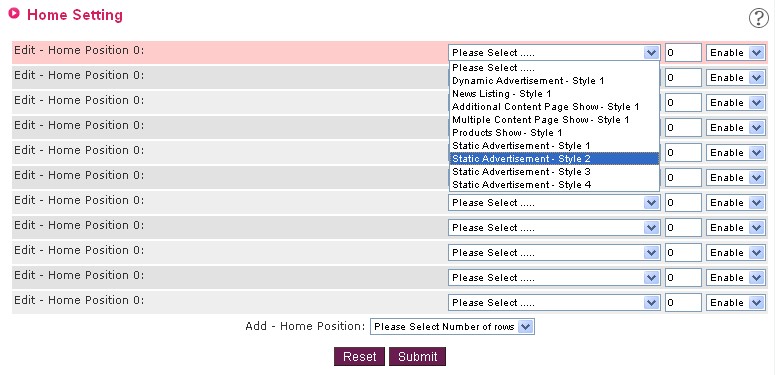
3. Upload the photo
- The photo must be in jpg format and should follow the recommended photo width.
- Check the checkbox of "Apply to this language only" if you have different photos for different languages.
- You may link the ad to another web page, simply type in the website link.

4. Rank and enable the Static Advertisement
There are a "rank" field and "status" filed on the right. The number represents the rank; the smaller the number, the higher the rank. The status has enable, disable and delete.
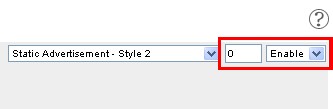
Lastly, click "Submit".
Result:
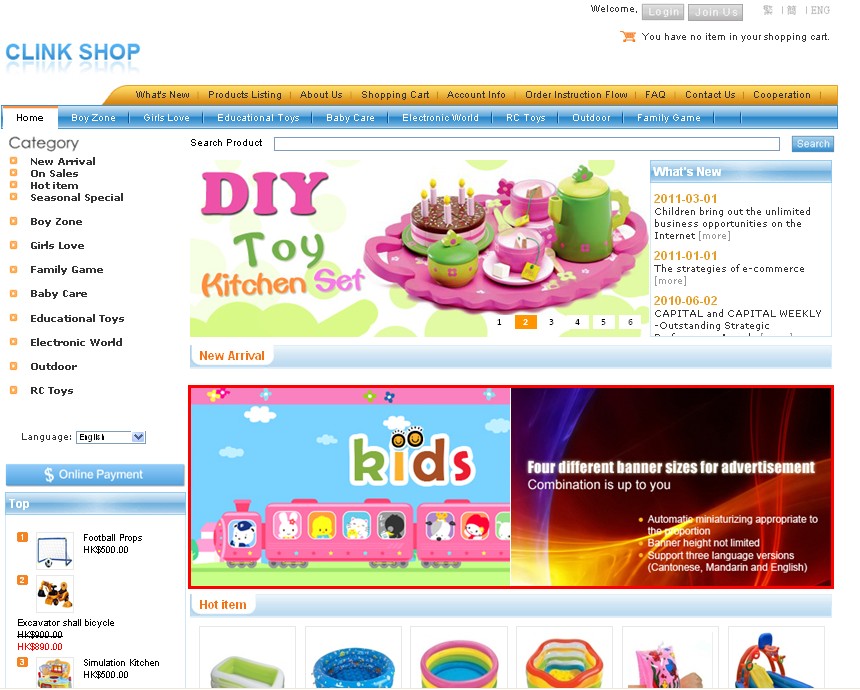
Also, please visit:
http://faq-eshopv3.clinksoft.net/menu_eshopv3-1.php?lang=en&p=85
How to get the spam emails from the Spam Controller?
A) Quarantine (and receive an email report)
B) Subject Keyword
C) Immediately Delete
When the Spam Controller service is activated, all email accounts are set to "Subject Keyword" by default, but we can set them all to "quarantine" at once with email confirmation from the administrator. Also, the administrator can customize the spam processing mode for each email address in the Spam Controller panel.
1. Add the email address:
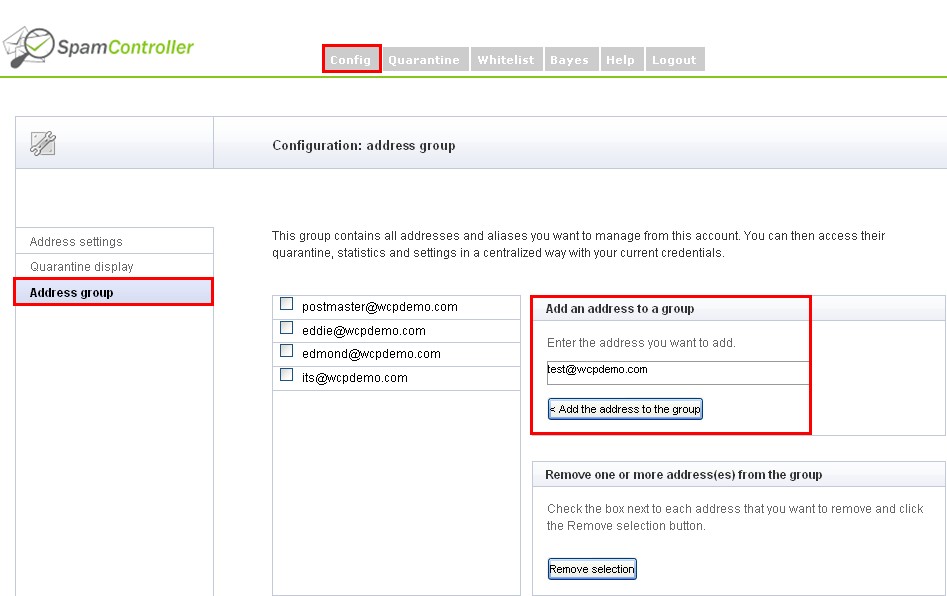
2. Customize the spam processing mode for each address:
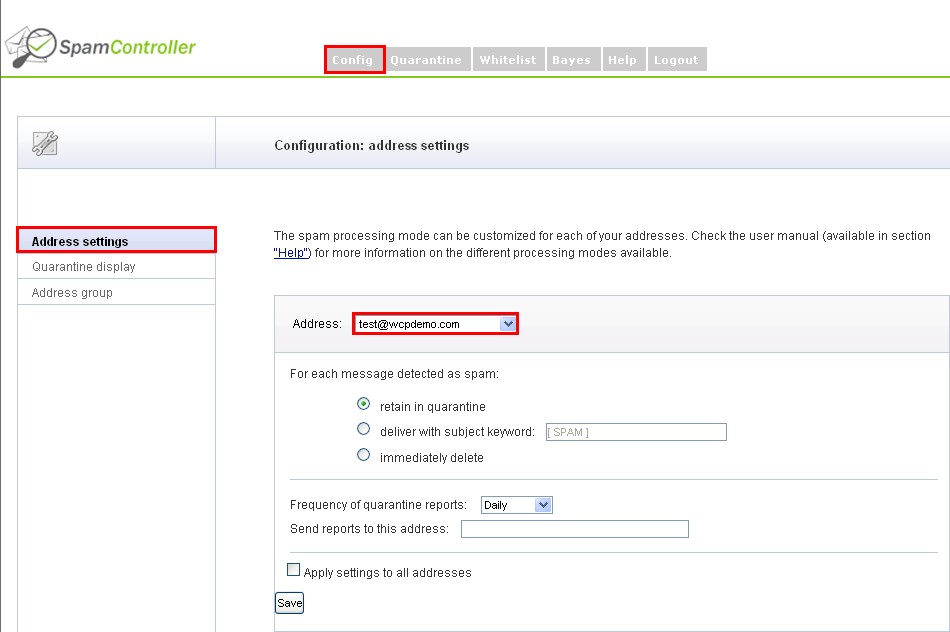
A) How to get the spam emails if "quarantine" is turn on?
The system will send a report email to each user in the next morning. In the report, the user will find all the emails that were quarantined on the previous day. By clicking "Force", the system instantaneously releases and delivers the email back to the user’s account.
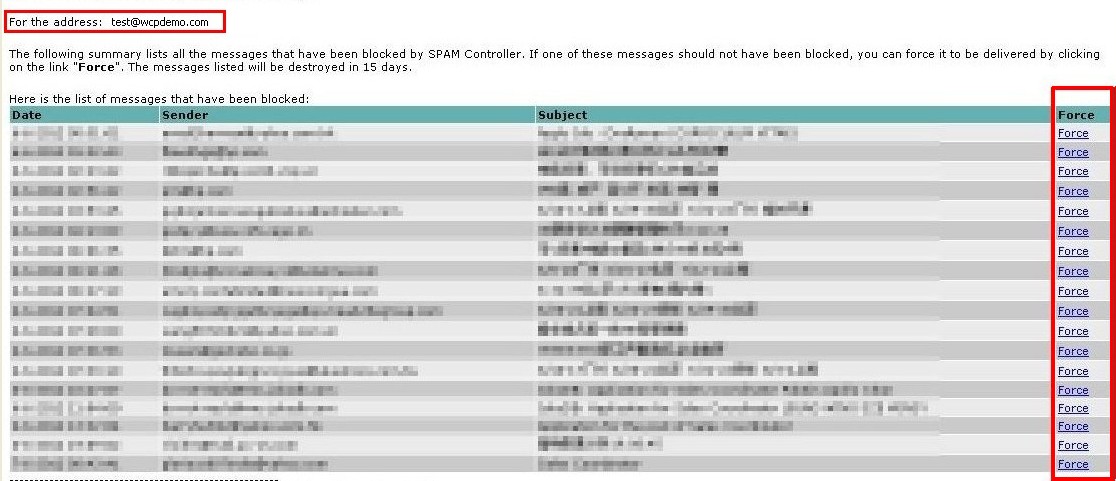
The administrator can request emails that are quarantined on the same day, but the users’ email address shall be in the Config page of the Spam Controller panel first. Then go to Quarantine page and select the email address. Click the "arrow sign"and the email will be delivered to the user.
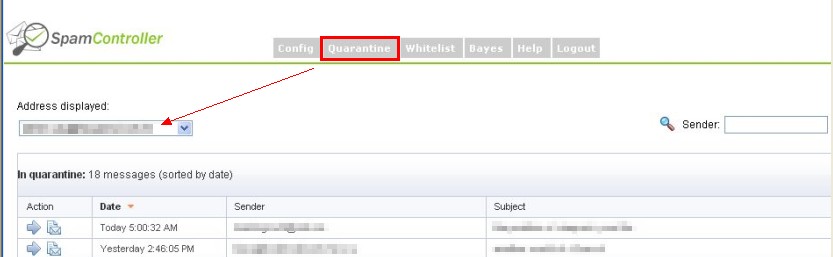
B) How to get the spam emails if "subject keyword" is turn on?
Spam Controller will deliver the spam emails in the inbox of each user account; they are prefixed by the default keyword [ SPAM ]. This keyword can be customized by the administrator in the Config page of the Spam Controller panel.
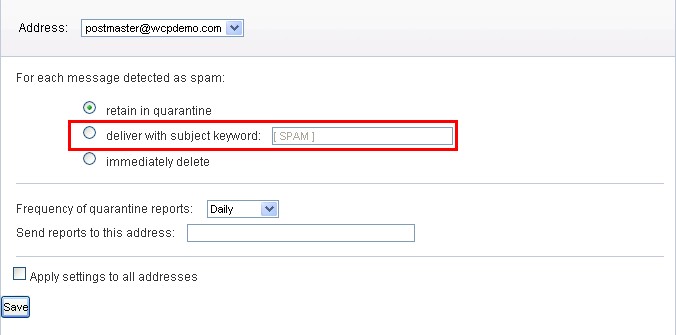
C) How to get the spam emails if "immediately delete" is turn on?
No one will be able to get back the spam emails as they are instantly deleted by the system. Use this function with caution.
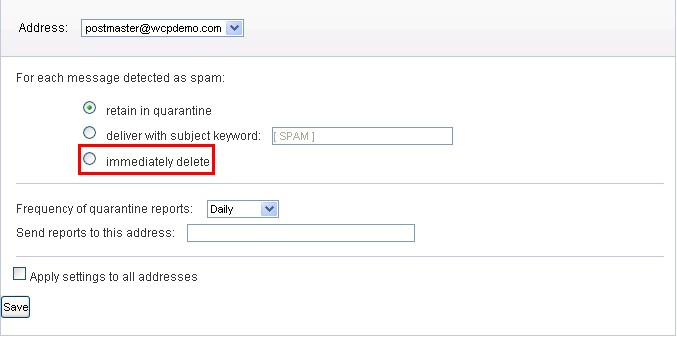
How to organize the Top Menu Bar and edit the Web Page Name ?
A1. Some hightlights of the functions of the Top Menu Bar Set

- Page Title : Show the web page name on the browser title.

- Login : Display the Login button on your website.

- Join Us : Display the Join Us button (membership subscription) where the Login is.

- Eng / Big5 / GB Option : Show「繁|簡|ENG」buttons on the top of the web page.

Note:
i) Set-up for different online shop versions
[For version 3.0E, 3.0 and 3.1] The Enable/Disable button of Home, What’s New, About Us, Products and Contact Us will affect the status of these web pages on the menu bar. For example, disabling About Us here means to hide the About Us page on the menu bar.
ii) The Enable/Disable button of Member Profile, Login and JoinUs will show/hide their status. And, they are somehow related; for example, if Join Us is enabled, Member Profile also needs to enable in order to work properly.
A2) Customize the Menu Bar

i) Menu Bar 1 is the upper one where as Menu Bar 2 is the lower one.

ii) Select the web pages that you want them to appear on the menu bar. And, the number represents the order.

B) Edit the Name of a Web Page (Applicable to version 3.2 only)
Management Position: Template Management - Top Menu Bar Set

i) Click "Update Web Page Name", and print screen the list of the original web page names for future use (recommended).

ii) Edit a web page name

iii) Click Update

iv) Check the result (or press F5 button)

How to add, edit and delete "About Us"?
If the text editor and HTML are used at the same time, the content of the HTML file will be displayed above the other.
A) Text Editor
A1. How to Add
Management Location: Content Management – Add Content
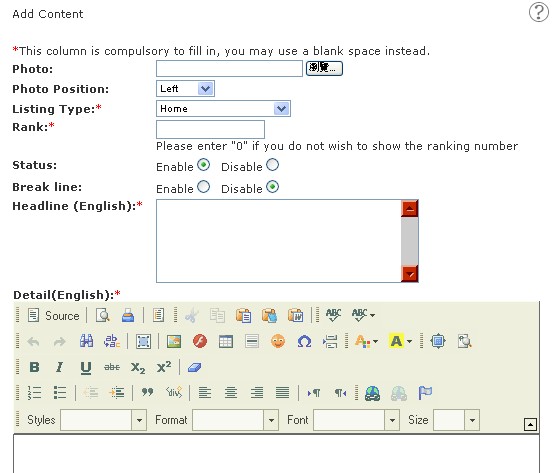
Highlights
* : Compulsory but may use a blank space instead
Photo : Upload one image directly from localhost
Rank : Can add unlimited pieces of "Add Content"; rank them.
Detail :
i)
 (Source) : Applicable for source code. Click , then paste the source code.
ii)
 (Image) : For images that are outside localhost, need to insert image URL.
iii)
 (Link) : Link a word or group of words or an image to a specific website or mailbox. Hightlight a word or group of words or an image, then click .
A2. How to Edit
Click on the About Us tab in the menu bar, and click "e".

A3. How to Delete
Click on the About Us tab in the menu bar, and click "d".

B) HTML
Management Location: Content Management – HTML File Listing
This function only supports HTML files. The newly-uploaded HTML file will replace the existing HTML file.
B1. How to Add
Upload your HTML file here.

B2. How to Edit
Download your current HTML file here, and upload it after editing.

B3. How to delete
Upload a blank HTML file or log in to FTP (e.g. ftp://ftp.mydomain.com) and delete the file in there.
How to add, edit and delete the 24 additional webpages?
Management Location: Content Management – Content Page Listing
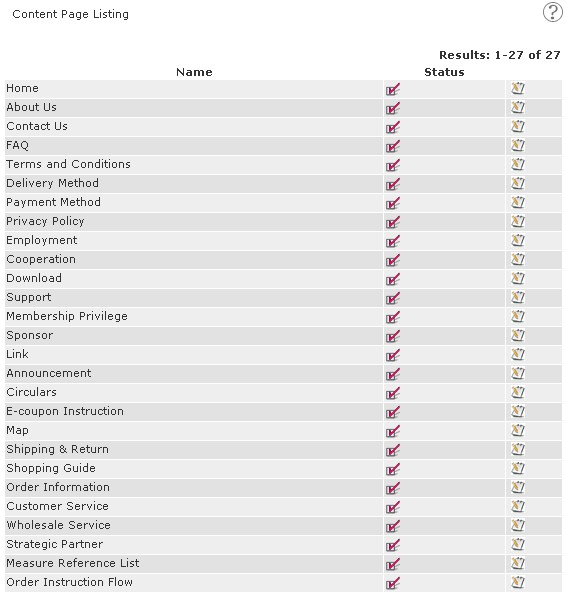
Online Shop Entry, Basic & Advanced Version
1. How to Add

 on the top-left corner

Highlight:
i) * : Compulsory but may use a blank space instead
ii) Photo: Upload one image directly from localhost

Highlight:
i)
(Source) : Applicable for source code. Click , then paste the source code.ii)
(Image) : For images that are outside localhost, need to insert image URL.iii)
(Link) : Link a word or group of words or an image to a specific website or mailbox. Hightlight a word or group of words or an image, then click .2. How to Edit
i) In the Content Page Listing, search the webpage name that needs editing, and click
ii) Either click
 to edit the content or click
 on the top-left corner, and then click next to the headline。
3. How to Delete
i) In the Content Page Listing, search the webpage name, and click
ii) Either click
 to delete the content or click on the top-left corner, and then click next to the headline。
Online Shop Flagship Version
For Flagship version, it has the same procedure than Entry, Basic and Advanced version. Furthermore, Flagship version has an extra function on the 24 additional webpages : Update Webpage Name.
For more information, please visit https://support.communilink.net/kb/content.php?article_id=417&lc=en, and read Part B.
How to add, edit and delete "Terms and Conditions"?
If the text editor and HTML are used at the same time, the content of the HTML file will be displayed above the other.
A) Text Editor
Management Location: Content Management – Content Page Listing
A1. How to Add
a) In the Content Page Listing, next to "Terms and Conditions", click
b) Then click
 on the top-left corner
c)

Highlights:
* : Compulsory but may use a blank space instead
Photo: Upload one image directly from localhost
Highlights:
i)
(Source) : Applicable for source code. Click , then paste the source code.ii)
(Image) : For images that are outside localhost, need to insert image URL.iii)
(Link) : Link a word or group of words or an image to a specific website or mailbox. Hightlight a word or group of words or an image, then click A2. How to Edit
i) In the Content Page Listing, next to "Terms and Conditions", click
ii) Either click
to edit the content or click  on the top-left corner, and then click next to the headline。
A3. How to Delete
i) In the Content Page Listing, next to "Terms and Conditions", click
ii) Either click
to delete the content or click on the top-left corner, and then click  next to the headline。
B) HTML
Management Location: Content Management–HTML File Listing
This function only supports HTML files. The newly-uploaded HTML file will replace the existing HTML file.
B1. How to Add
Upload your HTML file here.

B2. How to Edit
Download your current HTML file here, and upload it after editing.

Upload a blank HTML file or log in to FTP (e.g. ftp://ftp.mydomain.com) and delete the file in there.
How to add, edit and delete "Delivery Method"?
If the text editor and HTML are used at the same time, the content of the HTML file will be displayed above the other.
A) Text Editor
Management Location: Content Management – Content Page Listing
A1. How to Add
a) In the Content Page Listing, next to "Delivery Method", click
b) Then click
 on the top-left corner
c)

Highlights:
* : Compulsory but may use a blank space instead
Photo: Upload one image directly from localhost
Highlights:
i)
(Source) : Applicable for source code. Click , then paste the source code.ii)
(Image) : For images that are outside localhost, need to insert image URL.iii)
(Link) : Link a word or group of words or an image to a specific website or mailbox. Hightlight a word or group of words or an image, then click A2. How to Edit
i) In the Content Page Listing, next to "Delivery Method", click
ii) Either click
to edit the content or click  on the top-left corner, and then click next to the headline。
A3. How to Delete
i) In the Content Page Listing, next to "Delivery Method", click
ii) Either click
to delete the content or click on the top-left corner, and then click next to the headline。B) HTML
Management Location: Content Management–HTML File Listing
This function only supports HTML files. The newly-uploaded HTML file will replace the existing HTML file.
B1. How to Add
Upload your HTML file here.

B2. How to Edit
Download your current HTML file here, and upload it after editing.

Upload a blank HTML file or log in to FTP (e.g. ftp://ftp.mydomain.com) and delete the file in there.
How to add, edit and delete "Payment Method"?
If the text editor and HTML are used at the same time, the content of the HTML file will be displayed above the other.
A) Text Editor
Management Location: Content Management – Content Page Listing
A1. How to Add
a) In the Content Page Listing, next to "Payment Method", click
b) Then click
 on the top-left corner
c)

Highlights:
* : Compulsory but may use a blank space instead
Photo: Upload one image directly from localhost
Highlights:
i)
(Source) : Applicable for source code. Click , then paste the source code.ii)
(Image) : For images that are outside localhost, need to insert image URL.iii)
(Link) : Link a word or group of words or an image to a specific website or mailbox. Hightlight a word or group of words or an image, then click A2. How to Edit
i) In the Content Page Listing, next to "Payment Method", click
ii) Either click
to edit the content or click  on the top-left corner, and then click next to the headline。
A3. How to Delete
i) In the Content Page Listing, next to "Payment Method", click
ii) Either click
to delete the content or click on the top-left corner, and then click next to the headline。B) HTML
Management Location: Content Management–HTML File Listing
This function only supports HTML files. The newly-uploaded HTML file will replace the existing HTML file.
B1. How to Add
Upload your HTML file here.

B2. How to Edit
Download your current HTML file here, and upload it after editing.

Upload a blank HTML file or log in to FTP (e.g. ftp://ftp.mydomain.com) and delete the file in there.
How to add, edit and delete "Privacy Policy"?
1. How to Add
a) In the Content Page Listing, next to "Privacy Policy", click
b) Then click
 on the top-left corner
c)

Highlights:
* : Compulsory but may use a blank space instead
Photo: Upload one image directly from localhost
Highlights:
i)
(Source) : Applicable for source code. Click , then paste the source code.ii)
(Image) : For images that are outside localhost, need to insert image URL.iii)
(Link) : Link a word or group of words or an image to a specific website or mailbox. Hightlight a word or group of words or an image, then click 2. How to Edit
i) In the Content Page Listing, next to "Privacy Policy", click
ii) Either click
to edit the content or click  on the top-left corner, and then click next to the headline。
3. How to Delete
i) In the Content Page Listing, next to "Privacy Policy", click
ii) Either click
to delete the content or click on the top-left corner, and then click next to the headline。How to add, edit and delete "Employment"?
1. How to Add
a) In the Content Page Listing, next to "Employment", click
b) Then click
 on the top-left corner
c)

Highlights:
* : Compulsory but may use a blank space instead
Photo: Upload one image directly from localhost
Highlights:
i)
(Source) : Applicable for source code. Click , then paste the source code.ii)
(Image) : For images that are outside localhost, need to insert image URL.iii)
(Link) : Link a word or group of words or an image to a specific website or mailbox. Hightlight a word or group of words or an image, then click 2. How to Edit
i) In the Content Page Listing, next to "Employment", click
ii) Either click
to edit the content or click  on the top-left corner, and then click next to the headline。
3. How to Delete
i) In the Content Page Listing, next to "Employment", click
ii) Either click
to delete the content or click on the top-left corner, and then click next to the headline。How to add, edit and delete "Cooperation"?
1. How to Add
a) In the Content Page Listing, next to "Cooperation", click
b) Then click
 on the top-left corner
c)

Highlights:
* : Compulsory but may use a blank space instead
Photo: Upload one image directly from localhost
Highlights:
i)
(Source) : Applicable for source code. Click , then paste the source code.ii)
(Image) : For images that are outside localhost, need to insert image URL.iii)
(Link) : Link a word or group of words or an image to a specific website or mailbox. Hightlight a word or group of words or an image, then click 2. How to Edit
i) In the Content Page Listing, next to "Cooperation", click
ii) Either click
to edit the content or click  on the top-left corner, and then click next to the headline。
3. How to Delete
i) In the Content Page Listing, next to "Cooperation", click
ii) Either click
to delete the content or click on the top-left corner, and then click next to the headline。How to add, edit and delete "Download"?
1. How to Add
a) In the Content Page Listing, next to "Download", click
b) Then click
 on the top-left corner
c)

Highlights:
* : Compulsory but may use a blank space instead
Photo: Upload one image directly from localhost
Highlights:
i)
(Source) : Applicable for source code. Click , then paste the source code.ii)
(Image) : For images that are outside localhost, need to insert image URL.iii)
(Link) : Link a word or group of words or an image to a specific website or mailbox. Hightlight a word or group of words or an image, then click 2. How to Edit
i) In the Content Page Listing, next to "Download", click
ii) Either click
to edit the content or click  on the top-left corner, and then click next to the headline。
3. How to Delete
i) In the Content Page Listing, next to "Download", click
ii) Either click
to delete the content or click on the top-left corner, and then click next to the headline。How to add, edit and delete "Support"?
1. How to Add
a) In the Content Page Listing, next to "Support", click
b) Then click
 on the top-left corner
c)

Highlights:
* : Compulsory but may use a blank space instead
Photo: Upload one image directly from localhost
Highlights:
i)
(Source) : Applicable for source code. Click , then paste the source code.ii)
(Image) : For images that are outside localhost, need to insert image URL.iii)
(Link) : Link a word or group of words or an image to a specific website or mailbox. Hightlight a word or group of words or an image, then click 2. How to Edit
i) In the Content Page Listing, next to "Support", click
ii) Either click
to edit the content or click  on the top-left corner, and then click next to the headline。
3. How to Delete
i) In the Content Page Listing, next to "Support", click
ii) Either click
to delete the content or click on the top-left corner, and then click next to the headline。How to add, edit and delete "Membership Privilege"?
1. How to Add
a) In the Content Page Listing, next to "Membership Privilege", click
b) Then click
 on the top-left corner
c)

Highlights:
* : Compulsory but may use a blank space instead
Photo: Upload one image directly from localhost
Highlights:
i)
(Source) : Applicable for source code. Click , then paste the source code.ii)
(Image) : For images that are outside localhost, need to insert image URL.iii)
(Link) : Link a word or group of words or an image to a specific website or mailbox. Hightlight a word or group of words or an image, then click 2. How to Edit
i) In the Content Page Listing, next to "Membership Privilege", click
ii) Either click
to edit the content or click  on the top-left corner, and then click next to the headline。
3. How to Delete
i) In the Content Page Listing, next to "Membership Privilege", click
ii) Either click
to delete the content or click on the top-left corner, and then click next to the headline。How to add, edit and delete "Sponsor"?
1. How to Add
a) In the Content Page Listing, next to "Sponsor", click
b) Then click
 on the top-left corner
c)

Highlights:
* : Compulsory but may use a blank space instead
Photo: Upload one image directly from localhost
Highlights:
i)
(Source) : Applicable for source code. Click , then paste the source code.ii)
(Image) : For images that are outside localhost, need to insert image URL.iii)
(Link) : Link a word or group of words or an image to a specific website or mailbox. Hightlight a word or group of words or an image, then click 2. How to Edit
i) In the Content Page Listing, next to "Sponsor", click
ii) Either click
to edit the content or click  on the top-left corner, and then click next to the headline。
3. How to Delete
i) In the Content Page Listing, next to "Sponsor", click
ii) Either click
to delete the content or click on the top-left corner, and then click next to the headline。How to add, edit and delete "Link"?
1. How to Add
a) In the Content Page Listing, next to "Link", click
b) Then click
 on the top-left corner
c)

Highlights:
* : Compulsory but may use a blank space instead
Photo: Upload one image directly from localhost
Highlights:
i)
(Source) : Applicable for source code. Click , then paste the source code.ii)
(Image) : For images that are outside localhost, need to insert image URL.iii)
(Link) : Link a word or group of words or an image to a specific website or mailbox. Hightlight a word or group of words or an image, then click 2. How to Edit
i) In the Content Page Listing, next to "Link", click
ii) Either click
to edit the content or click  on the top-left corner, and then click next to the headline。
3. How to Delete
i) In the Content Page Listing, next to "Link", click
ii) Either click
to delete the content or click on the top-left corner, and then click next to the headline。How to add, edit and delete "Announcement"?
1. How to Add
a) In the Content Page Listing, next to "Announcement", click
b) Then click
 on the top-left corner
c)

Highlights:
* : Compulsory but may use a blank space instead
Photo: Upload one image directly from localhost
Highlights:
i)
(Source) : Applicable for source code. Click , then paste the source code.ii)
(Image) : For images that are outside localhost, need to insert image URL.iii)
(Link) : Link a word or group of words or an image to a specific website or mailbox. Hightlight a word or group of words or an image, then click 2. How to Edit
i) In the Content Page Listing, next to "Announcement", click
ii) Either click
to edit the content or click  on the top-left corner, and then click next to the headline。
3. How to Delete
i) In the Content Page Listing, next to "Announcement", click
ii) Either click
to delete the content or click on the top-left corner, and then click next to the headline。How to add, edit and delete "Circulars"?
1. How to Add
a) In the Content Page Listing, next to "Circulars", click
b) Then click
 on the top-left corner
c)

Highlights:
* : Compulsory but may use a blank space instead
Photo: Upload one image directly from localhost
Highlights:
i)
(Source) : Applicable for source code. Click , then paste the source code.ii)
(Image) : For images that are outside localhost, need to insert image URL.iii)
(Link) : Link a word or group of words or an image to a specific website or mailbox. Hightlight a word or group of words or an image, then click 2. How to Edit
i) In the Content Page Listing, next to "Circulars", click
ii) Either click
to edit the content or click  on the top-left corner, and then click next to the headline。
3. How to Delete
i) In the Content Page Listing, next to "Circulars", click
ii) Either click
to delete the content or click on the top-left corner, and then click next to the headline。How to add, edit and delete "E-coupon Instruction"?
1. How to Add
a) In the Content Page Listing, next to "E-coupon Instruction", click
b) Then click
 on the top-left corner
c)
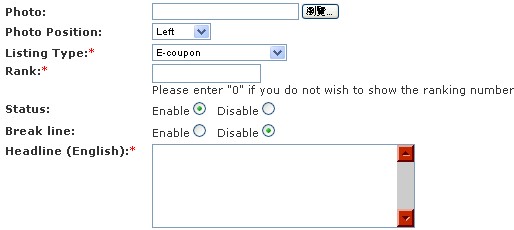
Highlights:
* : Compulsory but may use a blank space instead
Photo: Upload one image directly from localhost
Highlights:
i)
(Source) : Applicable for source code. Click , then paste the source code.ii)
(Image) : For images that are outside localhost, need to insert image URL.iii)
(Link) : Link a word or group of words or an image to a specific website or mailbox. Hightlight a word or group of words or an image, then click 2. How to Edit
i) In the Content Page Listing, next to "E-coupon Instruction", click
ii) Either click
to edit the content or click  on the top-left corner, and then click next to the headline。
3. How to Delete
i) In the Content Page Listing, next to "E-coupon Instruction", click
ii) Either click
to delete the content or click on the top-left corner, and then click next to the headline。How to add, edit and delete "Map"?
1. How to Add
a) In the Content Page Listing, next to "Map", click
b) Then click
 on the top-left corner
c)

Highlights:
* : Compulsory but may use a blank space instead
Photo: Upload one image directly from localhost
Highlights:
i)
(Source) : Applicable for source code. Click , then paste the source code.ii)
(Image) : For images that are outside localhost, need to insert image URL.iii)
(Link) : Link a word or group of words or an image to a specific website or mailbox. Hightlight a word or group of words or an image, then click 2. How to Edit
i) In the Content Page Listing, next to "Map", click
ii) Either click
to edit the content or click  on the top-left corner, and then click next to the headline。
3. How to Delete
i) In the Content Page Listing, next to "Map", click
ii) Either click
to delete the content or click on the top-left corner, and then click next to the headline。How to add, edit and delete "Shipping & Return"?
1. How to Add
a) In the Content Page Listing, next to "Shipping & Return", click
b) Then click
 on the top-left corner
c)

Highlights:
* : Compulsory but may use a blank space instead
Photo: Upload one image directly from localhost
Highlights:
i)
(Source) : Applicable for source code. Click , then paste the source code.ii)
(Image) : For images that are outside localhost, need to insert image URL.iii)
(Link) : Link a word or group of words or an image to a specific website or mailbox. Hightlight a word or group of words or an image, then click 2. How to Edit
i) In the Content Page Listing, next to "Shipping & Return", click
ii) Either click
to edit the content or click  on the top-left corner, and then click next to the headline。
3. How to Delete
i) In the Content Page Listing, next to "Shipping & Return", click
ii) Either click
to delete the content or click on the top-left corner, and then click next to the headline。How to add, edit and delete "Order Information"?
1. How to Add
a) In the Content Page Listing, next to "Order Information", click
b) Then click
 on the top-left corner
c)
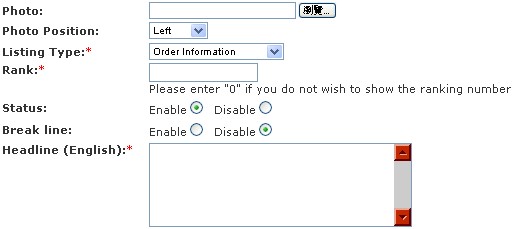
Highlights:
* : Compulsory but may use a blank space instead
Photo: Upload one image directly from localhost
Highlights:
i)
(Source) : Applicable for source code. Click , then paste the source code.ii)
(Image) : For images that are outside localhost, need to insert image URL.iii)
(Link) : Link a word or group of words or an image to a specific website or mailbox. Hightlight a word or group of words or an image, then click 2. How to Edit
i) In the Content Page Listing, next to "Order Information", click
ii) Either click
to edit the content or click  on the top-left corner, and then click next to the headline。
3. How to Delete
i) In the Content Page Listing, next to "Order Information", click
ii) Either click
to delete the content or click on the top-left corner, and then click next to the headline。How to add, edit and delete "Shopping Guide"?
1. How to Add
a) In the Content Page Listing, next to "Shopping Guide", click
b) Then click
 on the top-left corner
c)

Highlights:
* : Compulsory but may use a blank space instead
Photo: Upload one image directly from localhost
Highlights:
i)
(Source) : Applicable for source code. Click , then paste the source code.ii)
(Image) : For images that are outside localhost, need to insert image URL.iii)
(Link) : Link a word or group of words or an image to a specific website or mailbox. Hightlight a word or group of words or an image, then click 2. How to Edit
i) In the Content Page Listing, next to "Shopping Guide", click
ii) Either click
to edit the content or click  on the top-left corner, and then click next to the headline。
3. How to Delete
i) In the Content Page Listing, next to "Shopping Guide", click
ii) Either click
to delete the content or click on the top-left corner, and then click next to the headline。How to add, edit and delete "Customer Service"?
1. How to Add
a) In the Content Page Listing, next to "Customer Service", click
b) Then click
 on the top-left corner
c)

Highlights:
* : Compulsory but may use a blank space instead
Photo: Upload one image directly from localhost
Highlights:
i)
(Source) : Applicable for source code. Click , then paste the source code.ii)
(Image) : For images that are outside localhost, need to insert image URL.iii)
(Link) : Link a word or group of words or an image to a specific website or mailbox. Hightlight a word or group of words or an image, then click 2. How to Edit
i) In the Content Page Listing, next to "Customer Service", click
ii) Either click
to edit the content or click  on the top-left corner, and then click next to the headline。
3. How to Delete
i) In the Content Page Listing, next to "Customer Service", click
ii) Either click
to delete the content or click on the top-left corner, and then click next to the headline。How to add, edit and delete "Wholesale Service"?
1. How to Add
a) In the Content Page Listing, next to "Wholesale Service", click
b) Then click
 on the top-left corner
c)

Highlights:
* : Compulsory but may use a blank space instead
Photo: Upload one image directly from localhost
Highlights:
i)
(Source) : Applicable for source code. Click , then paste the source code.ii)
(Image) : For images that are outside localhost, need to insert image URL.iii)
(Link) : Link a word or group of words or an image to a specific website or mailbox. Hightlight a word or group of words or an image, then click 2. How to Edit
i) In the Content Page Listing, next to "Wholesale Service", click
ii) Either click
to edit the content or click  on the top-left corner, and then click next to the headline。
3. How to Delete
i) In the Content Page Listing, next to "Wholesale Service", click
ii) Either click
to delete the content or click on the top-left corner, and then click next to the headline。How to add, edit and delete "Strategic Partner"?
1. How to Add
a) In the Content Page Listing, next to "Strategic Partner", click
b) Then click
 on the top-left corner
c)

Highlights:
* : Compulsory but may use a blank space instead
Photo: Upload one image directly from localhost
Highlights:
i)
(Source) : Applicable for source code. Click , then paste the source code.ii)
(Image) : For images that are outside localhost, need to insert image URL.iii)
(Link) : Link a word or group of words or an image to a specific website or mailbox. Hightlight a word or group of words or an image, then click 2. How to Edit
i) In the Content Page Listing, next to "Strategic Partner", click
ii) Either click
to edit the content or click  on the top-left corner, and then click next to the headline。
3. How to Delete
i) In the Content Page Listing, next to "Strategic Partner", click
ii) Either click
to delete the content or click on the top-left corner, and then click next to the headline。How to add, edit and delete "Measure Reference List"?
1. How to Add
a) In the Content Page Listing, next to "Measure Reference List", click
b) Then click
 on the top-left corner
c)

Highlights:
* : Compulsory but may use a blank space instead
Photo: Upload one image directly from localhost
Highlights:
i)
(Source) : Applicable for source code. Click , then paste the source code.ii)
(Image) : For images that are outside localhost, need to insert image URL.iii)
(Link) : Link a word or group of words or an image to a specific website or mailbox. Hightlight a word or group of words or an image, then click 2. How to Edit
i) In the Content Page Listing, next to "Measure Reference List", click
ii) Either click
to edit the content or click  on the top-left corner, and then click next to the headline。
3. How to Delete
i) In the Content Page Listing, next to "Measure Reference List", click
ii) Either click
to delete the content or click on the top-left corner, and then click next to the headline。How to add, edit and delete "Order Instruction Flow"?
1. How to Add
a) In the Content Page Listing, next to "Order Instruction Flow", click
b) Then click
 on the top-left corner
c)

Highlights:
* : Compulsory but may use a blank space instead
Photo: Upload one image directly from localhost
Highlights:
i)
(Source) : Applicable for source code. Click , then paste the source code.ii)
(Image) : For images that are outside localhost, need to insert image URL.iii)
(Link) : Link a word or group of words or an image to a specific website or mailbox. Hightlight a word or group of words or an image, then click 2. How to Edit
i) In the Content Page Listing, next to "Order Instruction Flow", click
ii) Either click
to edit the content or click  on the top-left corner, and then click next to the headline。
3. How to Delete
i) In the Content Page Listing, next to "Order Instruction Flow", click
ii) Either click
to delete the content or click on the top-left corner, and then click next to the headline。How to add, edit and delete "FAQ"?
1. How to Add
a) In the Content Page Listing, next to "FAQ", click
b) Then click
 on the top-left corner
c)

Highlights:
* : Compulsory but may use a blank space instead
Photo: Upload one image directly from localhost
Highlights:
i)
(Source) : Applicable for source code. Click , then paste the source code.ii)
(Image) : For images that are outside localhost, need to insert image URL.iii)
(Link) : Link a word or group of words or an image to a specific website or mailbox. Hightlight a word or group of words or an image, then click d) FAQ works as follows:
Headline: Insert your question
One question at a time.
2. How to Edit
i) In the Content Page Listing, next to "FAQ", click
ii) Either click
to edit the content or click  on the top-left corner, and then click next to the headline。
3. How to Delete
i) In the Content Page Listing, next to "FAQ", click
ii) Either click
to delete the content or click on the top-left corner, and then click next to the headline。How to add, edit and delete "Home"?
If the Text Editor and HTML are used at the same time, the content of the HTML file will be displayed above the other. For Flagship Online Shop, the content of the Home Setting page will go first, then HTML’s, and lastly, the text editor’s.
Online Shop Entry, Basic and Advanced Version
1. Text Editor
1A. How to Add
i) In the Content Page Listing, next to "Home", click
ii) Then click
 on the top-left corner
iii)

Highlights:
* : Compulsory but may use a blank space instead
Photo: Upload one image directly from localhost
Highlights:
a)
(Source) : Applicable for source code. Click , then paste the source code.b)
(Image) : For images that are outside localhost, need to insert image URL.c)
(Link) : Link a word or group of words or an image to a specific website or mailbox. Hightlight a word or group of words or an image, then click 1B. How to Edit
i) In the Content Page Listing, next to "Home", click
ii) Either click
to edit the content or click  on the top-left corner, and then click next to the headline。
1C. How to Delete
i) In the Content Page Listing, next to "Home", click
ii) Either click
to delete the content or click on the top-left corner, and then click next to the headline。2. HTML
Management Location: Content Management – HTML File Listing
This function only supports HTML files. The newly-uploaded HTML file will replace the existing HTML file.
2A. How to Add
Upload your HTML file here.

2B. How to Edit
Download your current HTML file here, and upload it after editing.

2C. How to delete
Upload a blank HTML file or log in to FTP (e.g. ftp://ftp.mydomain.com) and delete the file in there.
Online Shop Flagship Version
Text Editor’s and HTML’s procedure for Flagship version are same as Entry, Basic and Advanced version. Flagship version have extra settings for Home; they can be found in "Home Setting" page.

i) Search Product
Display product search engine
Display dynamic ads and headlines side by side
Support .jpg format
Click "Show Content" to see the recommended size
You may edit the headlines in "Company Managment" > "News Listing"
iii) Dynamic Advertisement
Display dynamic ads
Support .jpg format
Click "Show Content" to see the recommended size
iv) News Listing
Display headlines
You may edit the headlines in "Company Managment" > "News Listing"
v) Additional Content Page Display
Display any page in the Content Page Listing
vi) Multiple Content Page Display
Display more than one page in the Content Page Listing
vii) Products Display
Choose to display your products, and set them to "New Arrival", "Hot Item" or "On Sale"
viii) Static Advertisement
Display static ads/banners
Have 4 styles: style 1 for 1 image, style 2 for 2 images, and so on.
Support .jpg format
Click "Show Content" to see the recommended size
Remarks:
-The total number of photos in Dynamic Advertisement and Static Advertisement should not exceed 50.
-The options may differ from layout to layout.
-The Home Setting page is designed to be compatible with Microsoft Internet Explorer.
How to update stock?
B. Manually (Applicable to Online Shop v3.1 and above)
C. Automatically (Applicable to Online Shop v3.1 and above)
D. Out of stock setting
A. Manually (Applicable to Online Shop v3.0E and above)
Management Location: Product Management – Products Listing
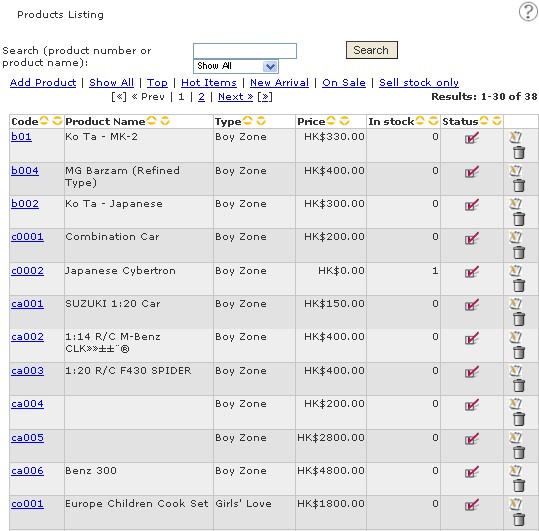
- Search product, then click
- Next to "In stock", insert the correct amount
B. Manually (Applicable to Online Shop v3.1 and above)
Management Location: Product Management– Price & Qty List
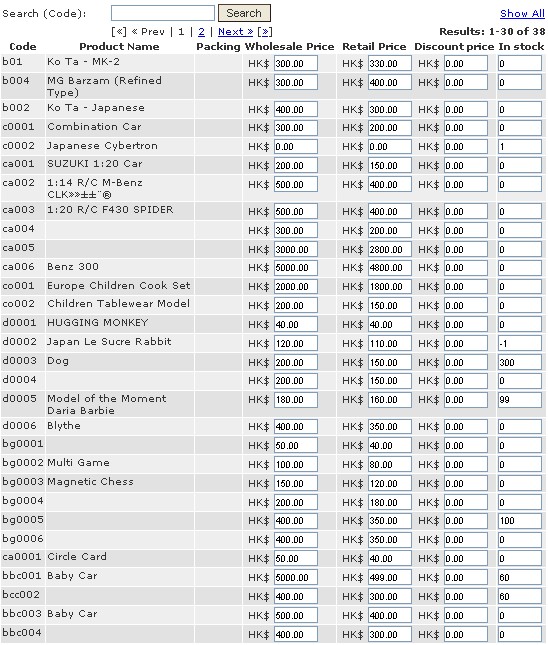
Display the price and quantity list in a table, ease of editing and management
C. Automatically (Applicable to Online Shop v3.1 and above)
Management Location: Shopping Management – Cart Setting

- Enable "Auto Update Stock"
Remark: Assume "Auto Update Stock" function is ON and the current stock of product A is 0. If someone buys product A, system will accept the order and will show a negative number in "stock" field. To avoid negative numbers, please refer to part D.
D. Out of stock setting
Management Location: Product Management – Products Listing
- Search product, then click
- "In stock" must be 0, and in "Option", tick "Sell stock only"


- When click
 , system will prompt the follow warning:
- And, "No Stock" will be shown on the product detail page.
How to set up email account on Android?
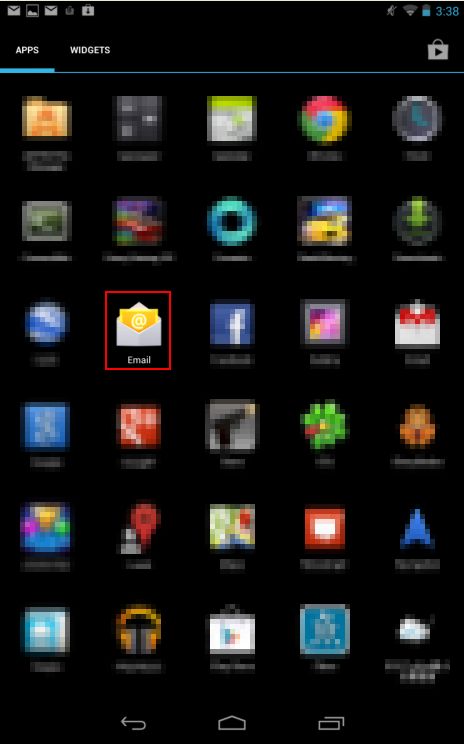
2. Click "Add Account".

3. Insert your email address and password, and choose "Manual setup".
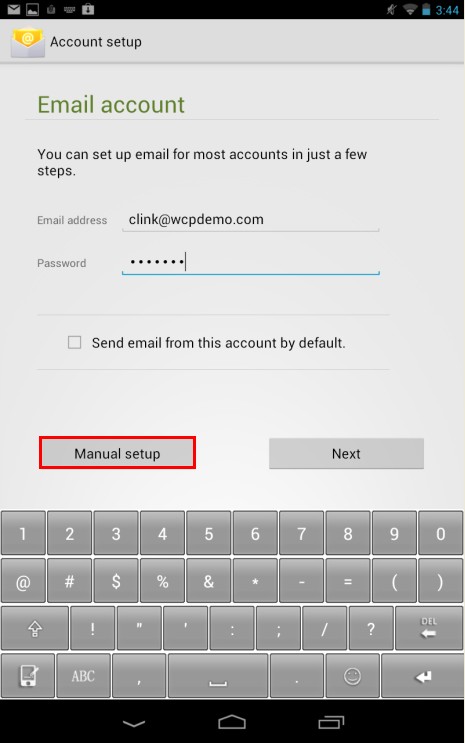
4. Choose "IMAP".
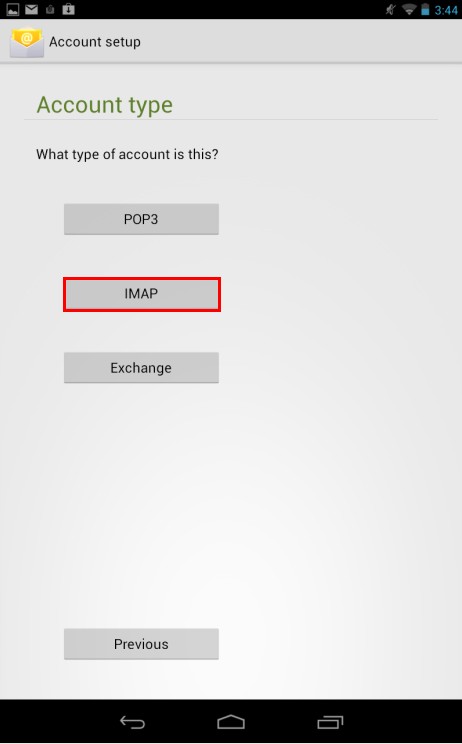
5. Fill out your incoming server settings.
Username: your full email address (e.g. [email protected])
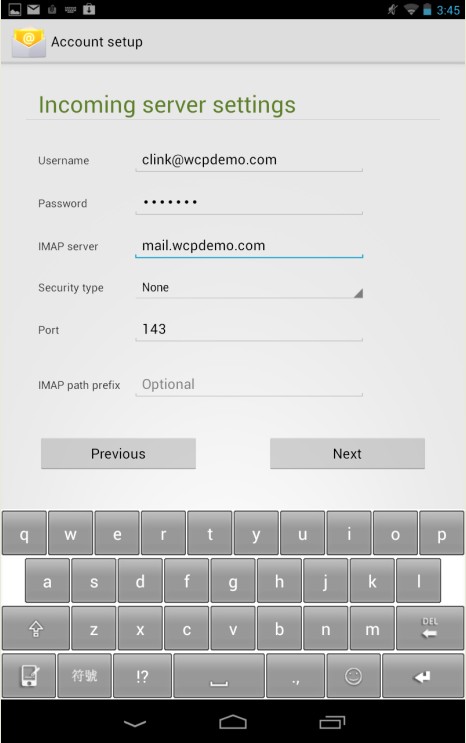
6. Fill out your outgoing server settings.
SMTP server: smtp.YourDomain.com (e.g. smtp.wcpdemo.com)
[If your service does not include SMTP or your telecom service provider has blocked third-party SMTP,
Username: your full email address (e.g. [email protected])
Password: your email account password
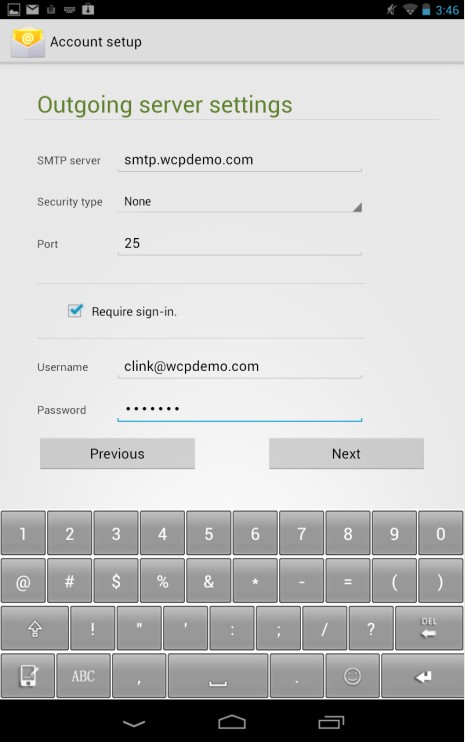
7. Choose your account options, and then click "Next".
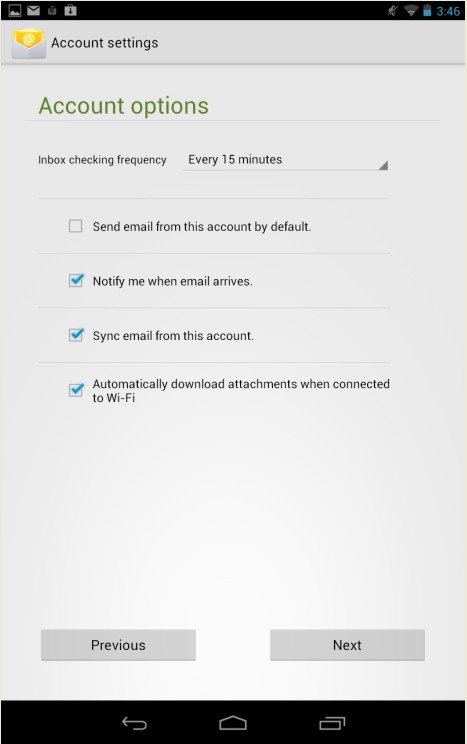
8. Your account is set up. Click "Nex", and then "Finish".
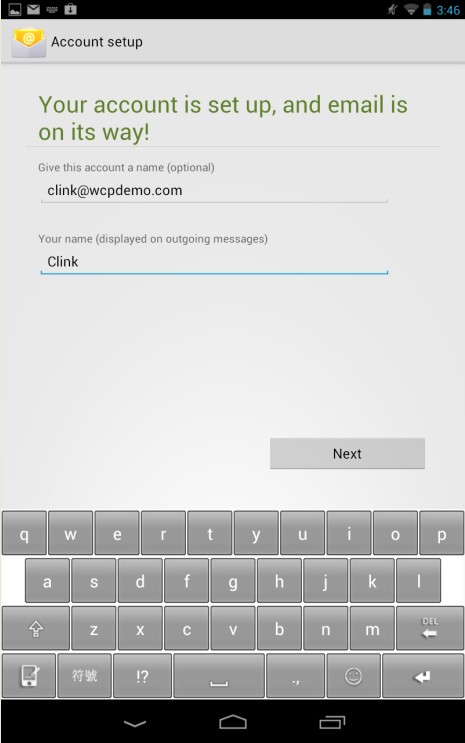
How to activate the Global SMTP port on Android device?
2. On Settings page, click on your email account.

3. Click "Outgoing Settings"

4. Change the Port from 25 to 2620, 465 or 587. (The SMTP port depends on mobile phone, phone provider or ISP).

How to add Facebook Like, fans page, Twiter button or other social plugin in online shop
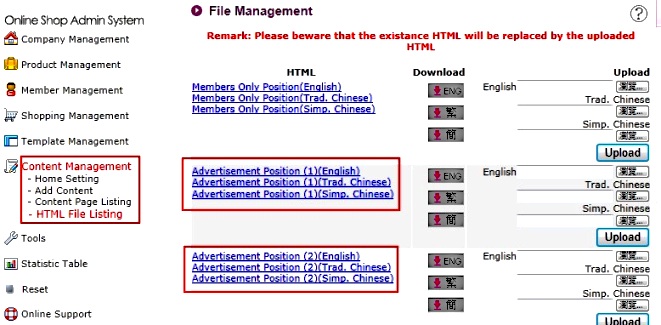
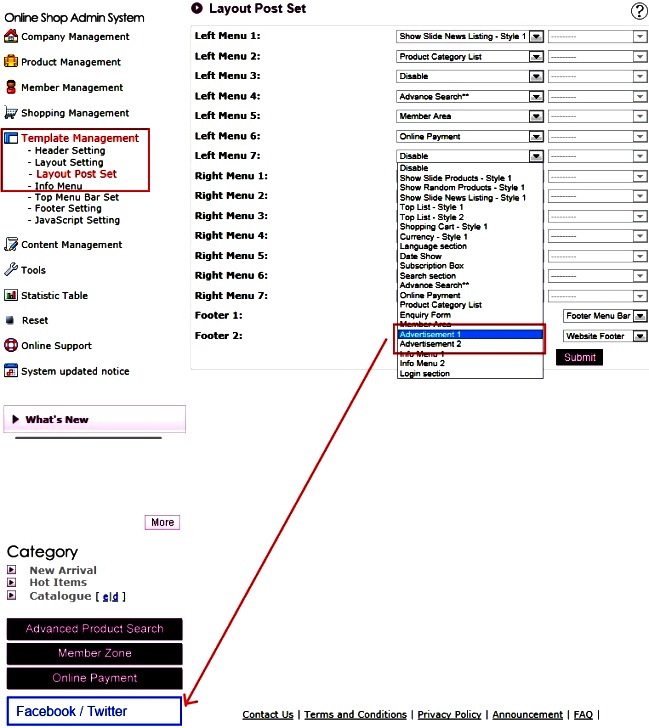
Beware of Chinese Domain Name Scams
Subject: domain and keyword in CN
Dear Manager,
(Please forward this to your CEO, because this is urgent. Thanks)
We are a Network Service Company which is the domain name registration center in Shanghai, China. On August 12, 2013, we received an application from XXXX requested "(domain name)" as their internet keyword and China (CN) domain names. But after checking it, we find this name conflict with your company name or trademark. In order to deal with this matter better, it’s necessary to send email to you and confirm whether this company is your distributor or business partner in China?
How to activate the Global SMTP port on Outlook?
This setting is for Global SMTP
subscribed users.
1. Start Outlook. Go to File tab, and click Account
Settings.
2. Select your email account and click Amend.
3. Click More Setting in Internet Mail Setting.
4. Click Advance tab and update the SMTP port from 25 to 465, 587 or 2620
5. Click Apply to complete setting.
6. Please ensure that "My outgoing server (SMTP) require authentication" is enabled.
How to activate the Global SMTP port on Window Live Mail?


Email Problem of China Users
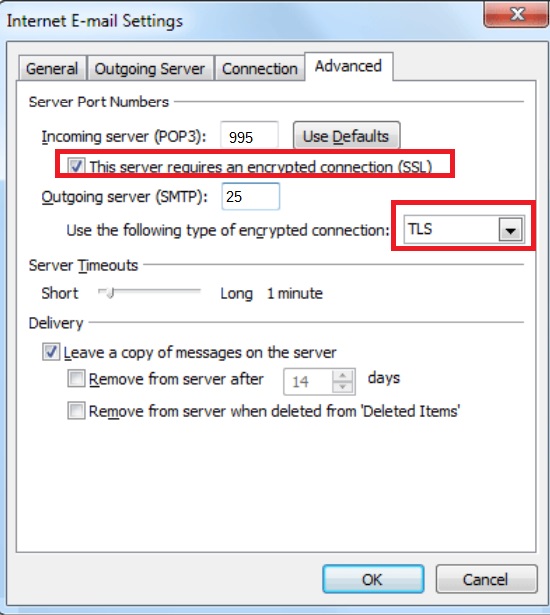
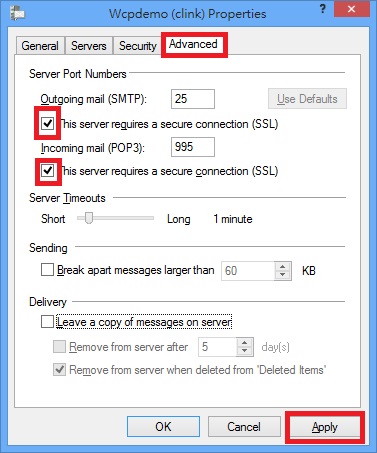

How to set up an email account in Mac Mail?


Phishing email
How to reset email password? (by user)
1. Login to Email Manager (ex: http://office.wcpdemo.com or http://office.yourdomain.com)
2.
Login with your domain name, username
and password
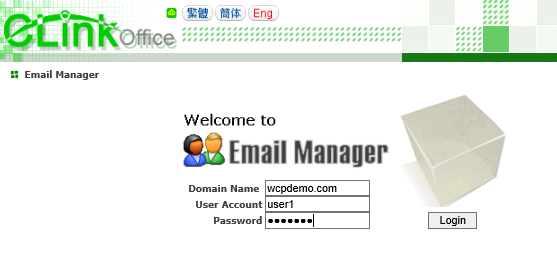
3.
Enter the New password and Password (again),
then click “Modify User” button to complete the setting
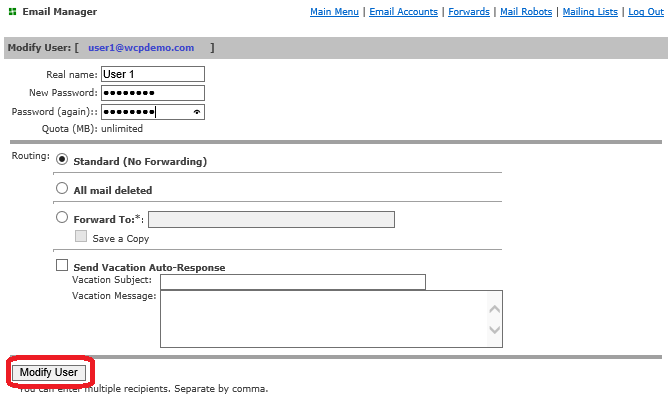
4.
“Account Updated” will be shown after password
updated
How to set Auto-reply or vacation message of email account? (by user)
Vacation function is used for replying the email
sender’s email automatically to let the sender knows his/her email has
reached to recipient and give notices or information to email
sender. You can enable this function with leaving a
message to them. Once the sender sends you an email, an auto-reply email
will be sent to your sender with the preset message.
1. Login to Email
Manager (ex: http://office.wcpdemo.com or
http://office.yourdomain.com)
2. Login with your
domain name, username and password
3. 3. Select the “Vacation (Autoresponder)” radio
button
Fill in required information
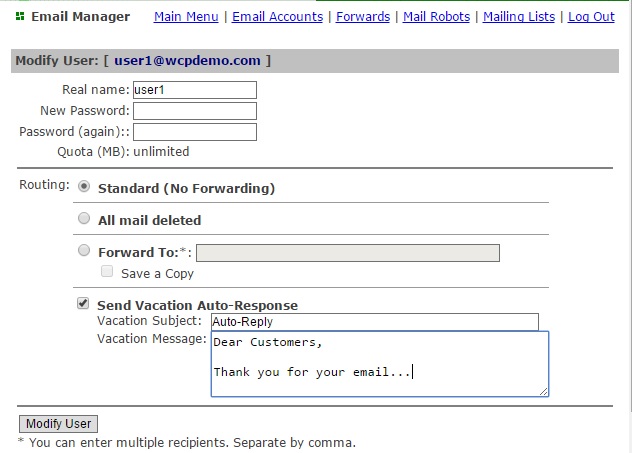
4. 4. Click “Modify USER” button to complete the
setting
How do I run Ping and Tracert on Window 8?
1.
Right click the Start icon, then click Run ( R ). Type “cmd” in Run Window and click OK

2. In the command mode, enter the hostname:
ping www.yourdomain.com (example: ping www.wcpdemo.com)
and then enter
tracert www.yourdomain.com (example: tracert www.wcpdemo.com)
If it’s your email connection problem, then enter
ping mail.yourdomain.com (example: ping mail.wcpdemo.com) tracert mail.yourdomain.com (example: tracert mail.wcpdemo.com)
If it’s your website connection problem, then enter
ping www.yourdomain.com (example: ping www.wcpdemo.com)
tracert www.yourdomain.com (example: tracert www.wcpdemo.com)
If it’s your FTP connection problem, then enter
ping ftp.yourdomain.com (example: ping ftp.wcpdemo.com)
tracert ftp.yourdomain.com (example: tracert ftp.wcpdemo.com)
3.
The network
results will look similar to :
4.
How to read
the results
Each line of output represents 1 "hop" on your trip across the Internet to our network and includes the time, in milliseconds, that it took to traverse that hop. If you see times over 350ms, or over 1 second, or asterisks (*), then that is the point on the Internet where you are being slowed down. Please contact your ISP.
Note: Only if your tracert result shows a
slow hop on our network, we will need you to send the entire result
of your network test to us for investigation.
5.
To dump the results:
i) Right click
ii) Choose
’Select All’
iii) Press the
’Enter’ key once (this step is to copy)
iv) Paste the
clipboard contents into your email message (CTRL-V or edit->paste)
6.
After you have dumped the results, please send them to
[email protected] for investigation.
How do I run Ping and Tracert on Window 7 or Windows Vista?
1.
Click Start, then type “cmd” in Start Search and press Enter
2. In the command mode, enter the hostname:
ping www.yourdomain.com (example: ping www.wcpdemo.com)
and then enter
tracert www.yourdomain.com (example: tracert www.wcpdemo.com)
If it’s your email connection problem, then enter
ping mail.yourdomain.com (example: ping mail.wcpdemo.com) tracert mail.yourdomain.com (example: tracert mail.wcpdemo.com)
If it’s your website connection problem, then enter
ping www.yourdomain.com (example: ping www.wcpdemo.com)
tracert www.yourdomain.com (example: tracert www.wcpdemo.com)
If it’s your FTP connection problem, then enter
ping ftp.yourdomain.com (example: ping ftp.wcpdemo.com)
tracert ftp.yourdomain.com (example: tracert ftp.wcpdemo.com)
3.
The network
results will look similar to :
4. How to read the results:
Note: Only if your tracert result shows a
slow hop on our network, we will need you to send the entire result
of your network test to us for investigation.
5.
To dump the results:
i) Right click
ii) Choose
’Select All’
iii) Press the
’Enter’ key once (this step is to copy)
iv) Paste the
clipboard contents into your email message (CTRL-V or edit->paste)
6.
After you have dumped the results, please send them to
[email protected] for investigation.
How do I run Ping and Traceroute on Macintosh OS X?
1. Click Finder or press 〔Command〕+〔N〕
2. Double click Applications, click Utilities, double click Terminal
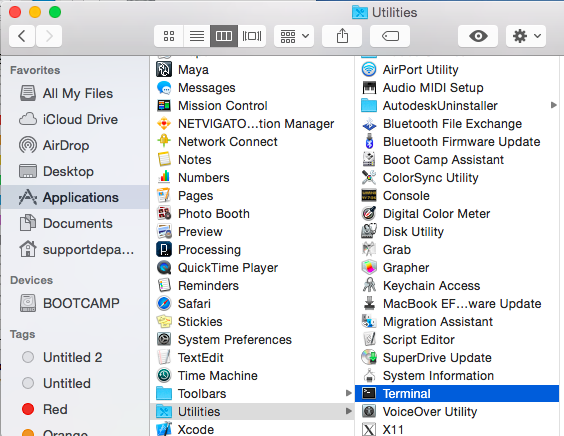
3. In the command mode, enter the command with the hostname :
ping www.yourdomain.com (example: ping www.wcpdemo.com)
and then enter
tracert www.yourdomain.com (example: tracert www.wcpdemo.com)
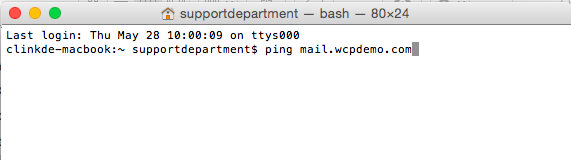
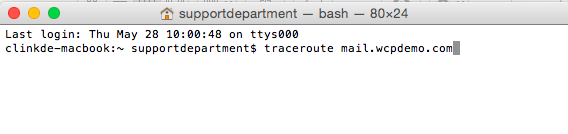
If it’s your email connection problem, then enter
ping mail.yourdomain.com (example: ping mail.wcpdemo.com)
tracert mail.yourdomain.com (example: tracert mail.wcpdemo.com)
If it’s your website connection problem, then enter
ping www.yourdomain.com (example: ping www.wcpdemo.com)
tracert www.yourdomain.com (example: tracert www.wcpdemo.com)
If it’s your FTP connection problem, then enter
ping ftp.yourdomain.com (example: ping ftp.wcpdemo.com)
tracert ftp.yourdomain.com (example: tracert ftp.wcpdemo.com)
4. To cancel the ping, press CTRL + C. The network results will look similar to :
Ping result:
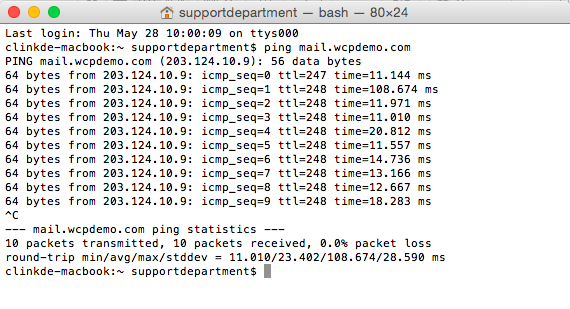
Traceroute result:
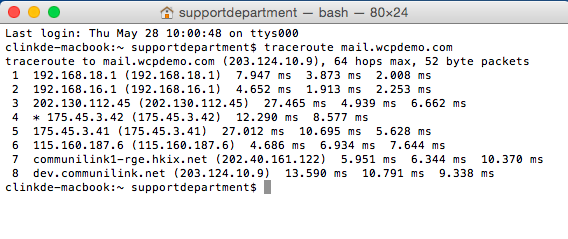
5. To capture the screenshot, press Command + Shift + 3.
6. After you have dumped the results, please send them to [email protected] for investigation.
How do I run Ping and Tracert on Android?
1.
Install the Ping Tool Apps in
your mobile.
Here some suggestions for your reference:
https://play.google.com/store/apps/details?id=ua.com.streamsoft.pingtools
https://play.google.com/store/apps/details?id=com.inflim.trp
https://play.google.com/store/apps/details?id=com.scan.traceroute&hl=zh_TW
2.
Open
the PING Tools

3.
In
PING and TRACEROUTE command mode,
enter
www.yourdomain.com
(example: www.wcpdemo.com)
if it’s your website connection problem
enter
mail.yourdomain.com
(example: mail.wcpdemo.com)
if it’s your email connection problem
enter
ftp.yourdomain.com
(example: ftp.wcpdemo.com)
if it’s your FTP connection problem
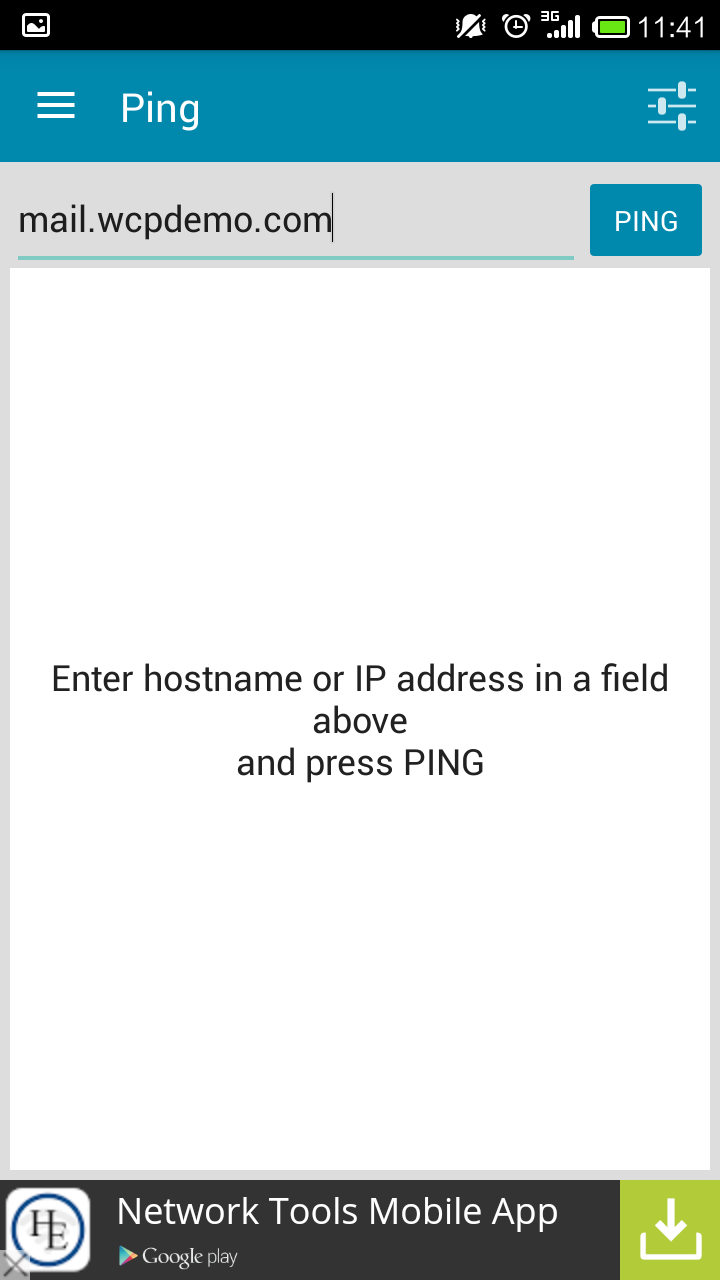
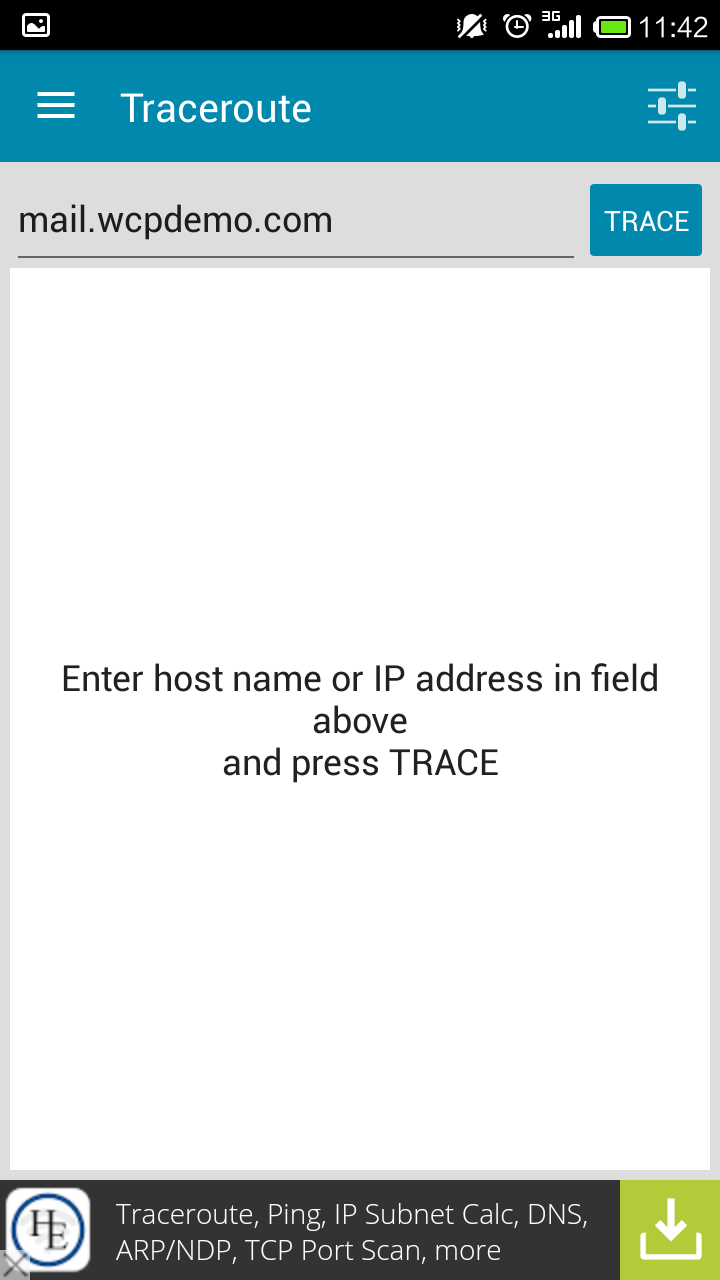
Then click PING or TRACE
4.
To
change to other command, such as Traceroute, click the setting button in the upper-left
corner and select Traceroute
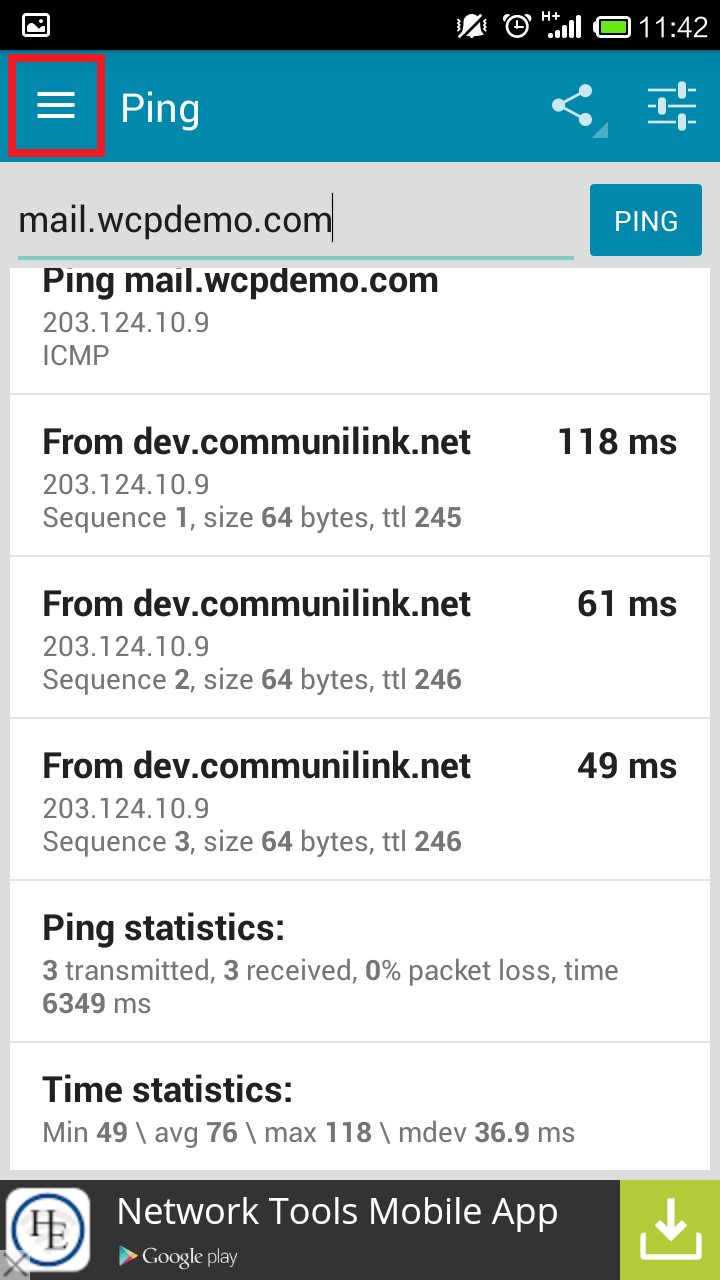
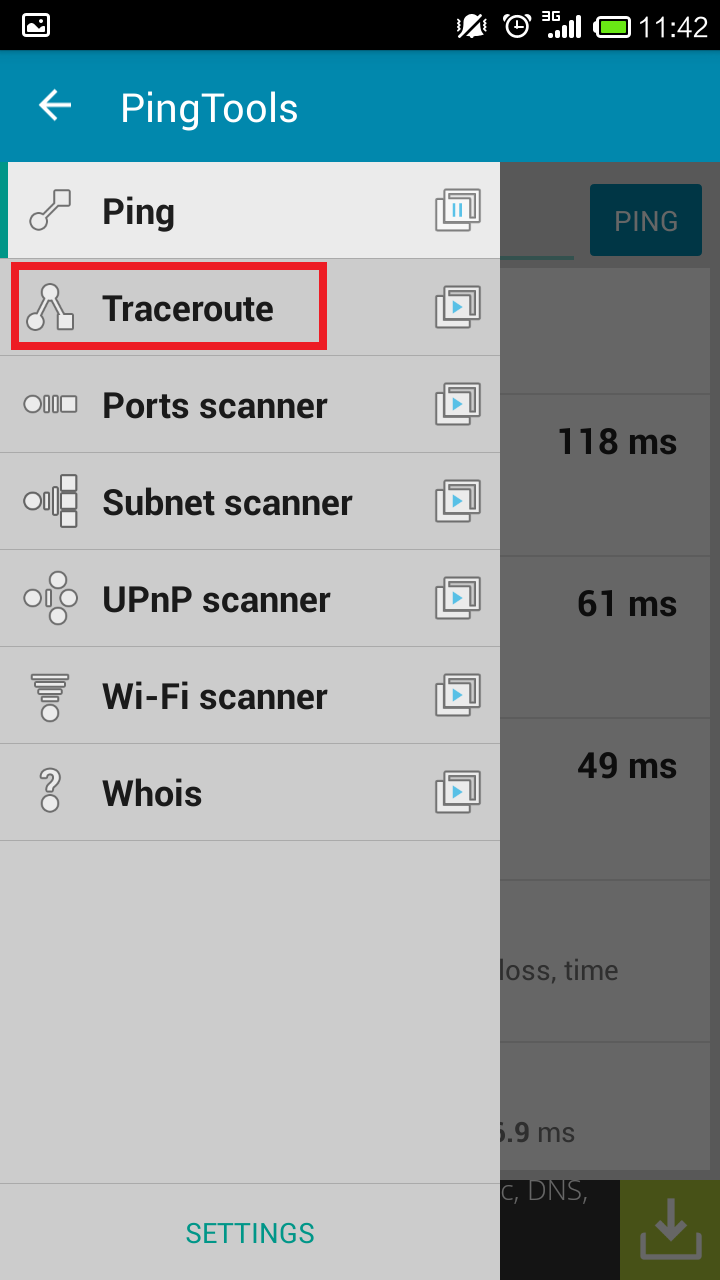
5.
The network
results will look similar to :
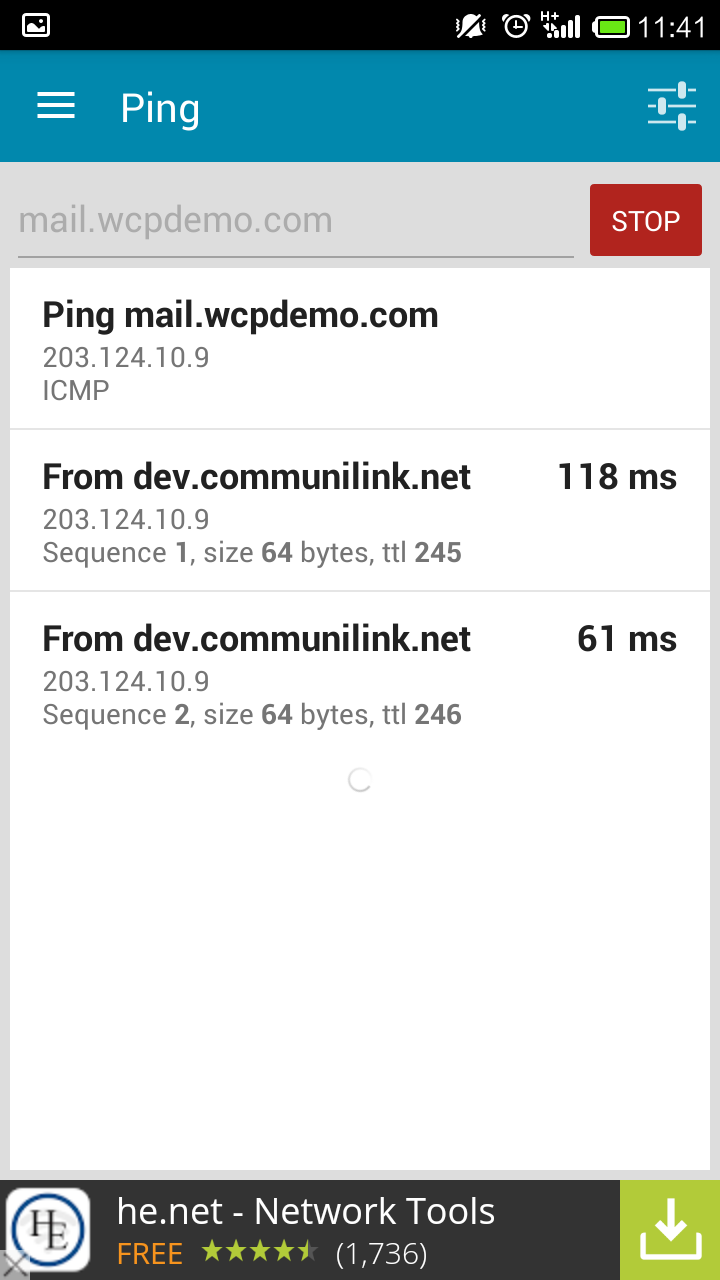
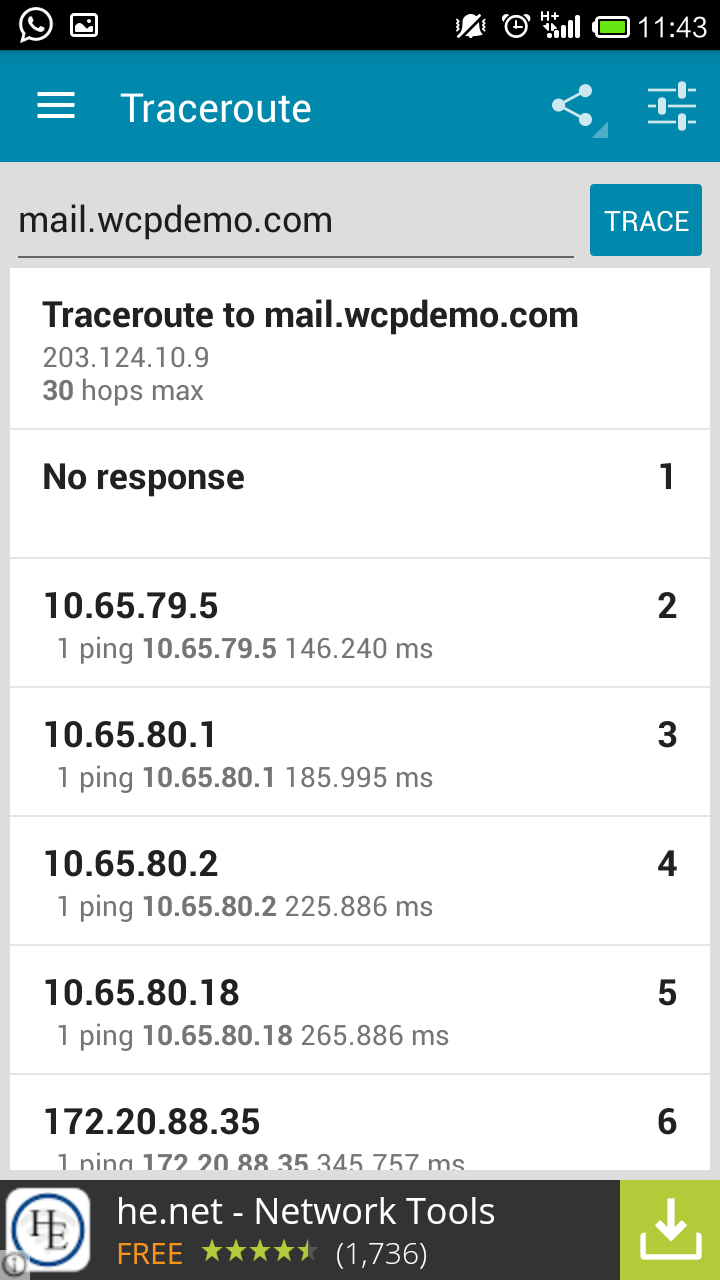
6.
Take
the screehshot of both ping and traceroute results, and send them to [email protected]
for investigation.
How do I run Ping and Tracert on iPhone?
1.
Install the Network Diagnose Apps in your
mobile.
Here some suggestions
for your reference:
https://itunes.apple.com/us/app/inettools-network-diagnose/id561659975?mt=8 https://itunes.apple.com/us/app/network-analyzer-ping-traceroute/id557405467?mt=8
2.
Open
the Network Diagnose Tools

3. Select Ping or Trace Route
4.
Enter
the hostname:
enter
www.yourdomain.com (example: www.wcpdemo.com)
if it’s your website connection problem
enter
mail.yourdomain.com
(example: mail.wcpdemo.com)
if it’s your email connection problem
enter
ftp.yourdomain.com
(example: ftp.wcpdemo.com)
if it’s your FTP connection problem
Then click Start
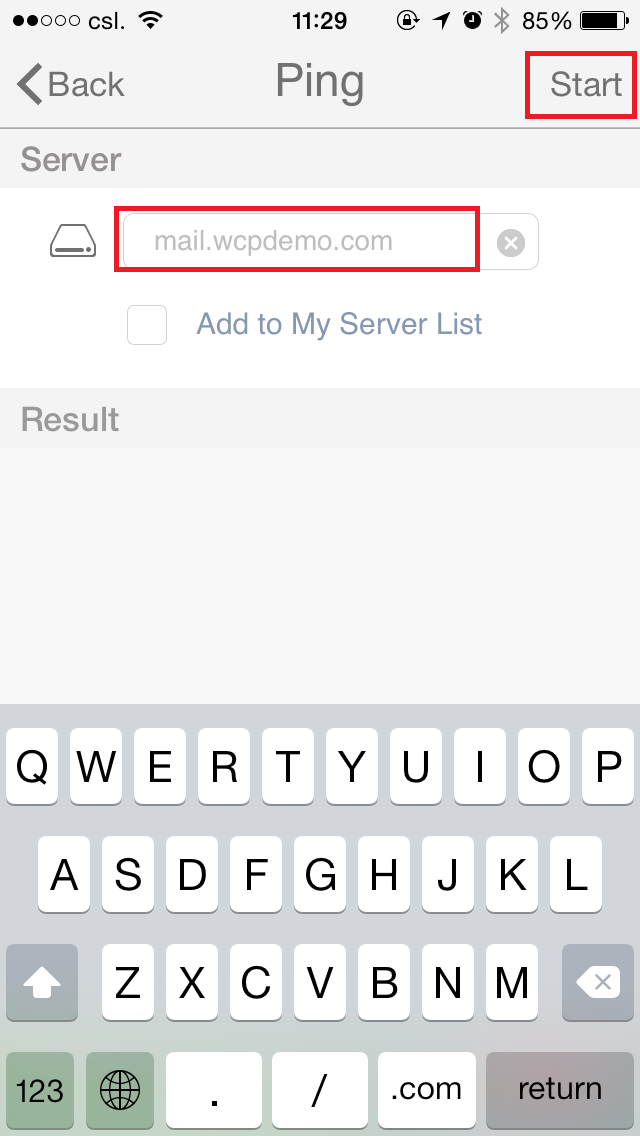
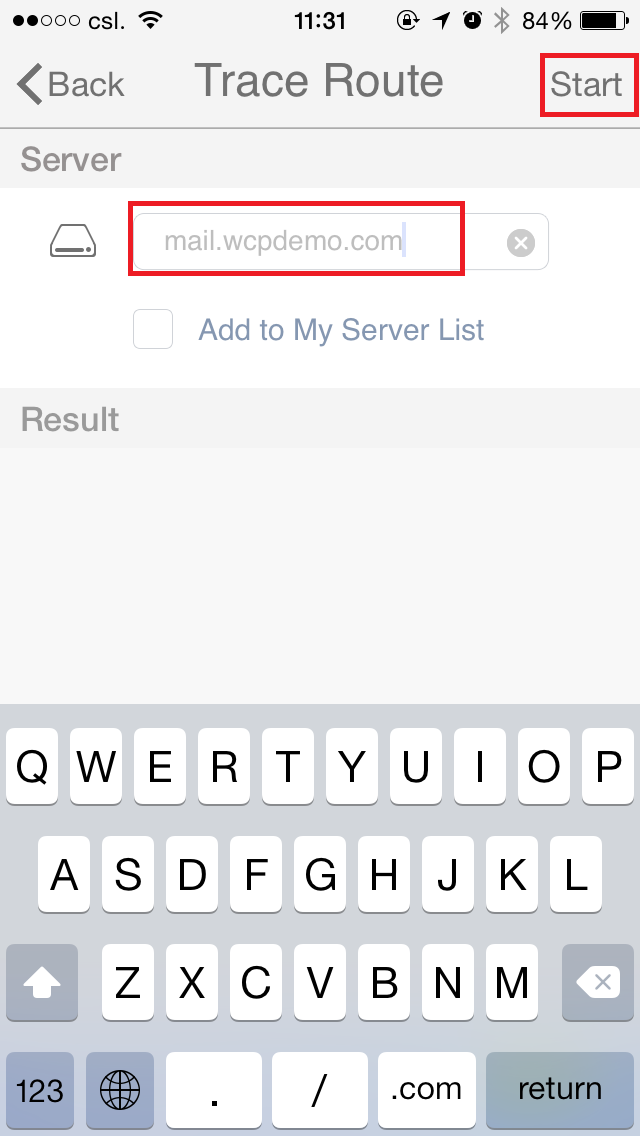
5. The network results will look similar as below. Then, take the screenshot of the result.
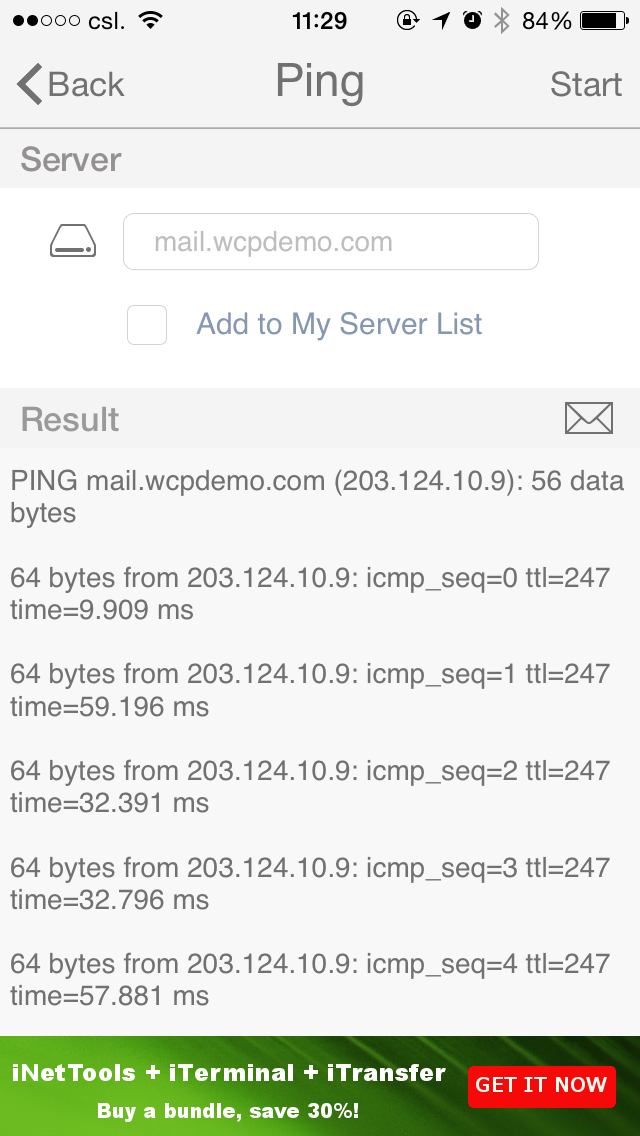
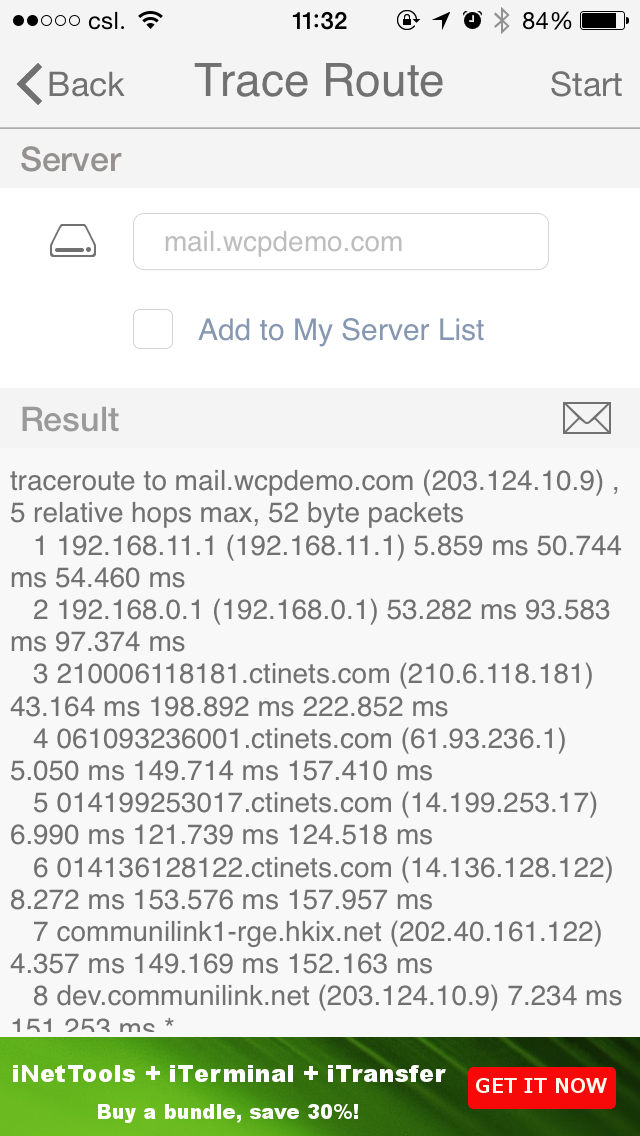
6.
To
change to other command, such as Trace Route, click the back button  in the
upper-left corner and select Trace Route
7.
Take
the screehshot of both Ping and RraceRoute results, and send them to [email protected] for investigation.
How do I run Ping and Tracert on Window 2000 to Windows XP?
1.
Click the Start icon, then click Run ( R ). Type “cmd” in Run Window and click OK
2.
In the command mode, enter
the hostname:
ping www.yourdomain.com (example: ping www.wcpdemo.com)
and then enter
tracert www.yourdomain.com (example: tracert www.wcpdemo.com)
If it’s your email connection problem,
then enter
ping mail.yourdomain.com
(example: ping mail.wcpdemo.com) tracert
mail.yourdomain.com (example: tracert mail.wcpdemo.com)
If it’s your website connection problem,
then enter
ping www.yourdomain.com (example: ping www.wcpdemo.com)
tracert www.yourdomain.com (example: tracert www.wcpdemo.com)
If it’s your FTP
connection problem, then enter
ping ftp.yourdomain.com (example: ping ftp.wcpdemo.com)
tracert ftp.yourdomain.com (example: tracert ftp.wcpdemo.com)
3.
The network
results will look similar to:
4.
How to read
the results
Each line of output represents 1 "hop" on your trip across the
Internet to our network and includes the time, in milliseconds, that it took to
traverse that hop. If you see times over 350ms, or over 1 second, or
asterisks (*), then that is the point on the Internet where you are being
slowed down. Please contact your ISP.
Note: Only if your tracert result shows a
slow hop on our network, we will need you to send the entire result
of your network test to us for investigation.
7.
To dump the results:
i)
Right click
ii)
Choose ’Select All’
iii)
Press the ’Enter’ key once
(this step is to copy)
iv)
Paste the clipboard contents into
your email message (CTRL-V or edit->paste)
8.
After you have dumped the results, please send them to
[email protected] for investigation.
What is RBL?
Why is my IP address or SMTP’s IP address in RBL?
How to de-list / release IP?
How to set my own SMTP in Gmail Account?
1.
Open your Gmail Account.
2.
Click the gear button
in the top-right and select Settings.

3.
Select Accounts and Import

4.
Select Add another email address you own

5.
Insert your email account details.
a.
Enter your Name (as you want email recipients to see it)
b.
Enter your Email Address (e.g. [email protected])
c.
Click Next Step

6. Insert your SMTP Mail Server details.
a.
SMTP Server: smtp.yourdomain.com
(eg. Smtp.wcpdemo.com)
b.
Username: Your Email Address (e.g. [email protected])
c.
Password: Your Password (This is the email password
set in Email Manager)
d.
Port: 25
If your service plan includes Global SMTP service, you may select port 25, 587 or 465.
e.
Click Add Account

7.
Then Gmail will send you an
email with a confirmation code. Retrieve the code from your email, enter the
code and click Verify.

8.
Enter the code and click Verify

9.
The SMTP setting is completed.

How to set up email account on iPhone (IOS 10)?
1.
Choose “Mail” in “Setting”

2.
Click “Accounts”

3.
Click “Add Account”

4.
Click “Other”

5.
Click “Add Mail Account”

6. Fill in the account information and click "Next"
Name: Your name
Email: FULL email address
Password: Your password
Description: About your email address

7. Fill in ing Mail Server IMAP / POP3 information
Hostname: Name: mail.yourdomain
userrname: FULL email address (ex: [email protected])
password: Your password

8. Fill in Outgoing Mail Server information, then click "Next"
Hostname: Name: smtp.yourdomain
userrname: FULL email address (ex: [email protected])
password: Your password

8. If it shows the warning as below when you are waiting for “verifying IMAP/POP3 or SMTP account information”, please press continuous. (waiting time depends on the connection speed. If waiting time is too long, you can reload the setting again.)
Click ’Continue’ at Verify Sever Identity of IMAP/POP3

9. Click ’Continue’ at Verify Sever Identity of SMTP

10. Then click "Save"

11. If Outgoing server is smtp.yourdomain, please choose SMTP smtp.yourdomain

12. Click "ON"

13. Fill in the approriate SMTP port, then click " Done".
Most of our email service includes SMTP port 25 and 1025
Globle SMTP service includes SMTP port 25, 1025, 587, 465 and 2620
You can contact support department if you do not know your SMTP port.


)
SSL VPN setup on Iphone

2. 下載完成後,進入 Pulse Secure 應用程式,細閱用戶端軟體使用者授權合約。
閱讀使用者授權合約後,按接受。
3. 按啟用 Pulse Secure 確定啟用。

4.
在表格中的 URL
填寫 hk.smartvpn.hk。
在使用者名稱中填寫我們提供的使用者名稱。
在驗證欄選密碼項。填寫後按儲存。

5.
儲存後,按 hk.smartvpn.hk。

6.
按連線連接伺服器。

7.
輸入密碼後,按”Sign
In”。

8. 用戶可瀏覽 www,whatismyip.com 已確保成功連接 VPN。
若 IP 是
203.124.11.145,ISP: Communilink Internet Service Provider Hong
Kong,
即代表你己成功連接 SmartVPN。

在 Android 上設置 SSL VPN
1.
在Play Store 搜尋 Pulse Secure,然後按安裝。按 ACCEPT 接受下載程式。
2.
下載完成後,進入
Pulse Secure 應用程式,細閱用戶端軟體使用者授權合約。
閱讀使用者授權合約後,按接受。
3.
按 Add Connection 新增連線設定。
4. 在下列表格中的 Connection Name 中填寫 hk.smartvpn.hk。
在URL 填寫 hk.smartvpn.hk。
在Username 填寫我們提供的使用者名稱。
在Authentication Type 選擇 Password。
填寫所需資料後,按 Create Connection。
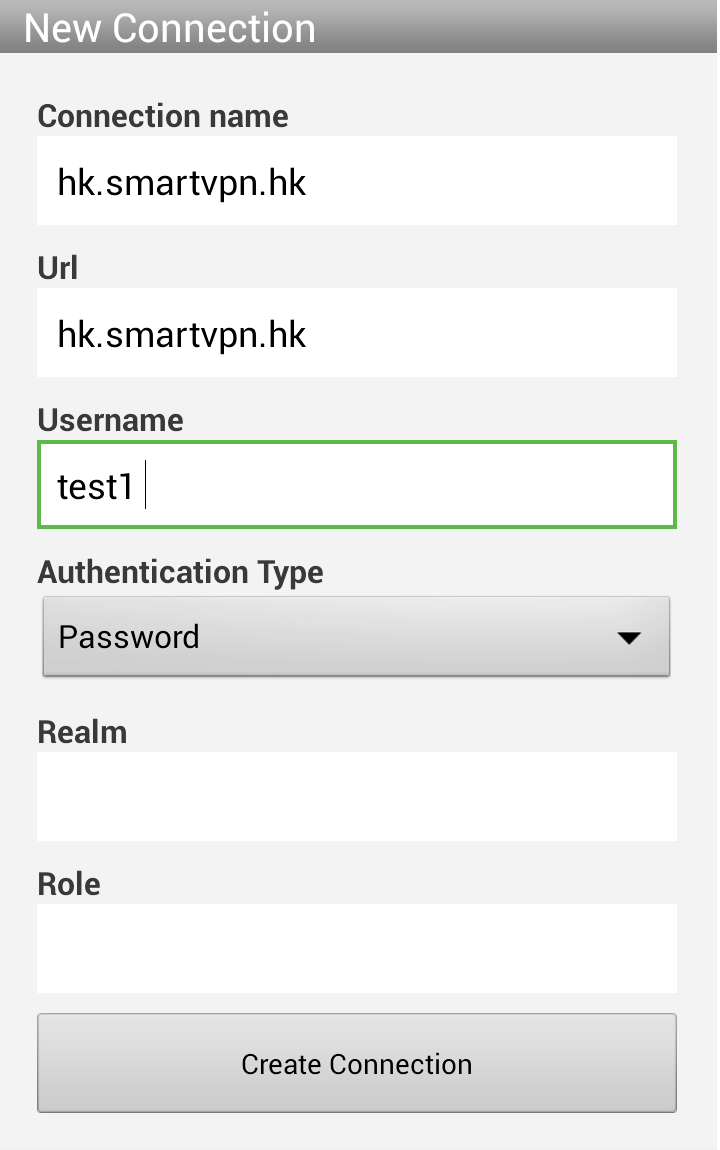
5. Connect 連接 VPN。
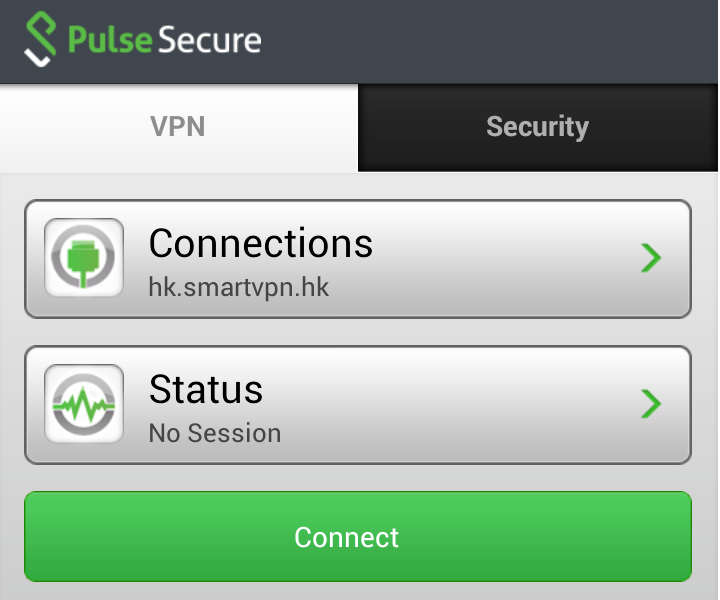
6.
在 Password 欄輸入密碼後,按 Sign In。
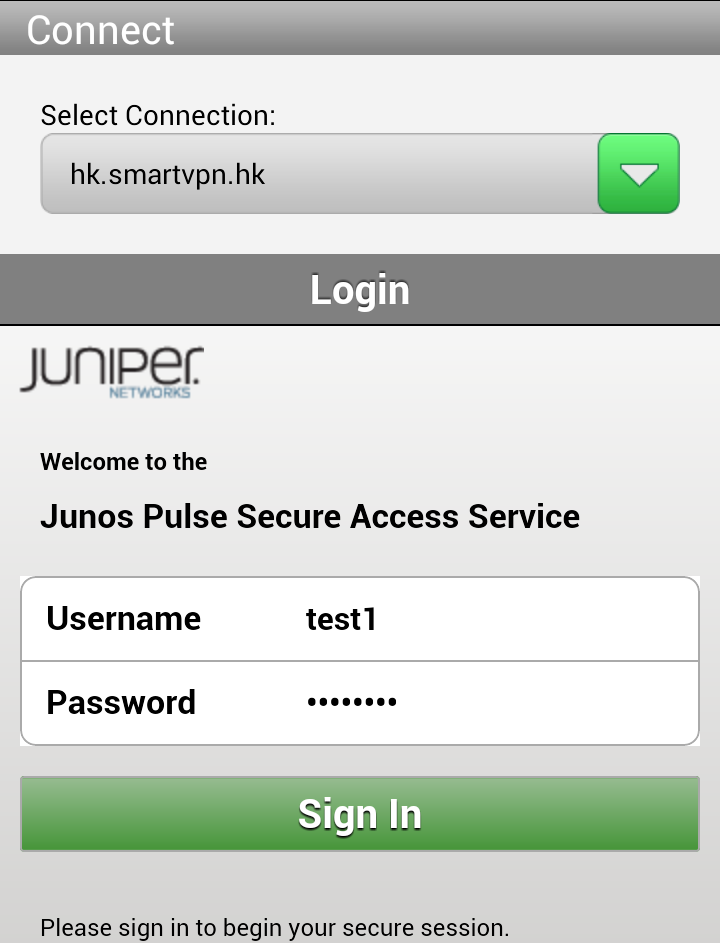
7. 用戶可瀏覽 www,whatismyip.com 已確保成功連接 VPN。
若 IP 是 203.124.11.145,ISP: Communilink Internet Service Provider Hong Kong,即代表你己成功連接 SmartVPN。
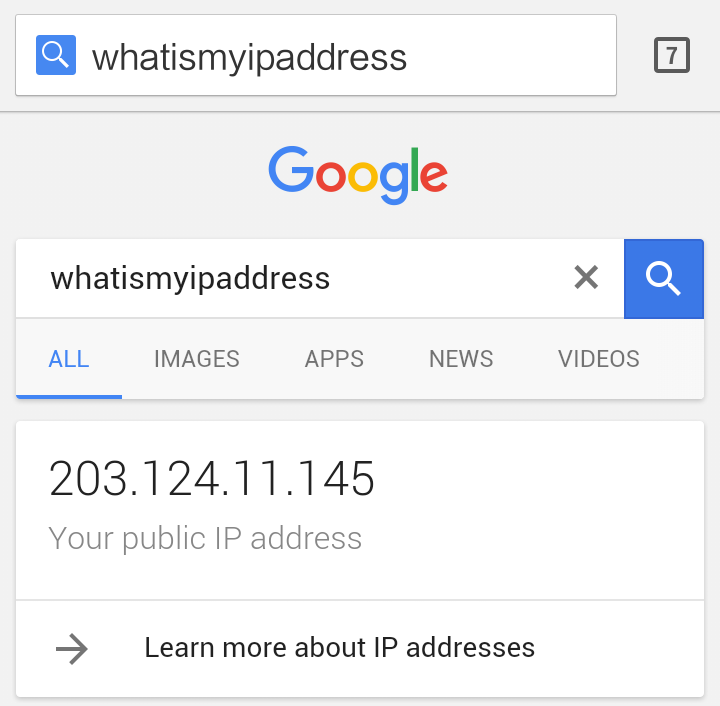
How to set up an email account in Outlook 2016?
|
1. Start Outlook 2016. Go to File, and click Add Account.
 2. Enter your email address (e.g. [email protected]). Click the upper arrow sign of Advanced options and tick the check box of "Let me set up my account manually". Then click Connect.  3. After click Connect, wait for adding your account.  4. Select POP or IMAP.  5. Enter incoming , outgoing server and port number details. Then click Connect. POP Setting: Incoming mail server: Enter mail.wcpdemo.com as your Incoming Mail Server (replace wcpdemo.com with your domain name) Port: 110 Outgoing mail server: Enter smtp.wcpdemo.com (replace wcpdemo.com with your domain name) OR your ISP’s SMTP as your Outgoing Mail Server Port: 25 SMTP default port is 25. You can modify the SMTP port number if your service includes extra SMTP port, such as 465 or 587. ***Please contact your ISP for the outgoing mail server setting if you are using theirs SMTP.  IMAP Setting: Incoming mail server: Enter mail.wcpdemo.com as your Incoming Mail Server (replace wcpdemo.com with your domain name) Encryption method: No Port: 143 Outgoing mail server: Enter smtp.wcpdemo.com (replace wcpdemo.com with your domain name) OR your ISP’s SMTP as your Outgoing Mail Server Encryption method: No Port: 25 SMTP default port is 25. You can modify the SMTP port number if your service includes extra SMTP port, such as 465 or 587. ***Please contact your ISP for the outgoing mail server setting if you are using theirs SMTP.  6. Enter your Password (This is the email password set in Email Manager) Tick "Save this password in your password list".  7. Untick "Set up Outlook Mobile on my phone, too". Then click OK to complete the account setting.  |
Email Server Certificate Updates
The full details of the updated certificate, including fingerprints, can be viewed before and after accepting the certificate. In Mac Mail, for example, when the message appears saying it could not verify the certificate, selecting "Show Certificate" will display all the details. Viewing the certificate details should be possible from any email client.
Mac Mail users: You may see "Mail can’t verify the identity of the server mail.domain.com" with the options to "Show Certificate" or "Continue". It may take 2-3 tries with the Continue button for it to be accepted. Select "Show Certificate", and there are "Trust" options there to accept the cert. If it still cannot connect after these attempts, please use your mail cluster for the Mail Server name on your account (ex: mail.yourdomain.com).

"Cannot Verify Server Identity" message from iPhone
2.) Go to Settings then tap on Mail.
3.) Tap on Accounts.
4.) Click on the email account to select it
5.) Click on label for your mail account again - it will be above the Mail and Notes icon
6.) Click on Advanced
7.) Click on the slider that is labeled Use SSL. It should not be marked as green.
8.) Click in the top left corner where it says Account.
9.) In the top right corner click on Done.

How to Set up an E-Mail Account on Your iPhone or iPad iOS 11 & 12
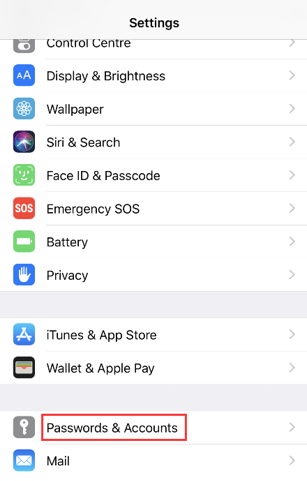
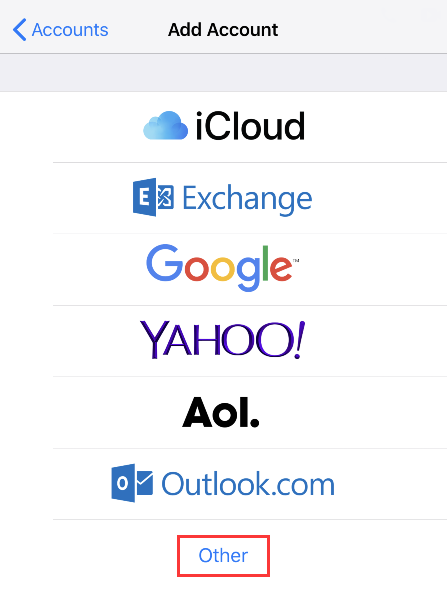
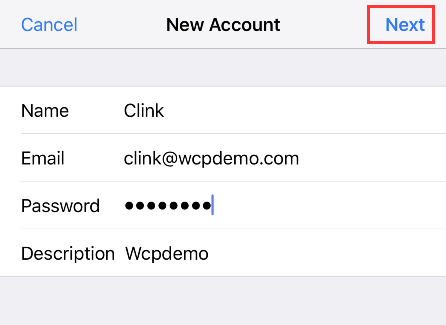
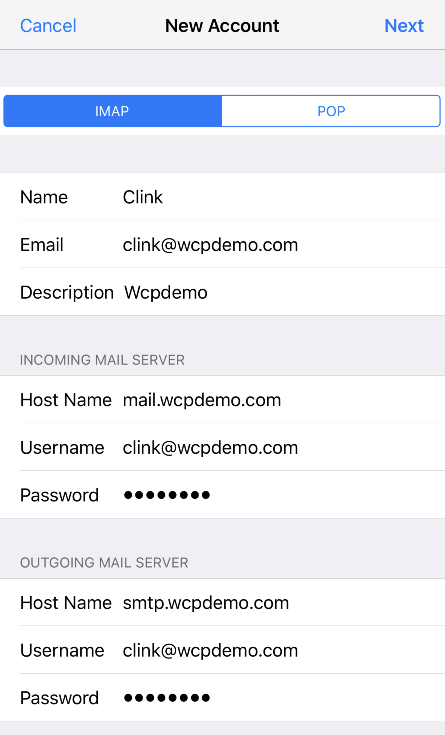
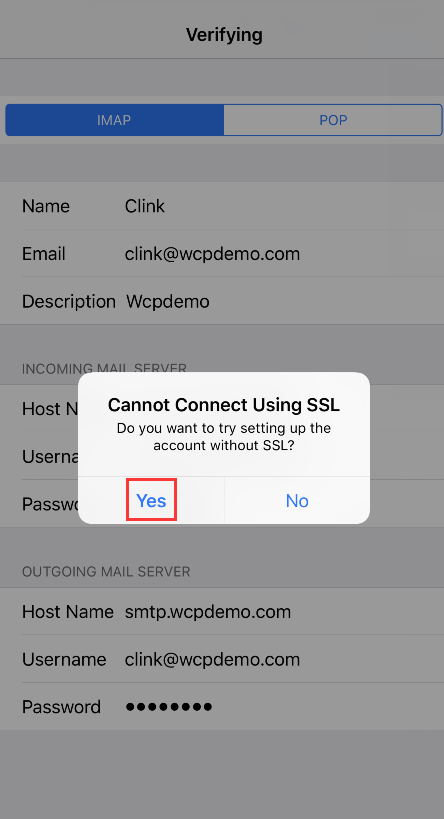
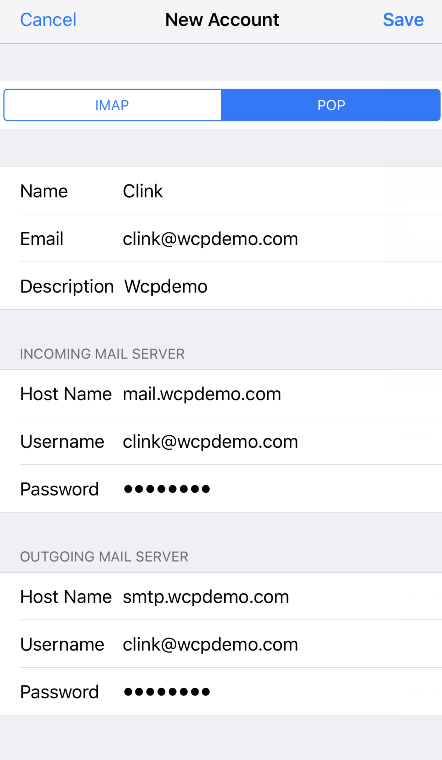
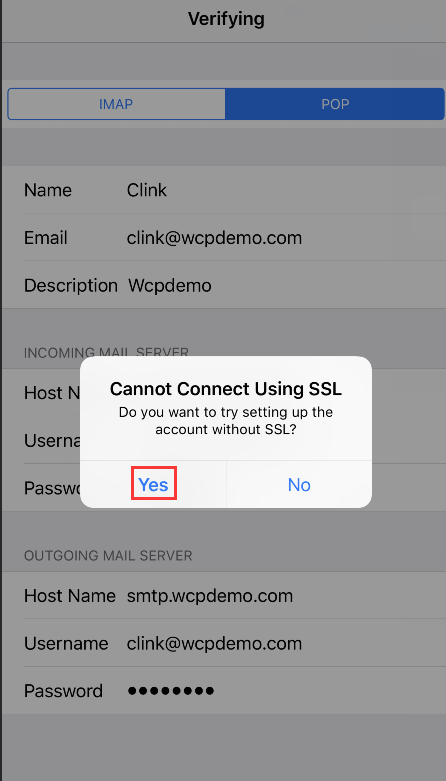
Redirect http to https
Redirect http to https
To redirect website http to https, create or edit your .htaccess (Unix hosting service) or web.config (Window hosting service), then upload it under public_html folder.
***Unix Hosting Service Website***
Download the existing .htaccess file, add the following, then upload it.
If the .htaccess has set other website rewrite, to prevent website error, contact your programmer to add for you.
RewriteCond %{HTTPS} off
RewriteRule (.*) https://%{HTTP_HOST}%{REQUEST_URI}
If no .htaccess file, use text editor to create one, then add the following
RewriteEngine on
RewriteCond %{HTTPS} off
RewriteRule (.*) https://%{HTTP_HOST}%{REQUEST_URI}
***Window Hosting Service Website***
Download the web.config file, add the following, then upload it.
If the web.config has set other website rewrite, to prevent website error, contact your programmer to add for you.
If no web.config file, use test editor to create one, then add the above code.
How to set up an email account in Outlook for Mac ?
Information you will need during the set-up process :
Your Domain Email Address:
[email protected]
Password: your email password
Incoming Mail Server: mail.yourdomain.com
Incoming Mail Server Port : 143 (IMAP) / 110 (POP)
Outgoing Mail Server (SMTP):
smtp.yourdomain.com
Outgoing Mail Server (SMTP) Port: 25 / 1025
* "yourdomain.com" = your own domain name
Step 1: Select
Outlook > Preferences > Account.

Step 2 : Click the plus (+) sign > New Account.


Step 3: Type your
email address > Continue.

Step 4 : Choose
IMAP/POP

Step 5: Fill in setting information
POP Settings :

IMAP Settings:

Step 6: Done

